H5P for LearnDash: How to Create Interactive and Engaging Course Content
Learn how to integrate H5P and LearnDash to create fully immersive and interactive course content. Plus get Tin Canny for detailed course and quiz reports.
H5P can transform the e-learning experience, making it more engaging and effective for learners of all kinds. If you’ve been wondering how to integrate H5P interactive content with your LearnDash courses, then this is the guide for you.
In this walkthrough, we’ll take you from installation to implementation and beyond so you can harness the power of H5P for LearnDash.
Learn how to create interactive and dynamic content that engages your learners and delivers results. Finally, we’ll introduce you to Tin Canny Reporting for LearnDash, the most comprehensive LearnDash course and quiz reporting tool, to track your learners’ progress through your augmented content.
Get ready to elevate your e-learning game and captivate your students like never before.
Benefits of Integrating H5P and LearnDash
According to this 2023 study, learners who engaged with H5P interactive content “reported a positive experience and indicated a preference for more interactive elements”.
But an enhanced user experience is just one of a host of benefits that comes from integrating H5P with LearnDash. Here are some more of the key advantages:
- Increased Engagement: H5P allows you to create interactive content like quizzes, interactive videos, drag-and-drop activities, and more. These elements engage learners actively, making the learning process more enjoyable and effective.
- User-Friendly Interface: H5P’s intuitive, browser-based editor makes it easy for educators to design and integrate rich media elements into their content—no coding skills required. This ease of use can encourage educators to make frequent and meaningful updates and customizations to course material.
- Enhanced Learning Outcomes: By combining different content types, H5P supports varied learning styles and fosters deeper comprehension.
- No Additional Cost: H5P is FREE to use! Educators looking to enhance their content can do so without taking on an additional financial burden.
- Compatibility with LearnDash and Tin Canny: H5P content is fully compatible with LearnDash, and when used with Tin Canny Reporting, provides detailed insights into learner performance. This integration helps educators track progress, identify learning gaps, and tailor instructions to meet the needs of their students.
- Versatility and Flexibility: H5P supports a wide range of content types, including interactive presentations, memory games, fill-in-the-blanks, and more. This versatility allows educators to create diverse learning experiences that can adapt to various educational contexts, environments and objectives.
By leveraging the power of H5P, educators can create more interactive, engaging, and effective online courses in LearnDash, leading to improved learner outcomes and satisfaction.
In the next section, we’ll talk a little bit more about what, exactly, H5P is and how it integrates with LearnDash. Then we’ll start creating some H5P content.
H5P, xAPI, LearnDash: What You Must Know
Before we start creating interactive content, there are a few things you should know about H5P, xAPI and how these tools integrate with LearnDash.
Introduction to H5P
H5P (HTML5 Package) is an open-source content collaboration framework for creating and sharing interactive content.
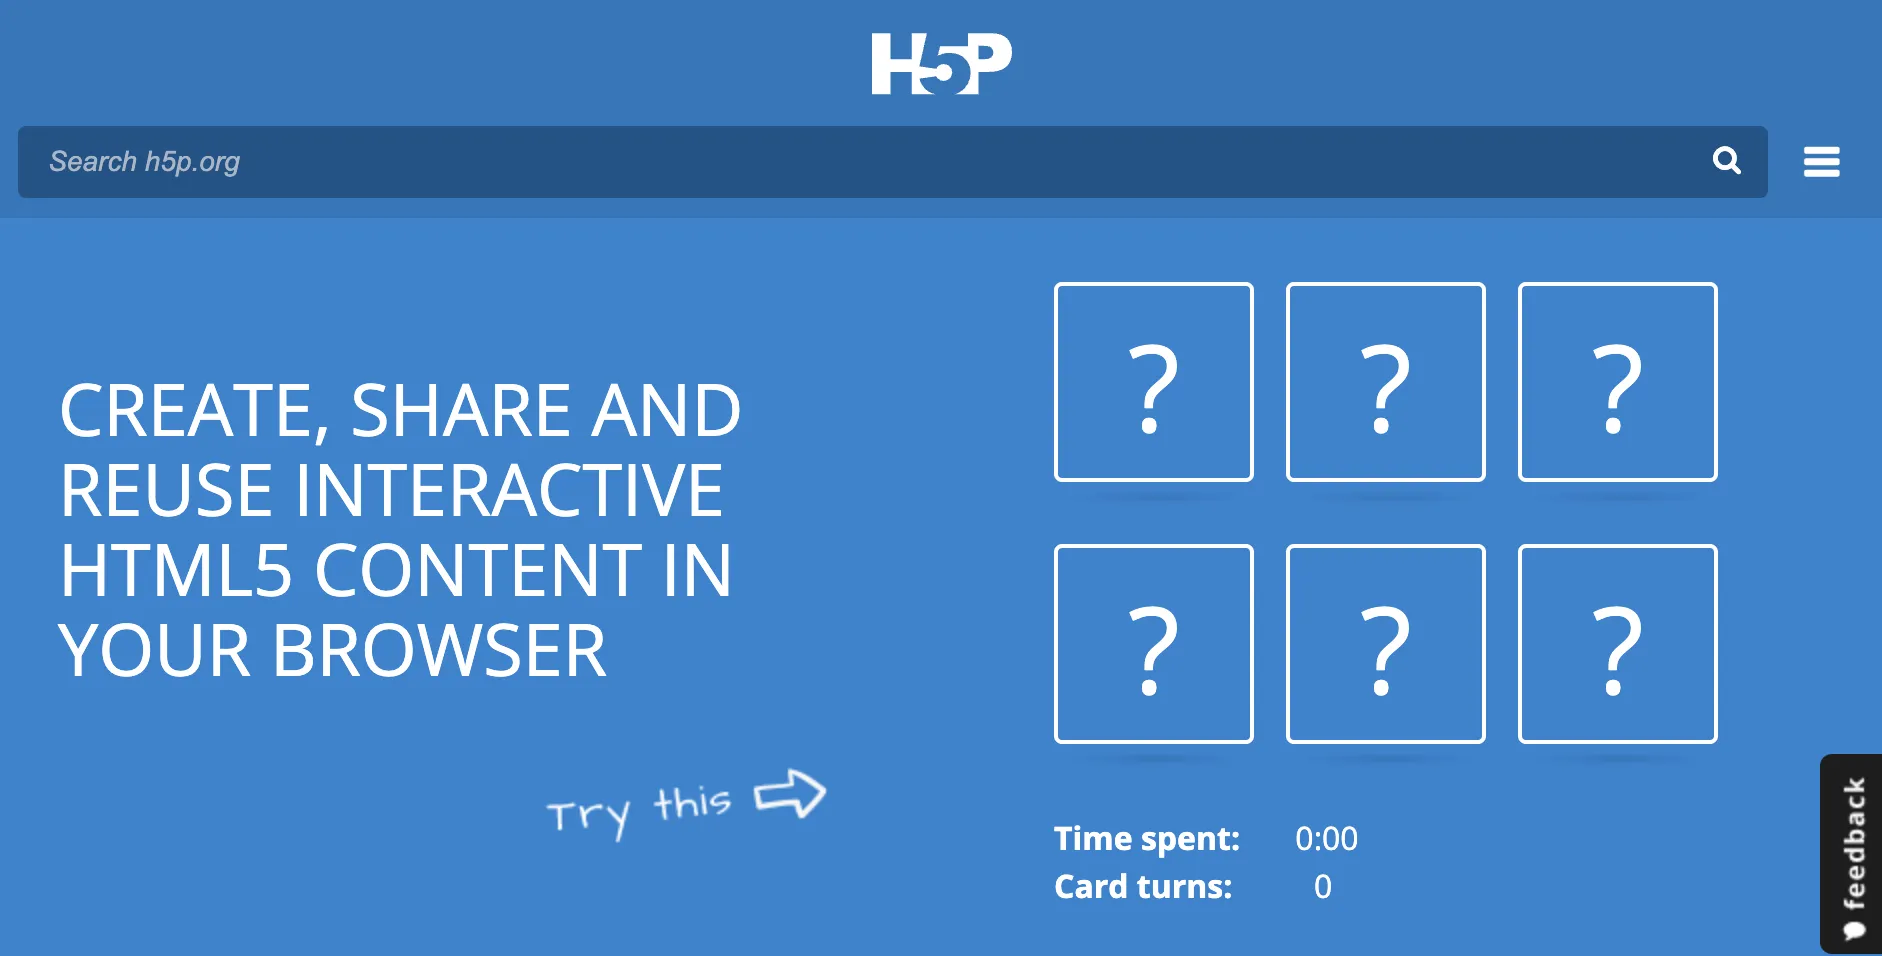
This tool supports various types of content, such as interactive videos, quizzes, presentations, and more, making learning experiences more engaging and dynamic.
What is xAPI?
Want to know how, exactly, H5P integrates with LearnDash? In a word: xAPI.
The Experience API (xAPI), also known as Tin Can API, is a specification for learning technologies that enables tracking and recording of learning experiences across diverse platforms and environments.
In other words, xAPI is the mechanism that communicates H5P data to LearnDash.
xAPI statements are structured as “Noun, Verb, Object” (for example, “John passed the quiz” or “John completed the course”) and provide detailed information about learner interactions. Each statement can contain additional information such as scores and timestamps.
As an educator or educational administrator, that’s all you’ll really need to know about xAPI. However, if you would like to know more about xAPI, you can dive into the details here.
H5P Content Types with xAPI Support
Not all H5P content types have xAPI support. This means that not all of the interactive content that you create with H5P can contribute to a learner’s progression through a LearnDash course, lesson or topic.
Below, you can find a list of H5P content types with documented xAPI support.
Note: These are simply the H5P content types with documented xAPI support at the time of writing. Some additional content types might have xAPI support that is not explicitly stated and/or documented. It is recommended to always test content types with your LearnDash courses, lessons and topics before publishing them to learners.
Note as well that Tin Canny Reporting can still track some interactions that do not contribute to course completion. For example, Tin Canny can track a user’s interaction with the H5P content type “Accordion”. We’ll explore more of this in a later section.
LearnDash Post Types and H5P Content
Even if a H5P content type has xAPI support, it may not necessarily contribute to a learner’s progress depending on the LearnDash post type in which the H5P content is embedded.
In essence, LearnDash has four post types: Courses, Lessons, Topics and Quizzes.
Only Lesson and Topic post types will support embedded H5P content that contributes to LearnDash course progress.
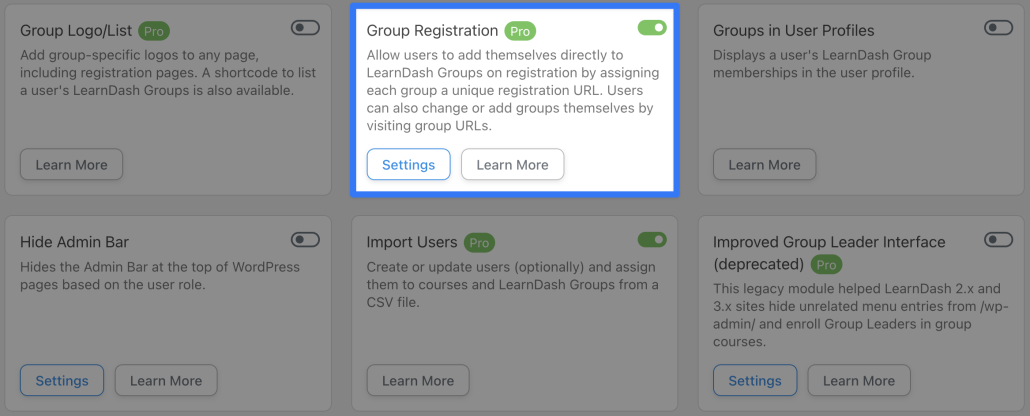
However, if you have the Uncanny Toolkit Pro plugin and enable the “Single Course Page” module, you can embed H5P content directly into LearnDash courses. We will talk more about that “uncanny” feature in a later section.
Integrate H5P and LearnDash: Download, Install and Engage
Now that we know a little bit more about H5P and how it integrates with LearnDash, let’s get started creating some engaging interactive content.
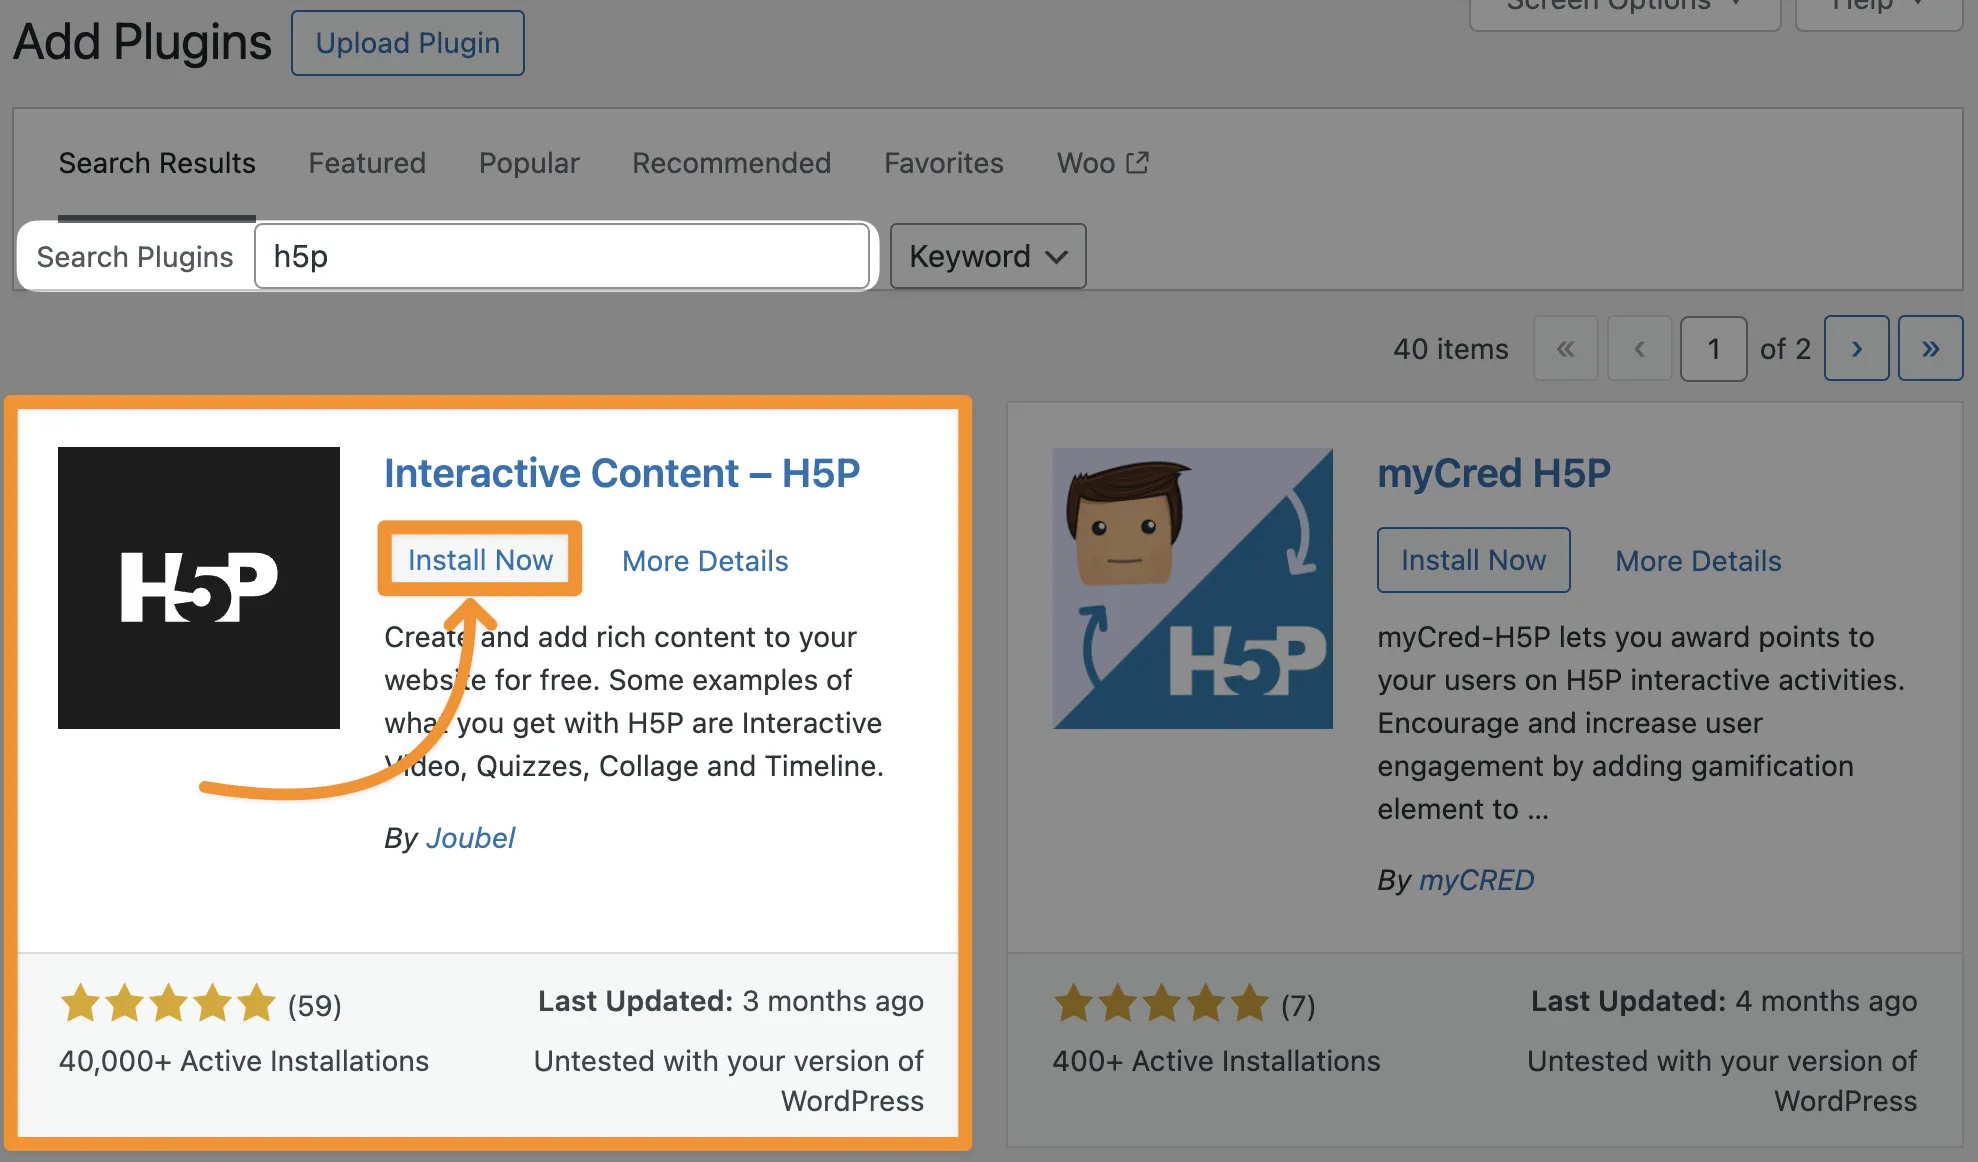
Step 1: Install H5P
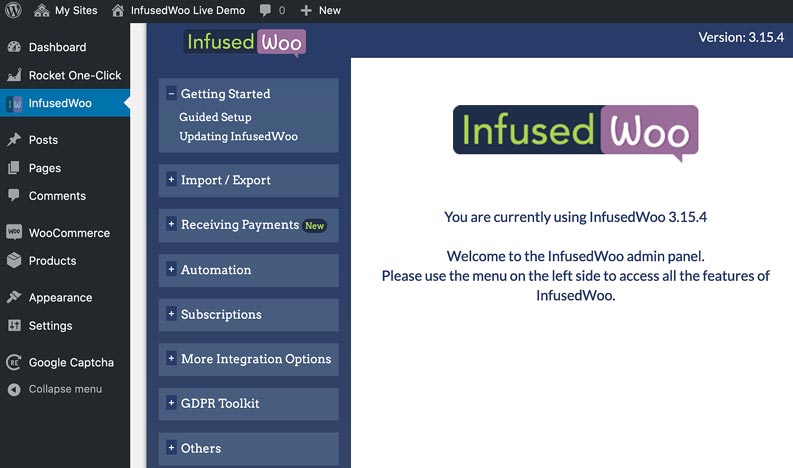
From your WordPress Admin Dashboard, navigate to Plugins > Add New Plugin. Search for the H5P plugin and click Install Now.
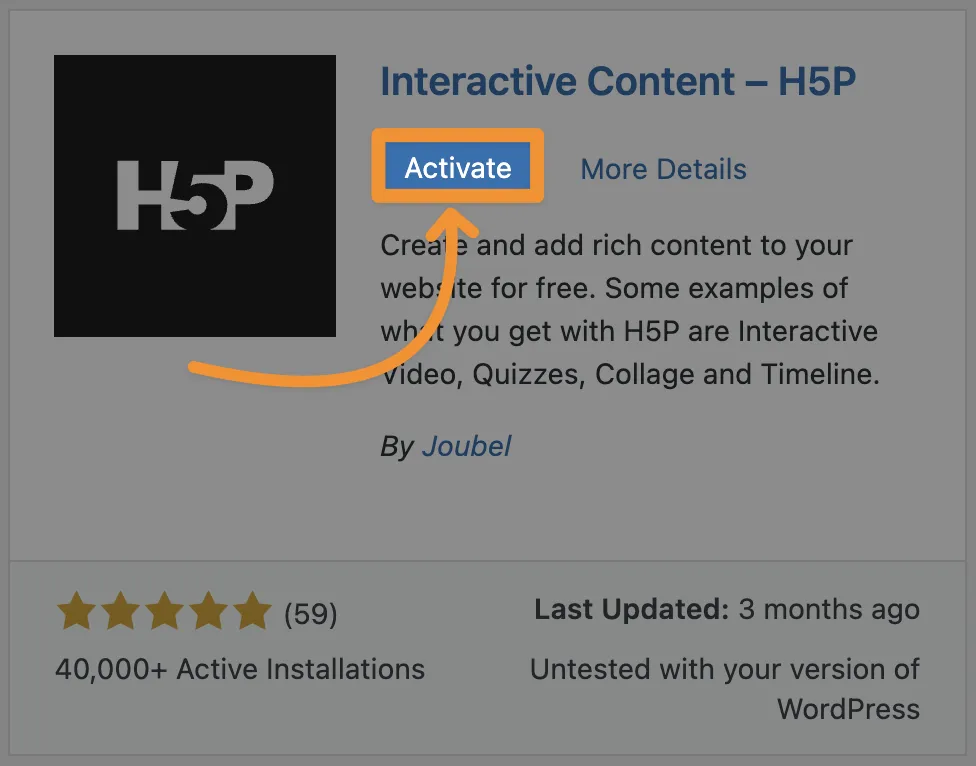
Once you’ve installed the H5P plugin, click Activate.
Step 2: Select H5P Content Type
From your WordPress Admin Dashboard, navigate to H5P Content > Add New.
A panel may appear in the new screen, explaining that you will need to install a content type before continuing.
If the panel did appear, click I consent, give me the Hub!

A panel may appear in the new screen, explaining that you will need to install a content type before continuing.If the panel did appear, click I consent, give me the Hub!
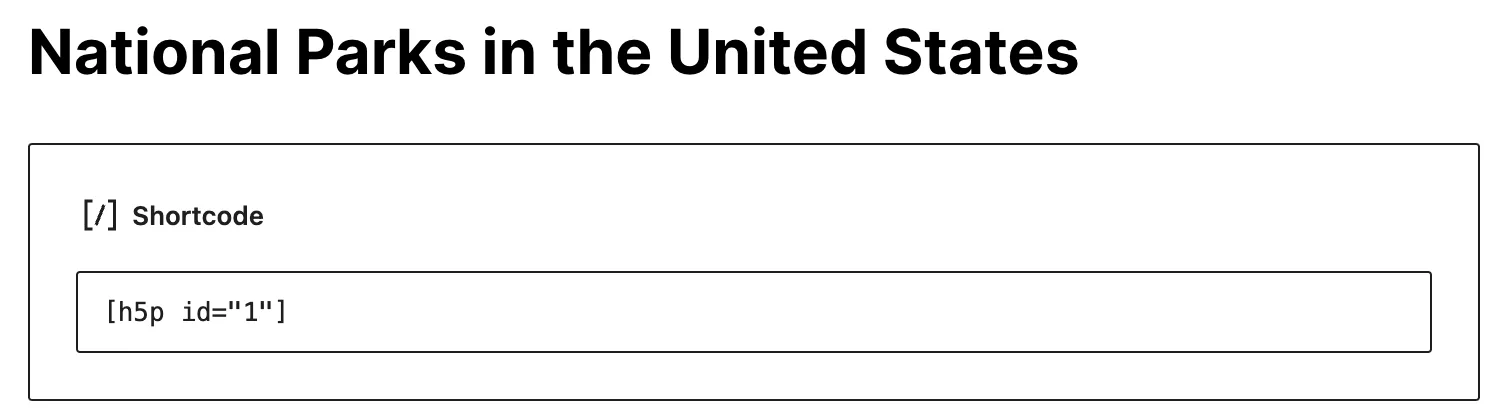
Select the type of interactive content that you want to create. For example, we have selected “Fill in the Blanks”.
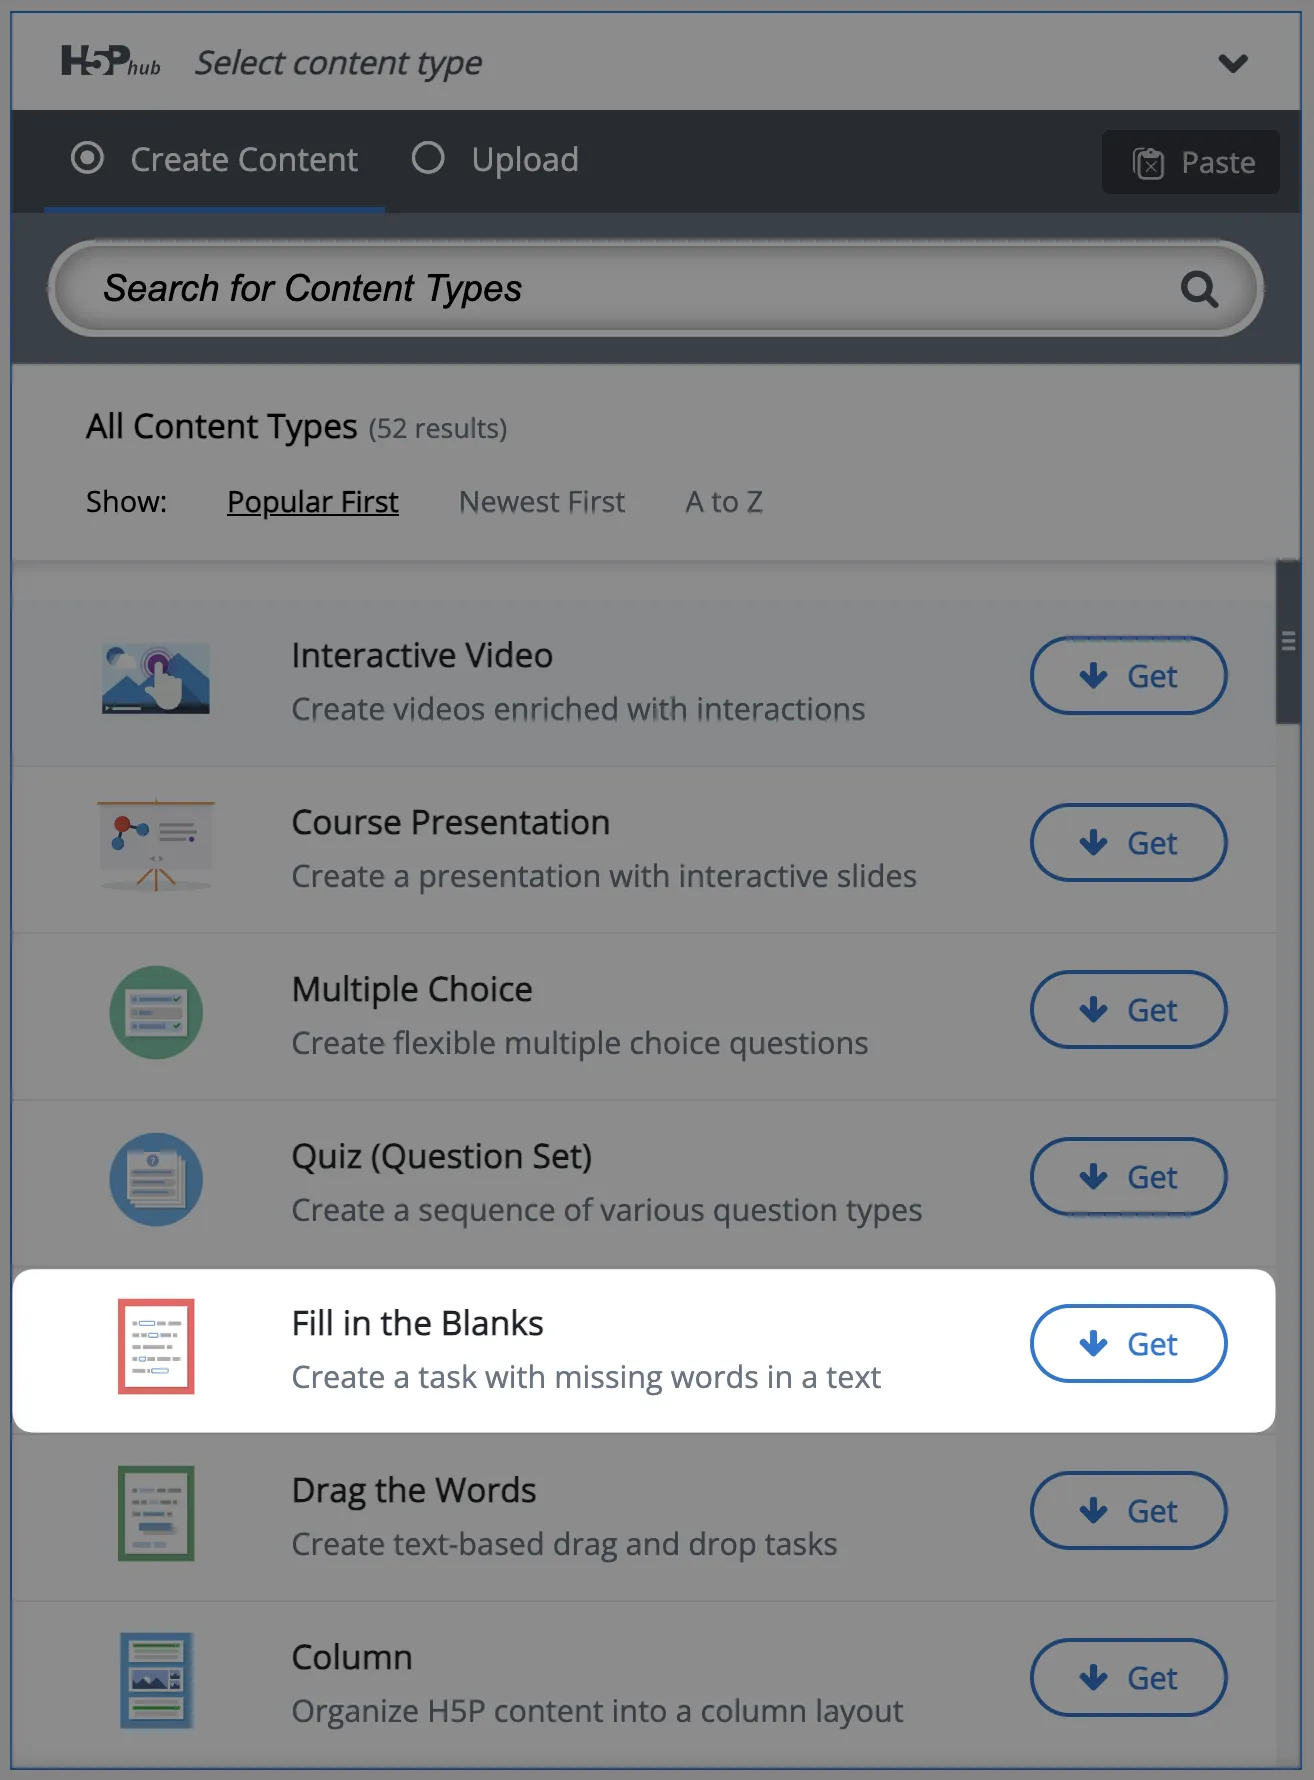
Install the content type if you haven’t already then click Use.
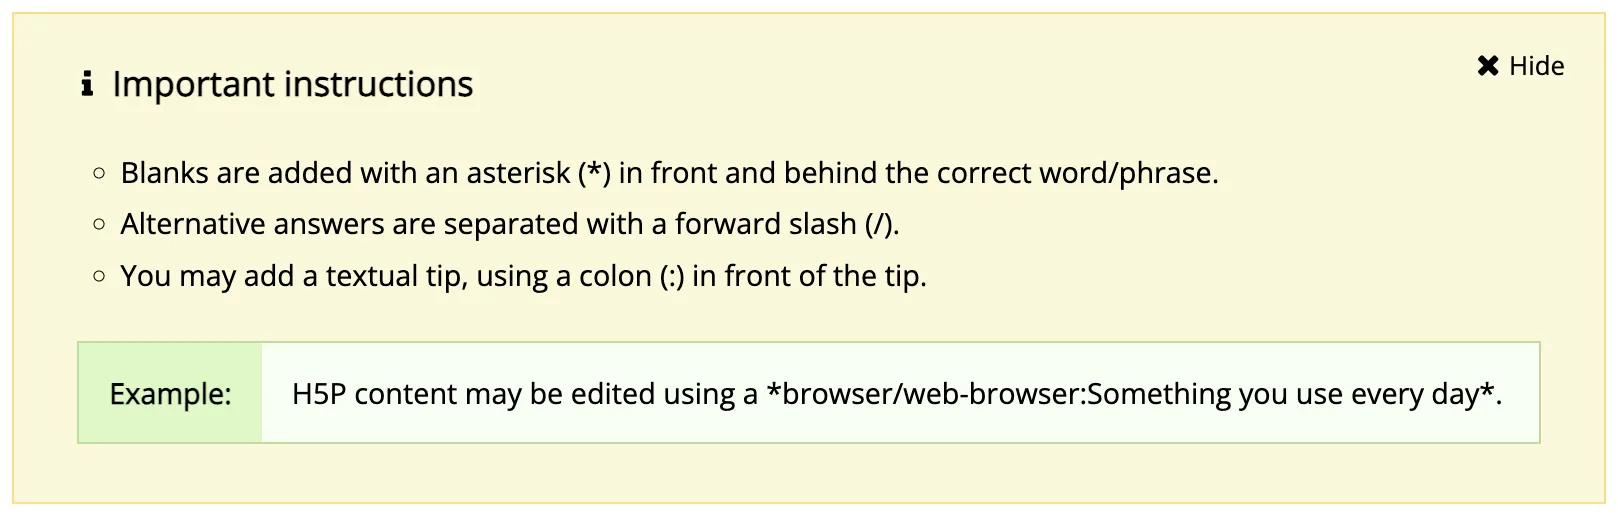
Step 3: Create H5P Content
Regardless of the content type that you have selected, H5P will have instructions on how to create your interactive content. For example, if you have selected “Fill in the Blanks” as we have, you will see these instructions:
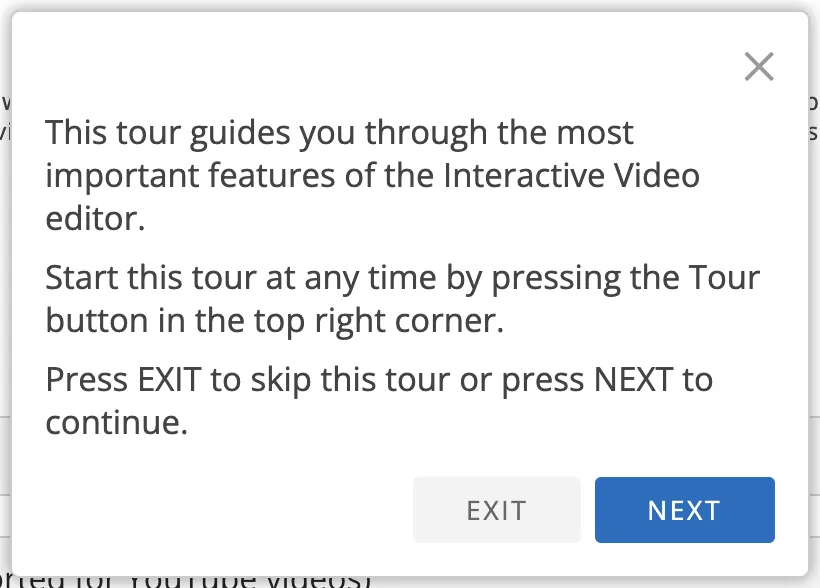
Or, if you had selected the “Interactive Video” content type, you would see these instructions:
Once you’re finished, click Create. H5P will generate the content for you and provide you with a shortcode that you can use to embed it in your LearnDash courses, lessons, topics and quizzes. (Recall, however, that embedded H5P content will only contribute to learner progress in lessons and topics unless you have the Uncanny Toolkit Pro plugin.)

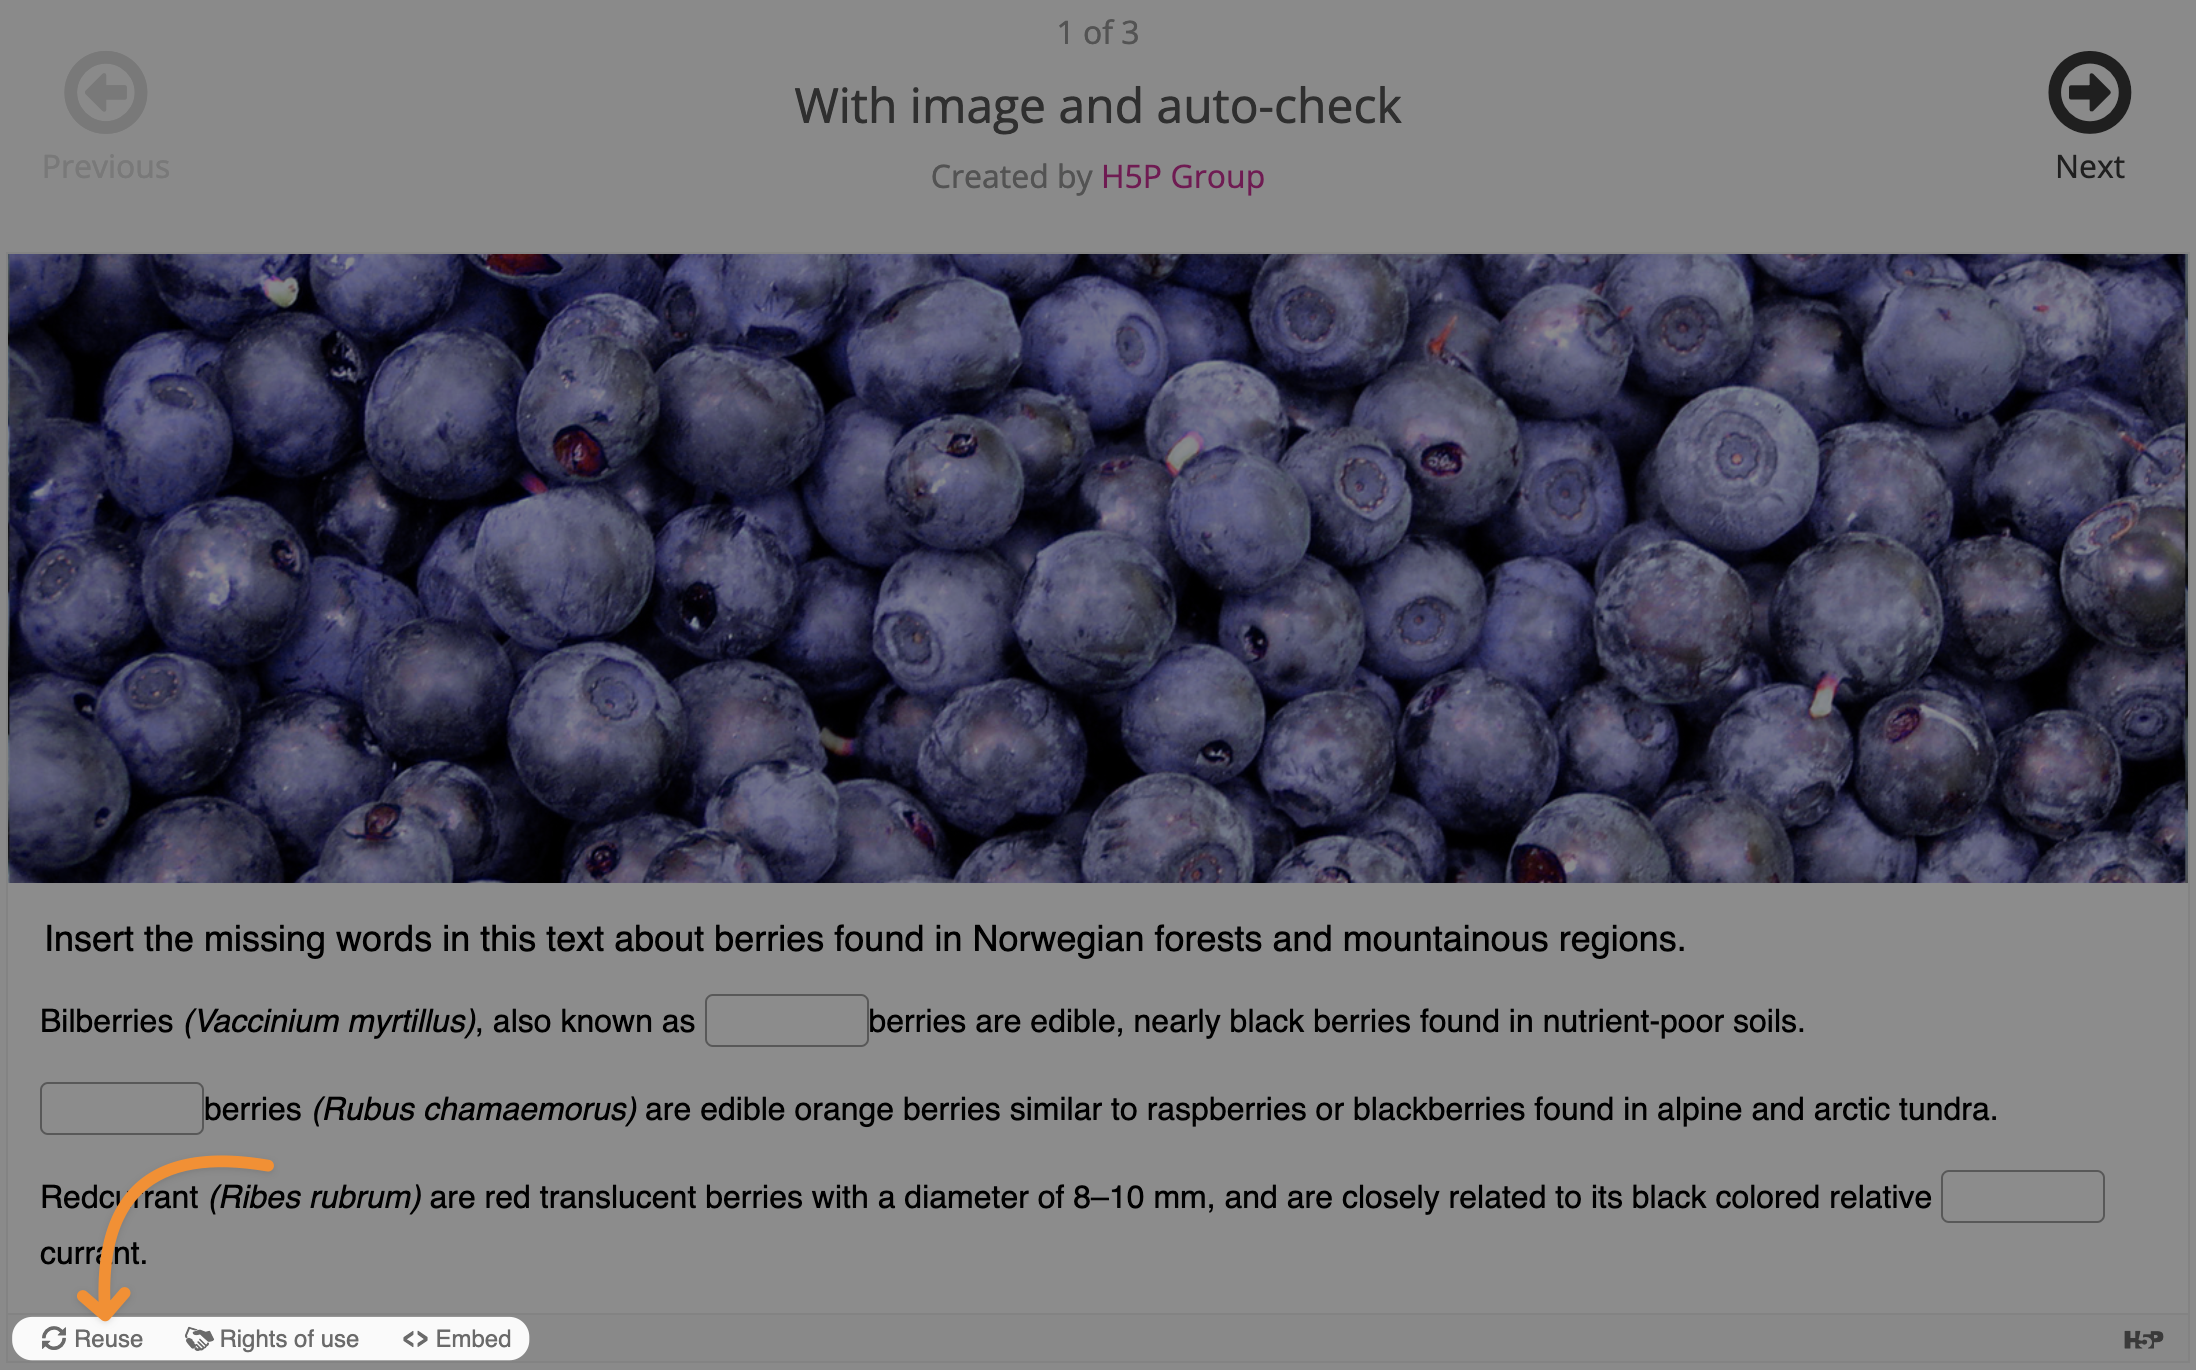
Not sure where to start? You can download sample content from H5P here. Select the type of content you want to sample and click Reuse on the content page.
Step 4: Embed H5P Content Into LearnDash
After creating your H5P content, Copy the shortcode. Open the lesson or topic you want to embed the content in.
In the Lesson or Topic page, click the Plus sign “+” to add a block and select the Shortcode block.
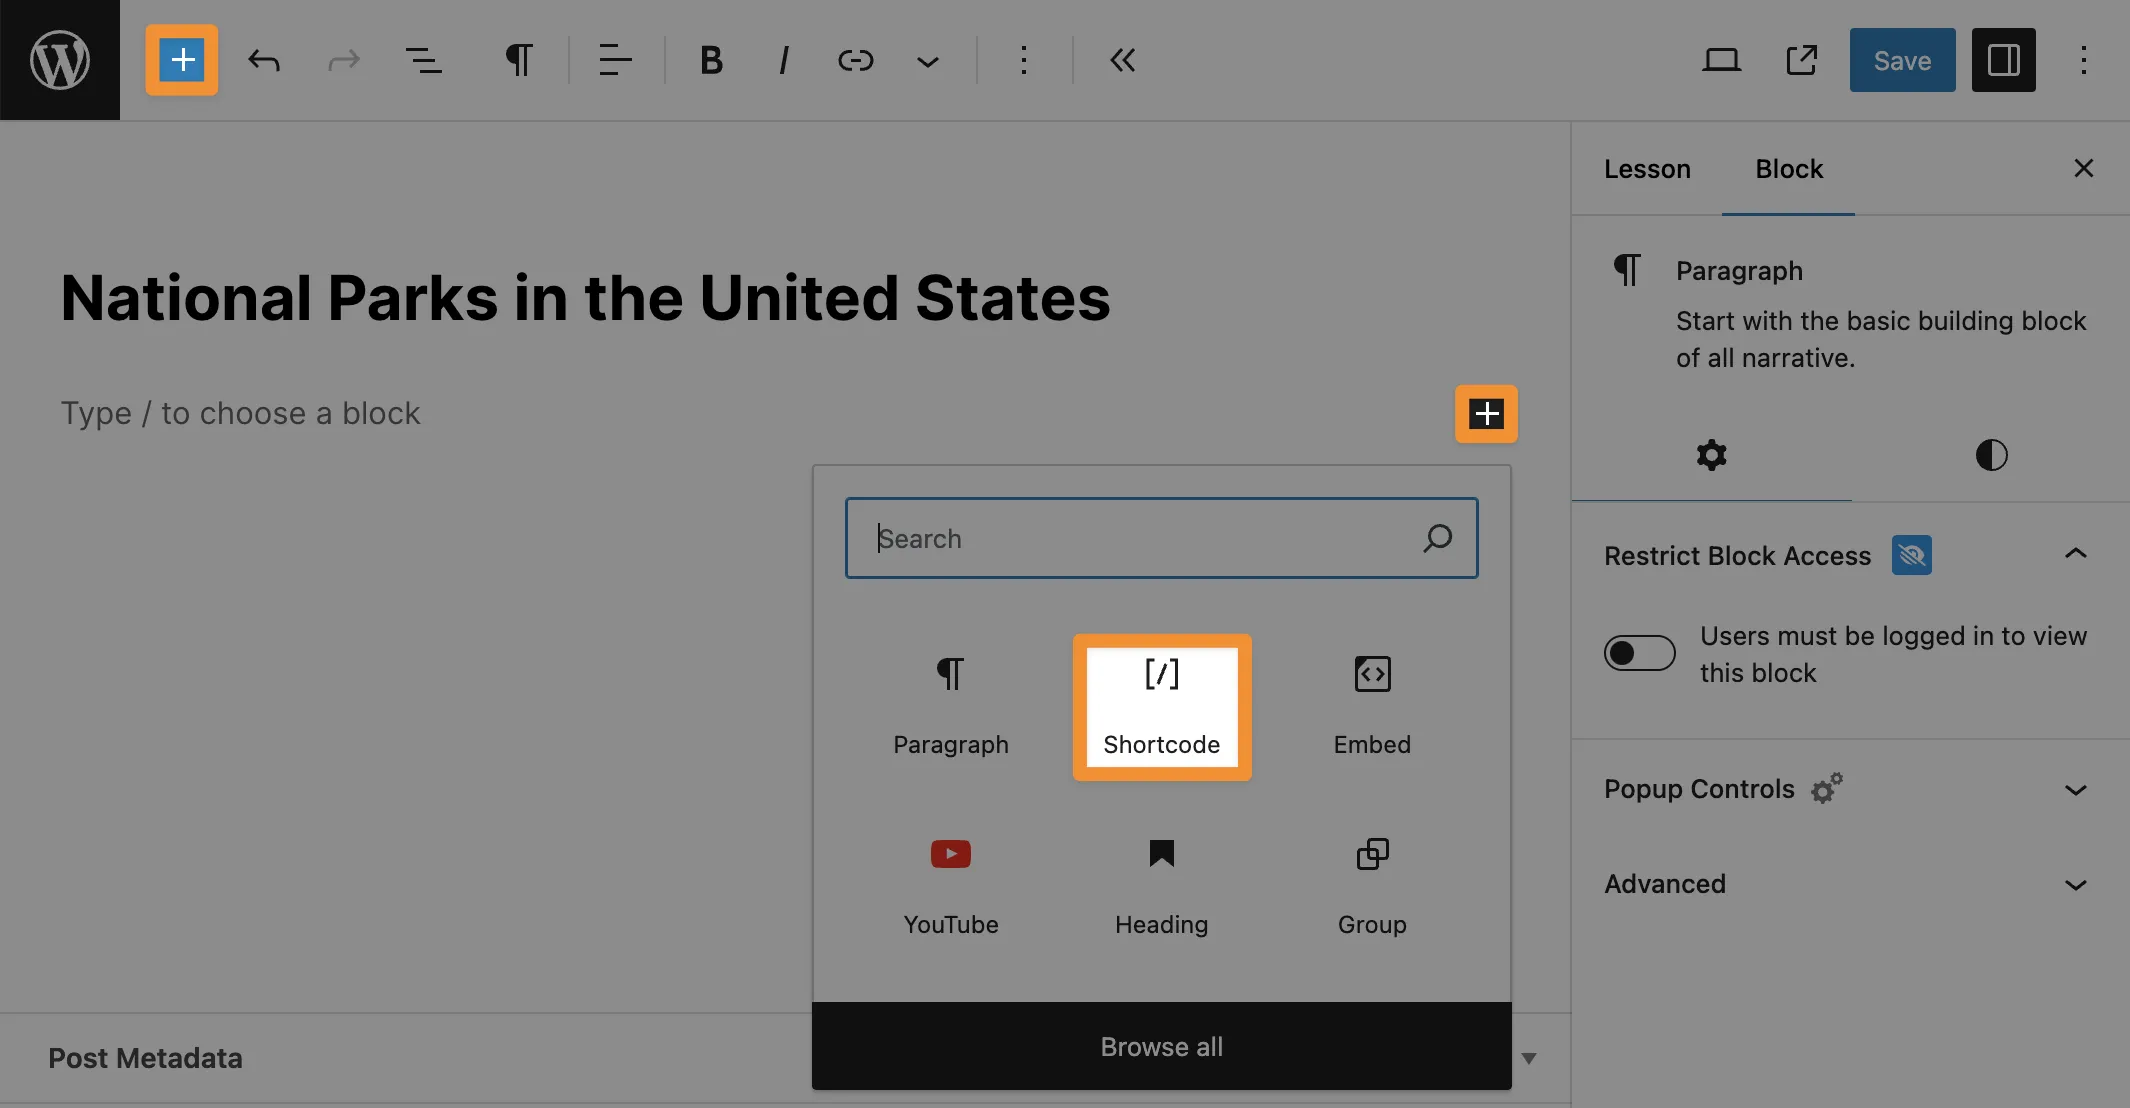
Paste the H5P shortcode into the space provided.
Complete building the rest of your lesson/topic. Once you’re finished, click Publish (or Save if you had previously published the post.)
Step 5: Test Your Interactive Content
You’re just about done! Add the lesson/topic to one of your courses from the LearnDash course builder.
Before you open the enrollment process to your learners, we recommend testing your new interactive content.
Great! Now that your interactive content is up and running, you’re probably wondering, “How can I track my learners’ progress?” In the next section, we’ll take a look at the only tool that can track your learners’ progress as well as their interactions with H5P content and generate detailed reports.
Tin Canny Reporting for LearnDash and H5P Interactive Content
Integrating H5P interactive content with your LearnDash courses adds another dimension to your LMS data. Tin Canny Reporting for LearnDash is the advanced reporting tool that provides in-depth insights into learner activities and engagement with interactive content.
By integrating with H5P content, Tin Canny extends the capabilities of LearnDash, allowing educators to track detailed learner engagement and performance metrics. This section explores how Tin Canny Reporting works with H5P content and highlights its key features.
Detailed xAPI and H5P Reports
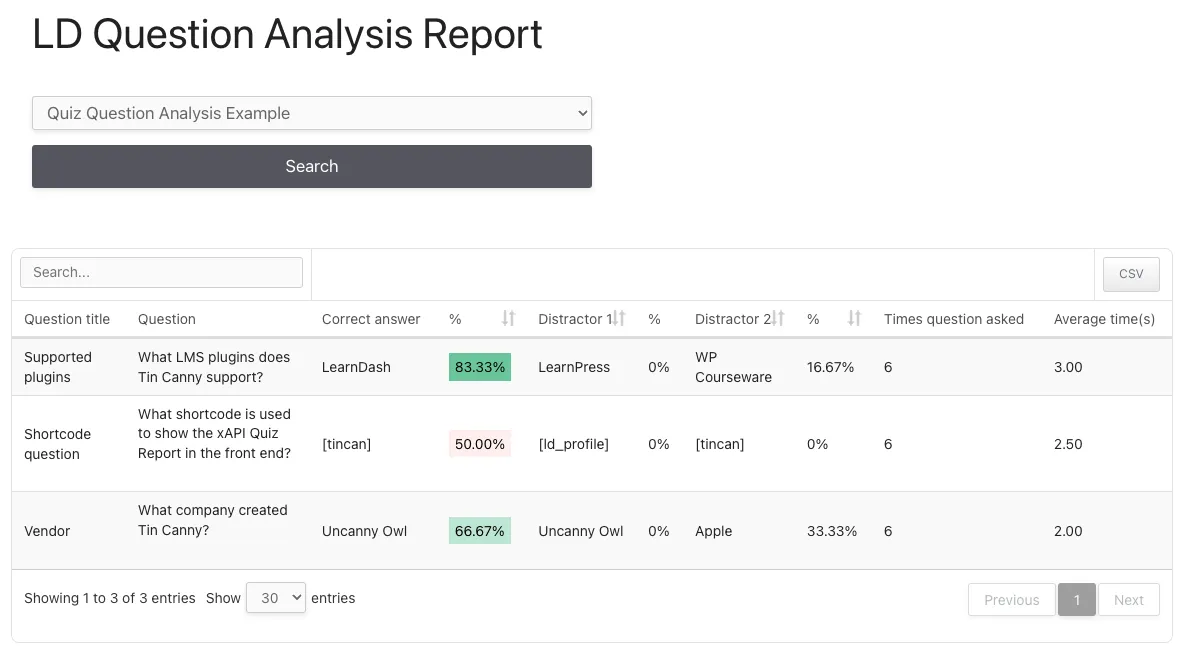
Tin Canny captures detailed xAPI statements from H5P content, providing granular insights into learner interactions. This includes tracking quiz responses, video interactions, and other H5P activities.
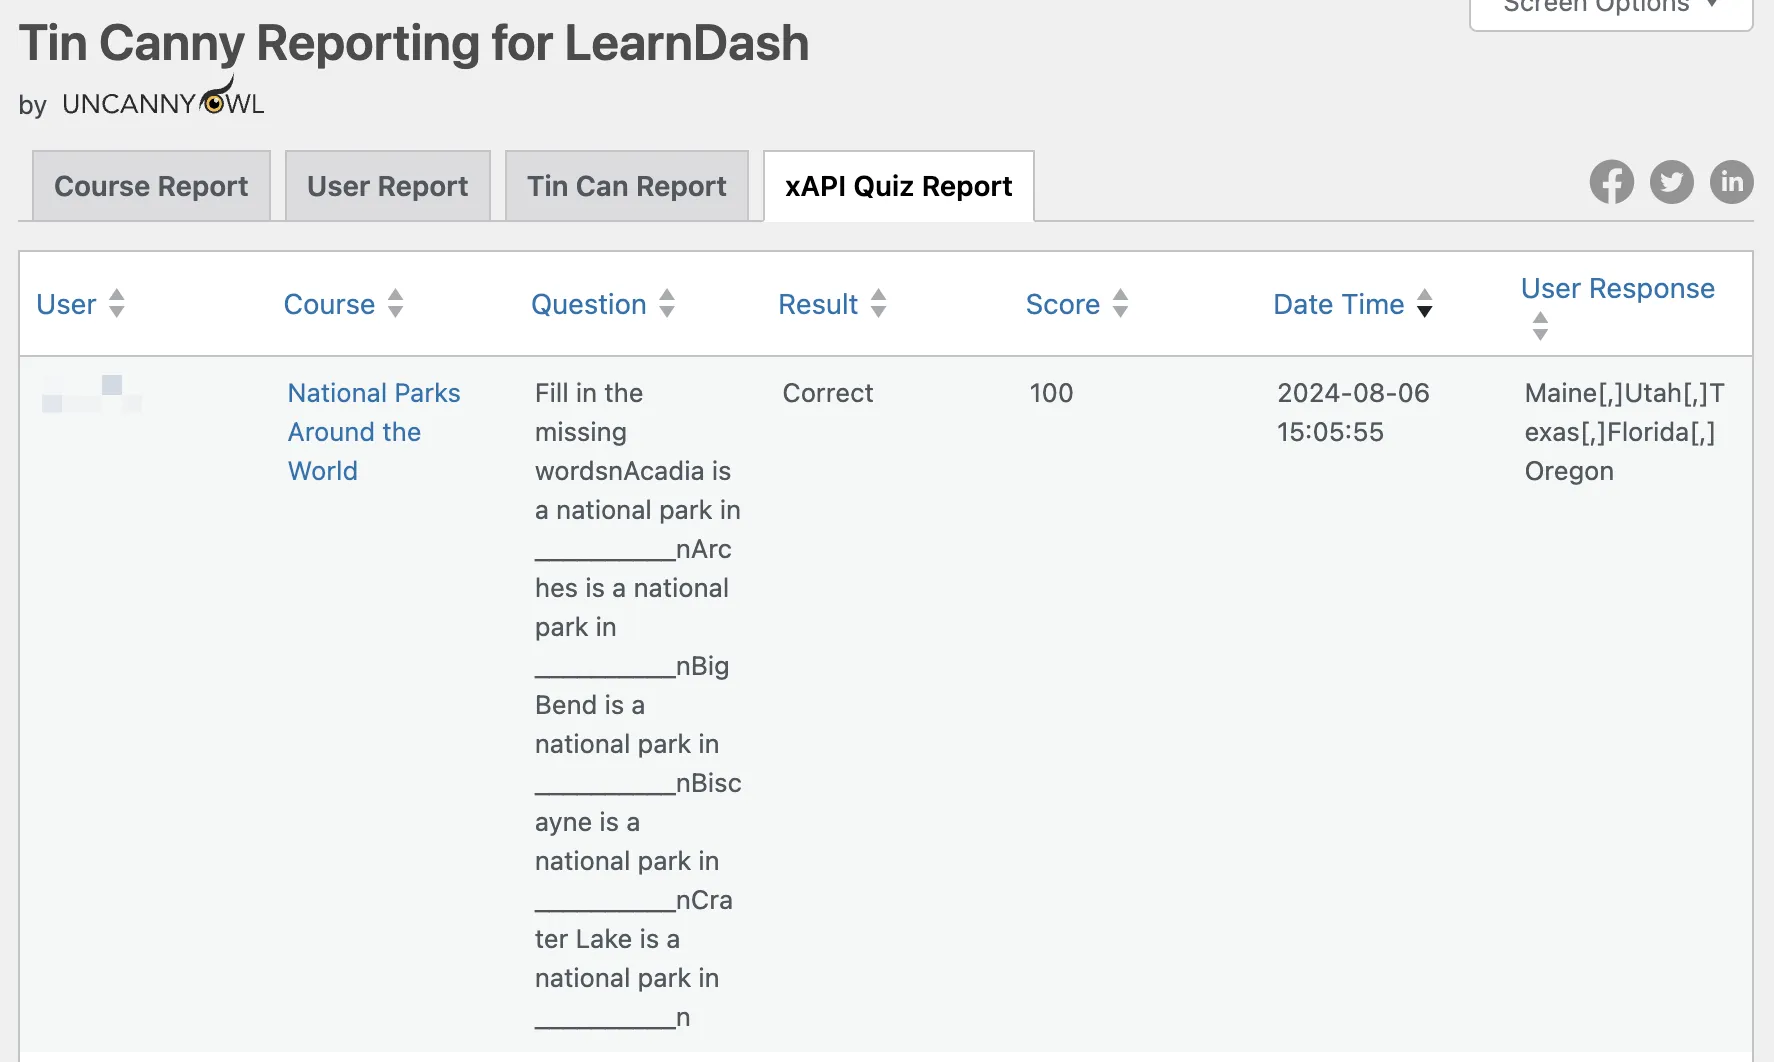
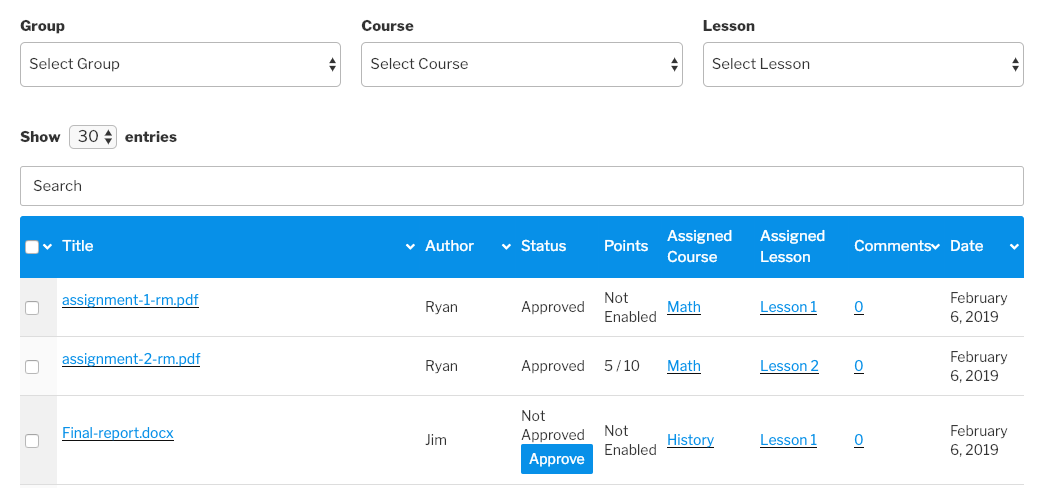
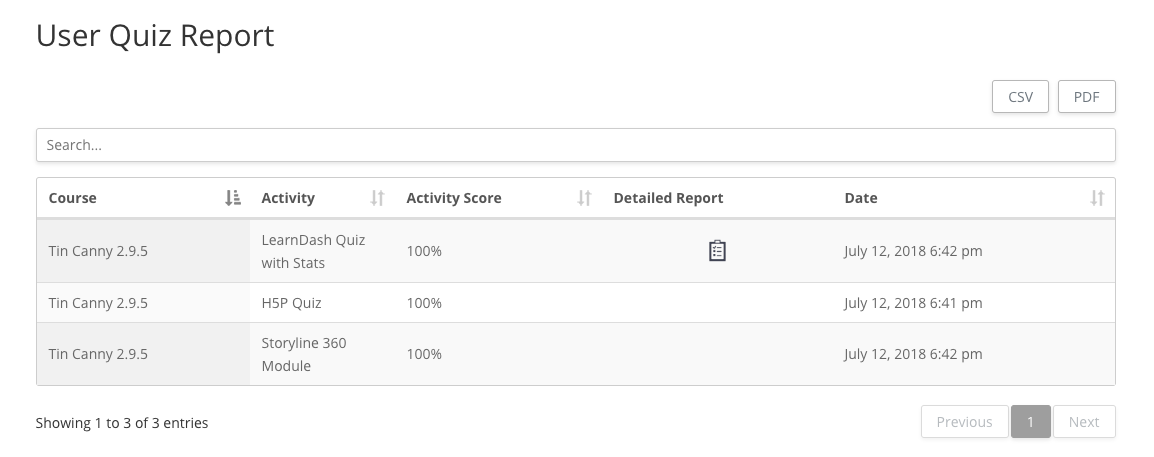
For example, the “Tin Can Report” allows us to track our users’ engagement with all kinds of H5P content, even if it does not contribute to course progression.

The “xAPI Quiz Report” is another powerful tool for tracking even more granular xAPI data such as a learner’s responses to H5P interactive content.
Tin Canny includes useful filters so that you can generate reports based on types of interactions, users, courses groups and more.
With Tin Canny, educators can generate comprehensive progress reports that detail each learner’s journey through a course. These reports include data on which H5P activities have been completed, scores achieved, responses given, time spent on each activity and much more.
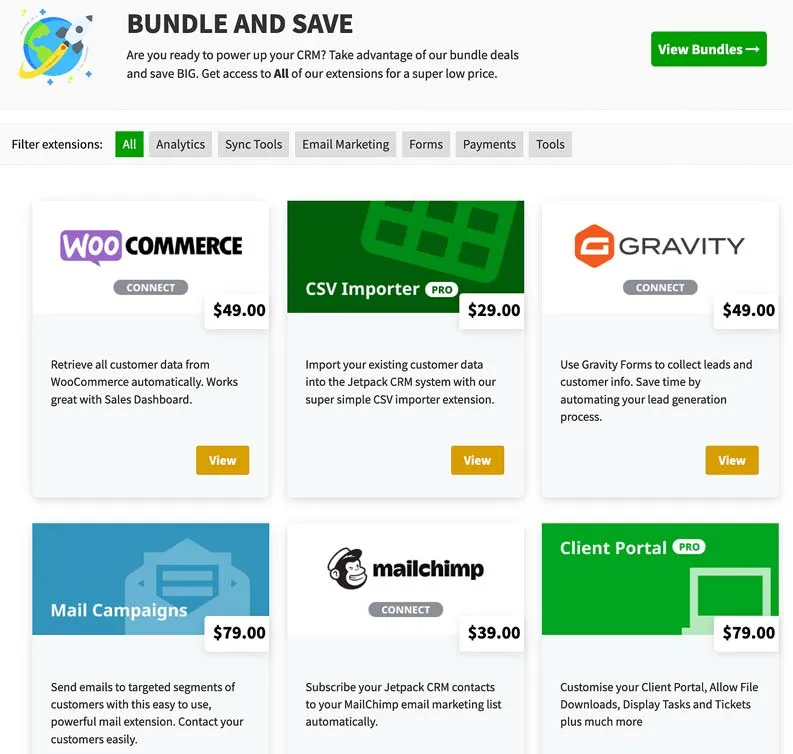
Get Tin Canny Reporting for LearnDash so you can upgrade your LearnDash reports and incorporate H5P and xAPI content data>>>.
Uncanny Toolkit Pro : Integrating H5P Content in LearnDash Courses Without Lessons
So far, we’ve looked at embedding H5P interactive content into two types of LearnDash posts; lessons and topics.
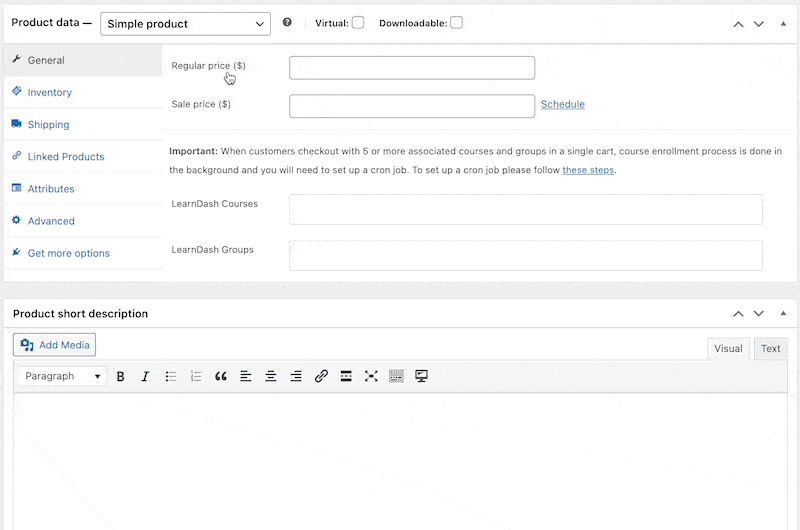
But what if you wanted to embed H5P content directly into a LearnDash course post type? This would be the case if you had a simple course that did not consist of lessons and its subordinate topics.
On their own, H5P and LearnDash can’t accommodate such a scenario. But, with the Uncanny Toolkit Pro plugin, you can unlock more learning possibilities.

The Toolkit Pro plugin is designed specifically for augmenting and expanding LearnDash’s already impressive capabilities. If you’ve ever thought, “I sure wish LearnDash could do this,” there’s a good chance that the feature you’re looking for is in the toolkit—the Uncanny Toolkit.
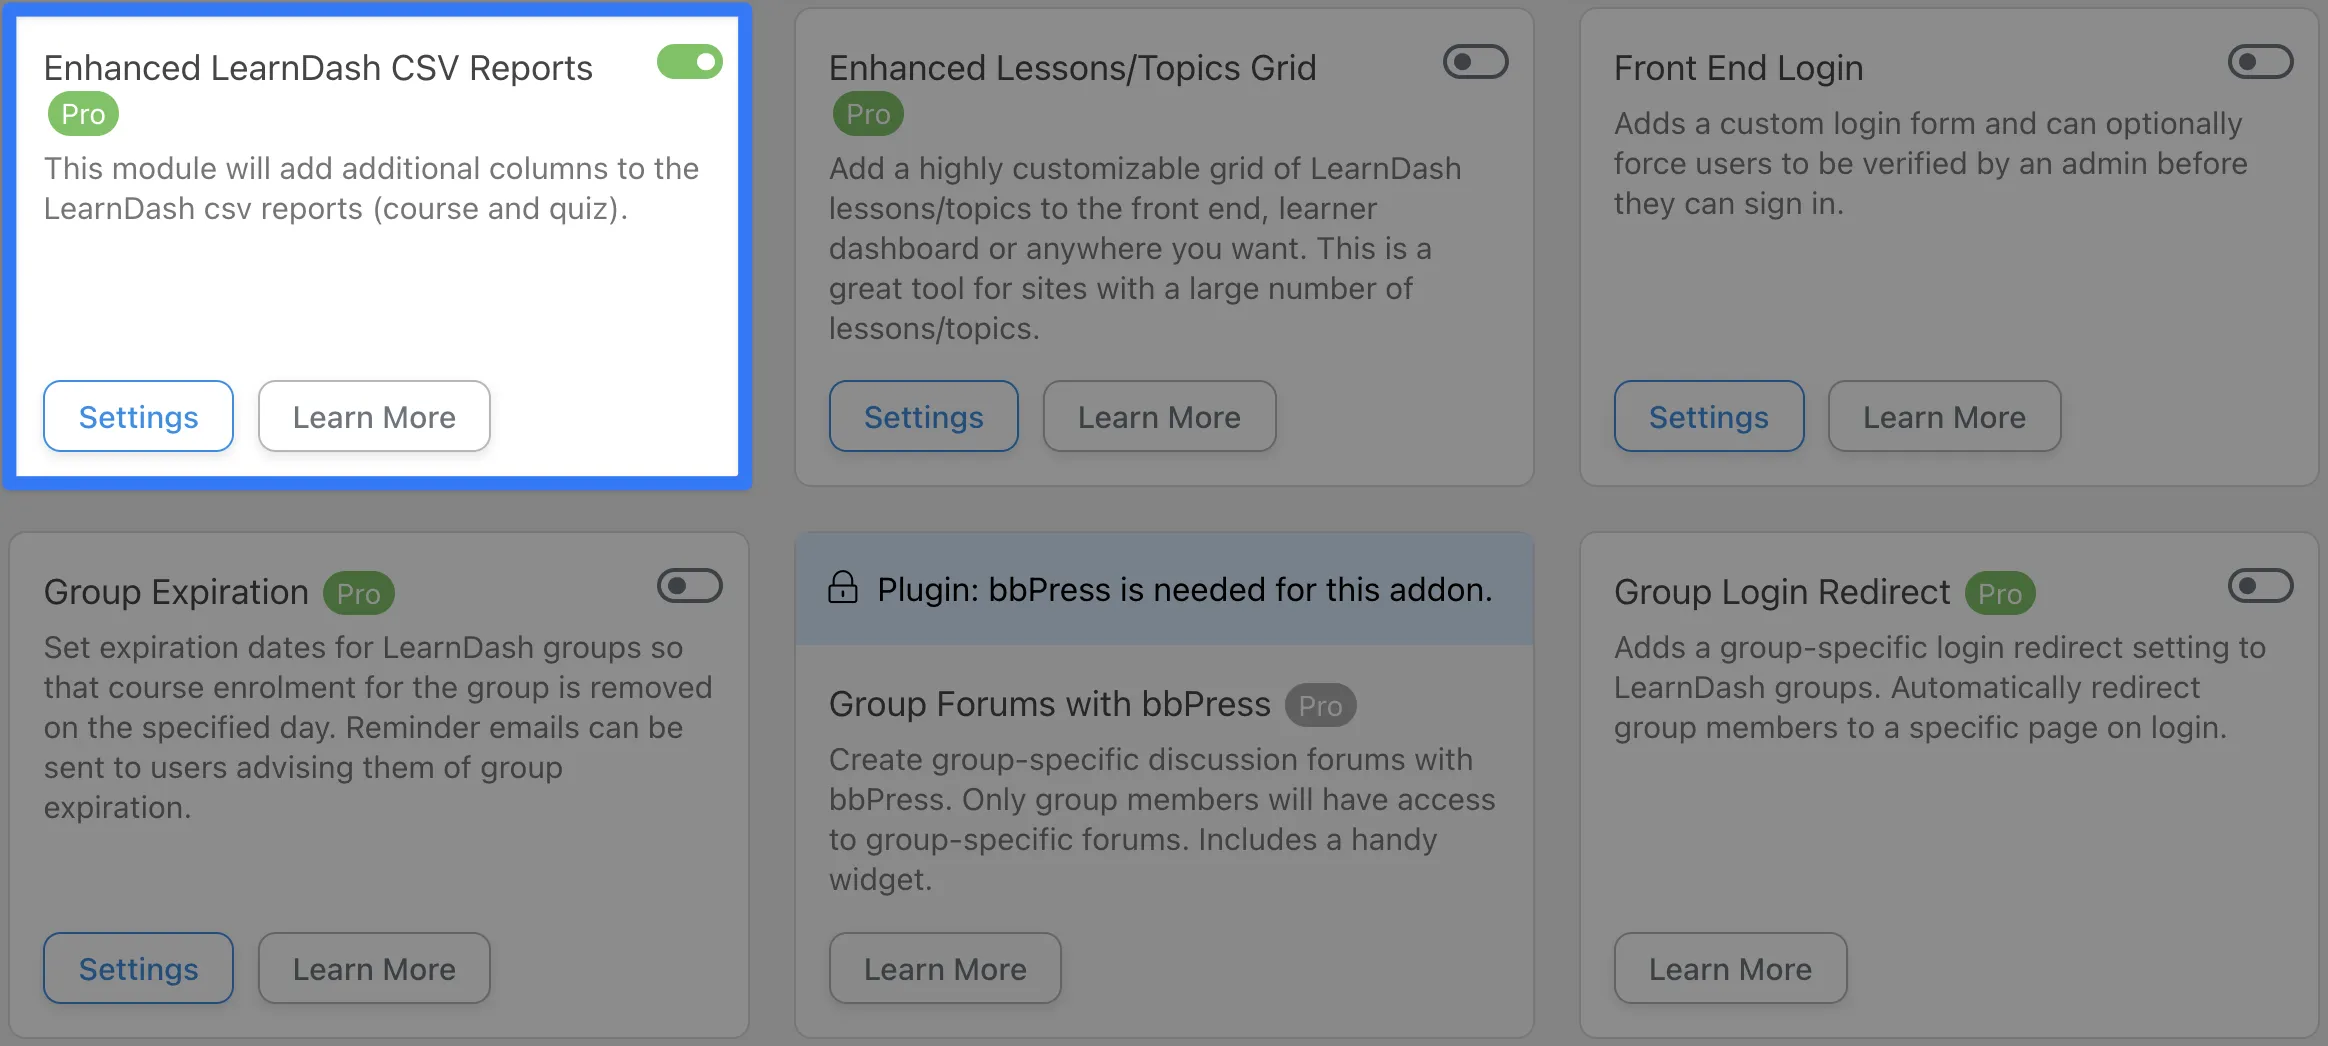
“Modules” such as “Group Expiration” and “Simple Course Timer” add much-needed functionality to a LearnDash website. However, it’s the “Single Course Pages” module that H5P users will find particularly interesting.
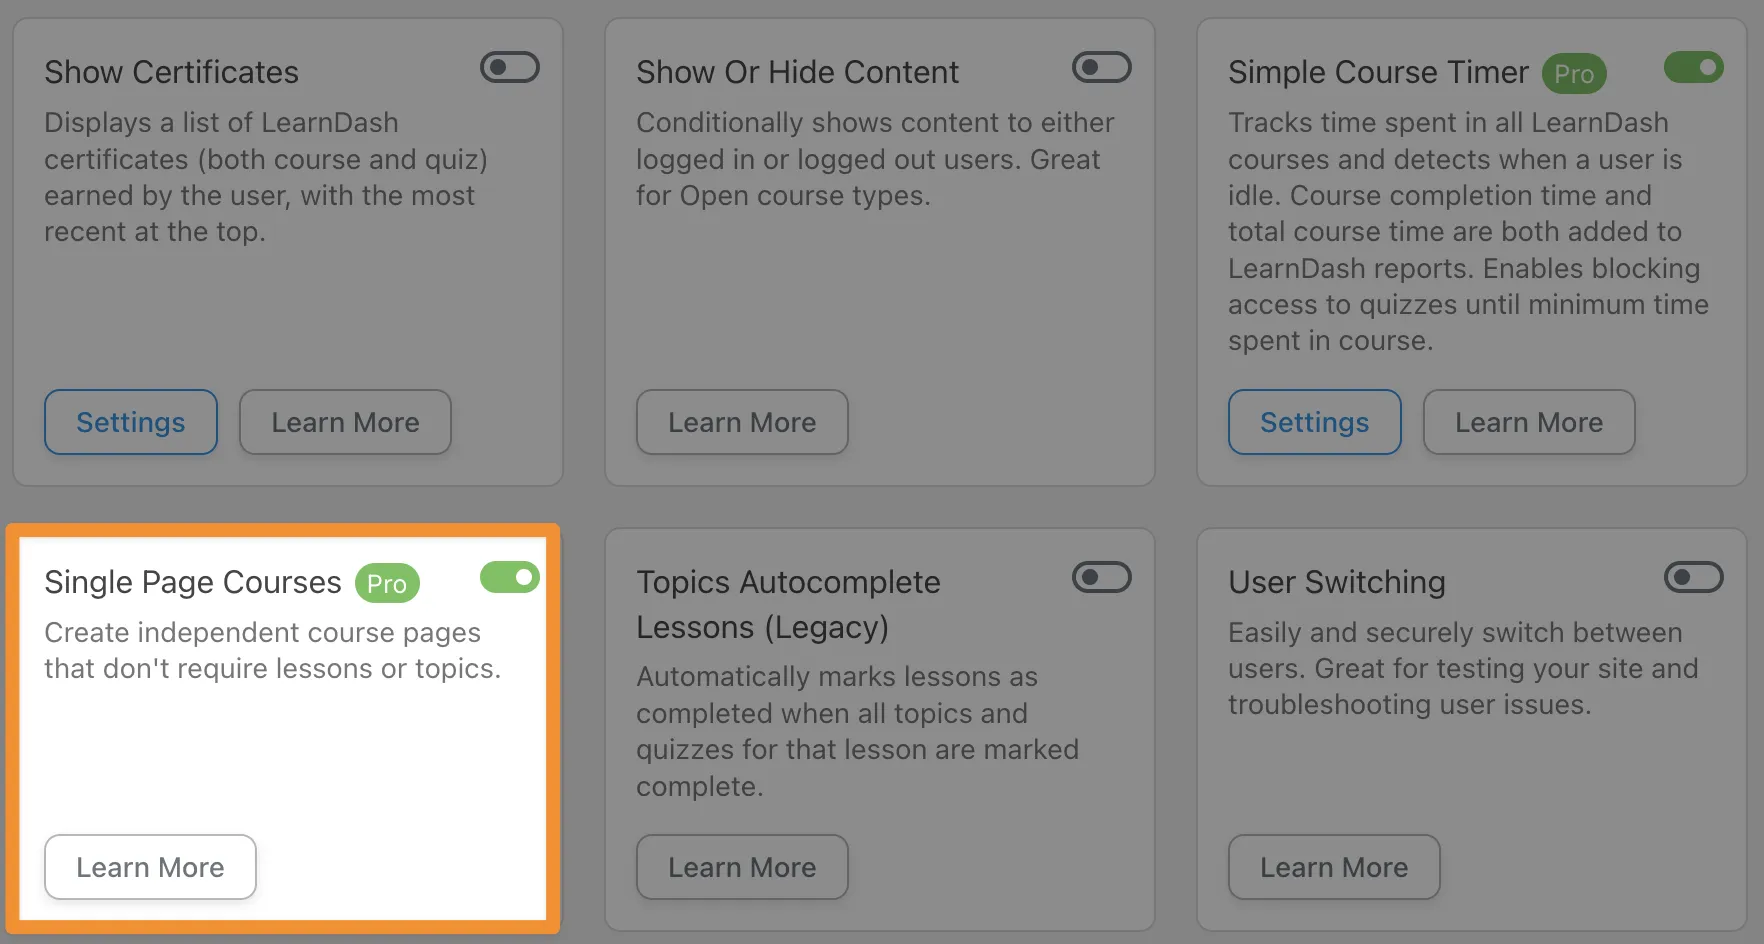
The module makes it possible for users to create LearnDash courses that do not include lessons or topics. With this module enabled, users can embed H5P/xAPI supported content directly into a LearnDash course and still track progress and completions.
Want to make a course out of an interactive video? Or an interactive video paired with a quiz that included a question set? You can make that happen with Tin Canny Reporting.
More H5P and LearnDash Integrations with Automator
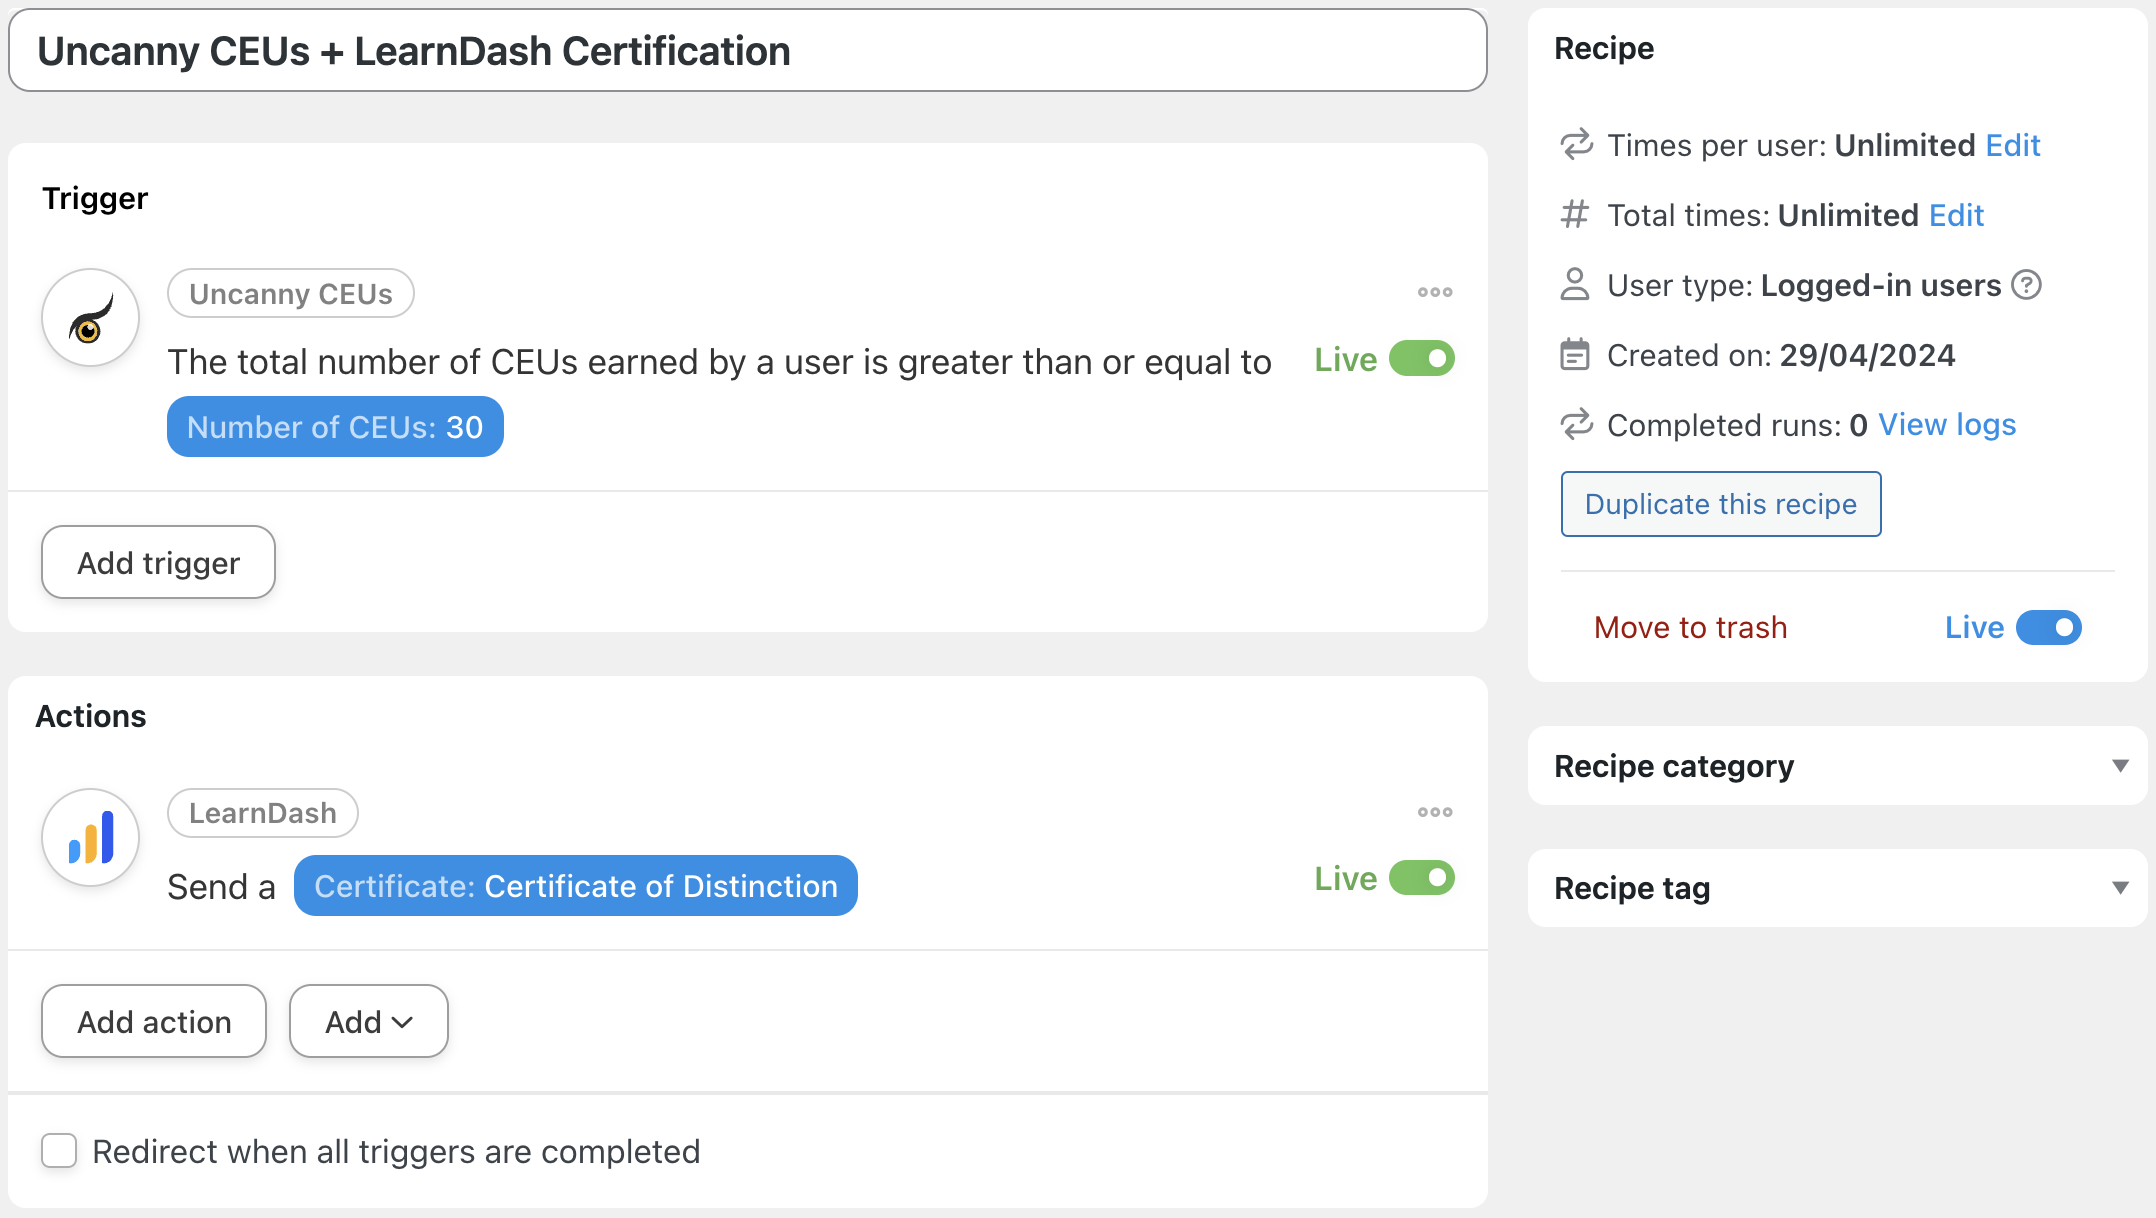
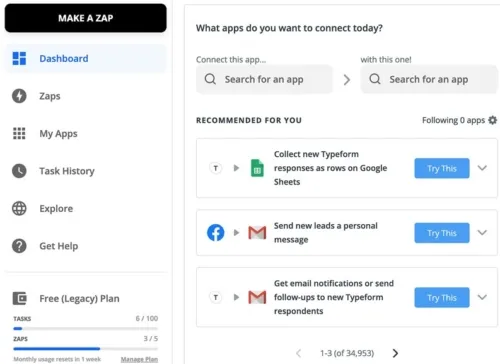
Still looking for more ways to integrate H5P and LearnDash? The Uncanny Automator plugin may just be the tool you’re looking for.
Automator is the #1 automation and integration tool for WordPress websites, allowing you to connect H5P content to your whole LMS ecosystem.
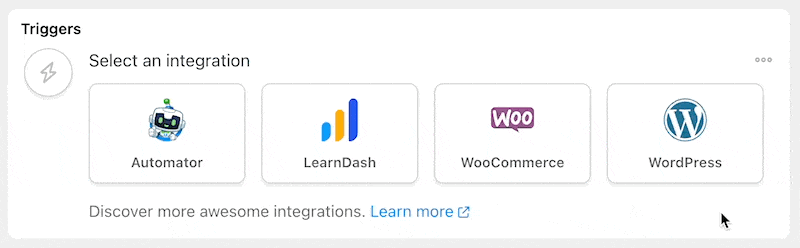
Using simple combinations of triggers and actions, you can do anything from sending an email in your preferred CRM to creating a card or task in Trello or ClickUp based on a learner’s journey.
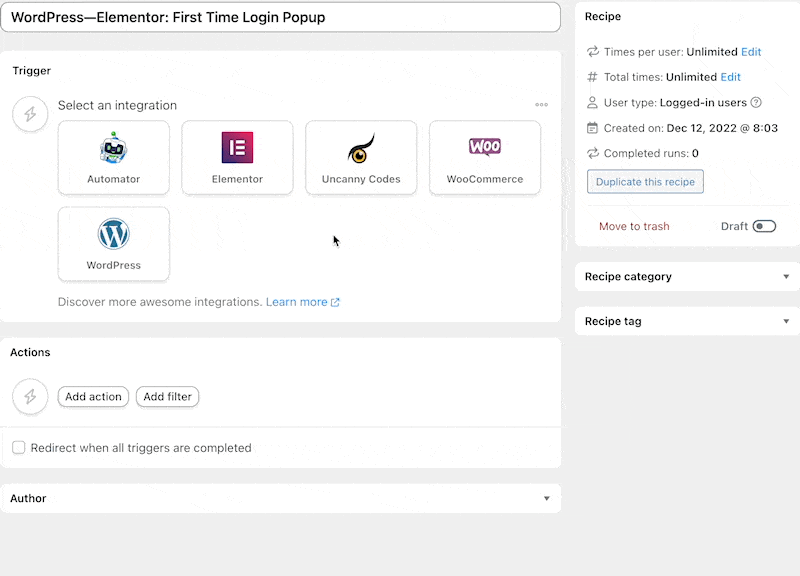
In the recipe pictured below, for example, we’re able to send an email to learners who score at or below a threshold with links to remedial content.
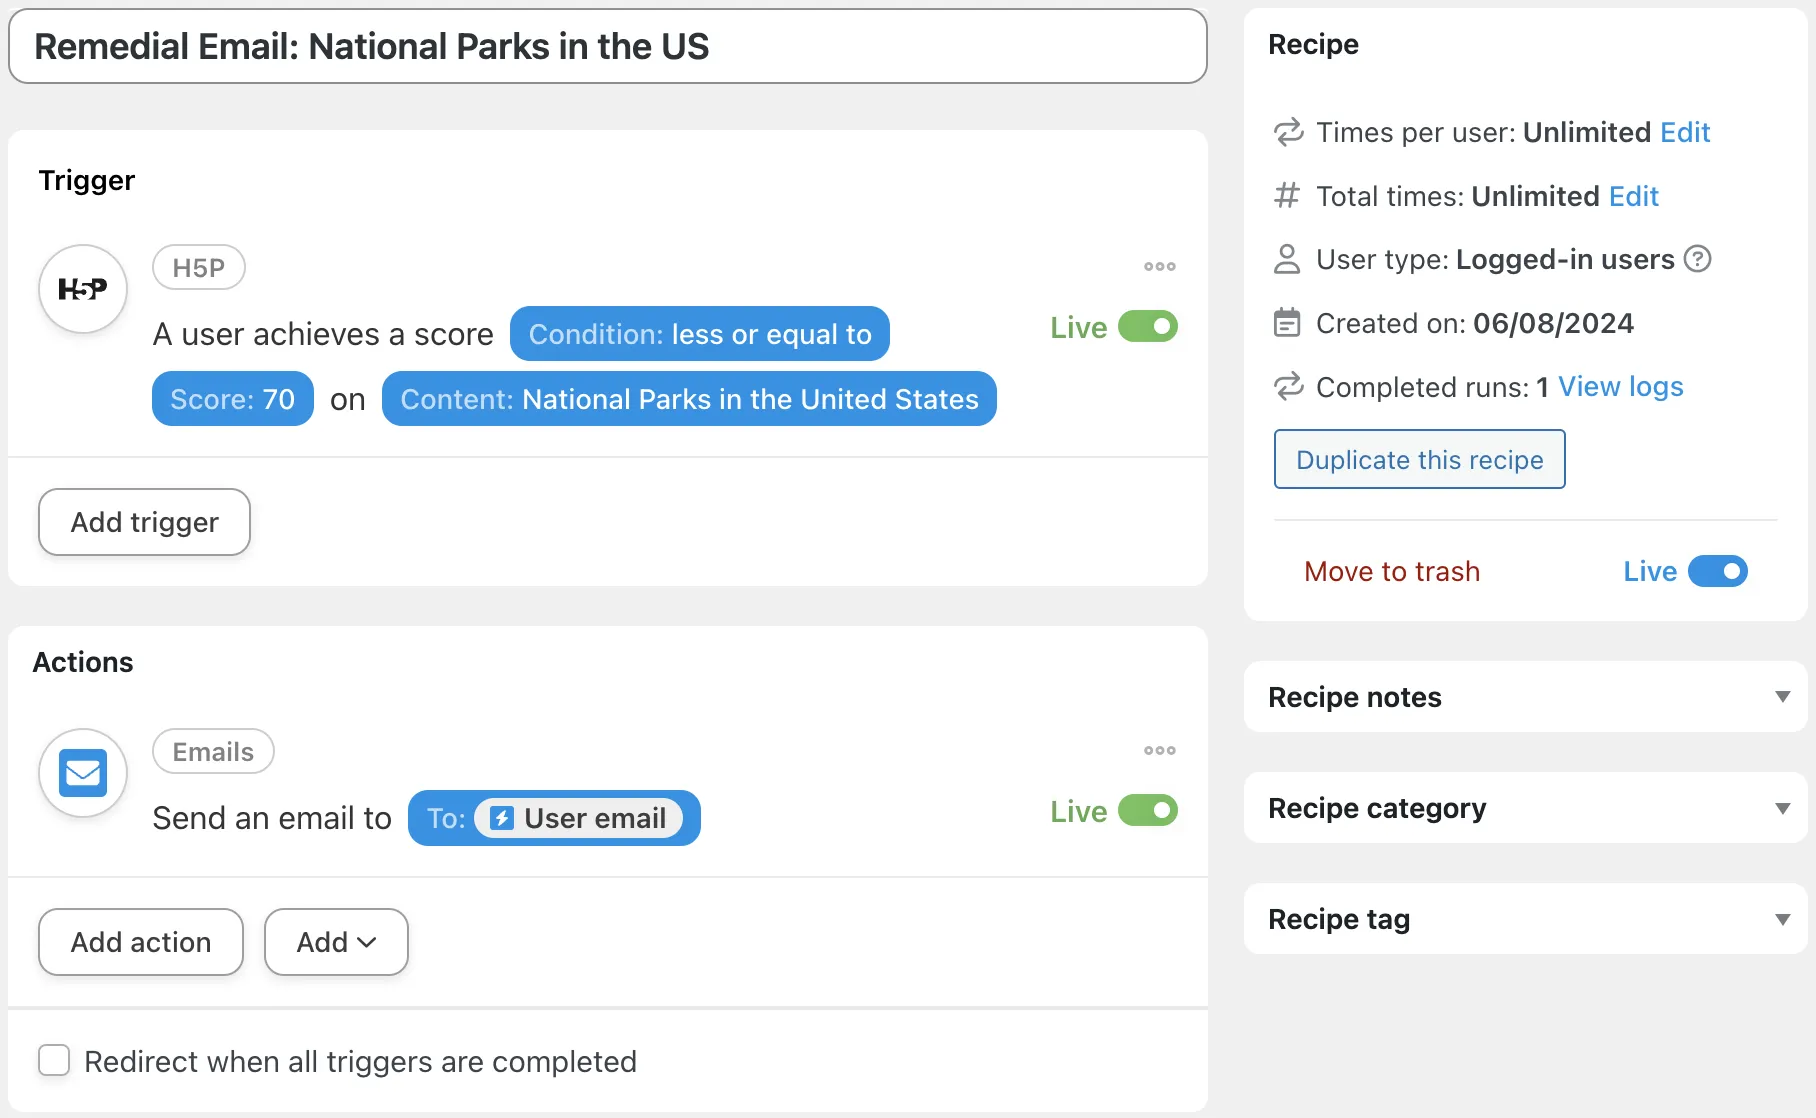
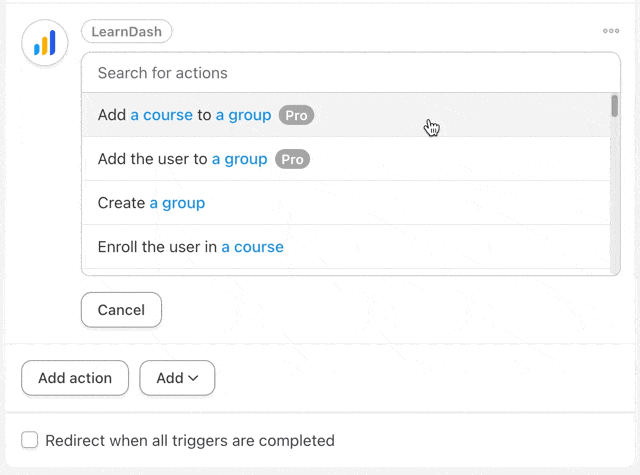
We could also choose from any number of LearnDash specific actions, from adding learners to groups or enrolling them in courses based on their H5P content completions.
Best Practices and Frequently Asked Questions
By now, you’re ready to create just about any kind of interactive content and integrate it with your LearnDash courses. But, as you continue to use H5P and LearnDash together, here are some best practices to keep in mind.
1. All H5P Interactive Content Has a Place
Different types of H5P content serve different purposes. Even if a content type does not have xAPI support and will not contribute to course progression, it may still be a valuable tool for reaching course objectives.
2. Test Compatibility and Functionality
Before deploying H5P content in live courses, thoroughly test each interactive element to ensure it functions correctly within the LearnDash environment. Verify that xAPI statements are being correctly sent and received, and that the content tracks learner progress accurately.
3. Use Tin Canny Reports to Monitor Engagement
Regularly review the data and reports generated by Tin Canny Reporting for LearnDash to monitor learner engagement with your interactive elements. You can use engagement metrics to inform content creation in the future and improve learner performance.
1. All H5P Interactive Content Has a Place
2. Test Compatibility and Functionality
Conclusion
3. Use Tin Canny Reports to Monitor Engagement
In this post, we’ve shown you how integrating H5P with LearnDash adds another dimension to your e-learning platform with interactive and engaging learning experiences.
This comprehensive guide walked you through the essential steps to integrate H5P content, explained the significance of xAPI, and highlighted the importance of tracking learner progress with Tin Canny Reporting.
Ready to elevate your LearnDash content?
Record learner interactions with H5P and xAPI supported content with Tin Canny Reporting for LearnDash. Then, unlock additional features for your LearnDash site with Uncanny Toolkit Pro. And don’t forget that more H5P integrations are waiting for you with an Uncanny Automator Pro license.
Until next time, keep up the learning!
Ready to elevate your LearnDash content?


 Check out community feedback. This can be really hard to find in the LearnDash space, but it’s still important to make an effort and solicit experiences about working with the vendor. Maybe there’s feedback on social media, plugin reviews for things they may have developed, the LearnDash support forums, even reaching out to previous customers. Also look for negative feedback, which can often be more telling than positive comments.
