You have a successful WordPress site. You’re happy because you got your site up and running quickly on a tight budget. Now, your website is the main source of your customers and sales. As your business grows, so does your need for more functionality and plugins.
A few times a month, you make content updates and do theme and plugin upgrades on your site all by yourself. You’ve never had any problems—you think running a website is a piece of cake.
Then, after you run a bulk update of a dozen or so plugins, you start getting emails from customers, your WordPress site, and even Google. The emails say that you have a serious issue with your site. You bring up your browser and try to pull up your site. Unfortunately, all you get is a blank white screen.
This nightmare scenario happens all too often. The good news is, it can easily be avoided if you use what’s called a staging site or staging environment.
A staging site is a separate copy of your live website. The keywords being: separate and copy.
Because a staging site is separate from your live site, you can do things like upgrading to a new version of WordPress, upgrading your theme, or updating your installed plugins without affecting your live site. And, since a staging site is a copy of your live site, you can make changes and test the changes on a staging site as if it was your live site. After you verify that the changes you made on staging look good and work the way they should, then you can make those same changes on the live site.
Testing updates on a staging site before applying the updates on your live site helps ensure:
- Your site is still fully functional and continues working as it should after updates.
- There’s no disruption of your online presence that you rely on to promote your brand awareness and preserve your credibility.
- There’s no loss of revenue and customers because of unplanned downtime.
- There are no search engine penalties from non-working pages or missing content (e.g., 404 or 500 errors).
- There’s no loss of precious site content or customer data—namely for membership, eLearning and eCommerce sites.
Staging sites don’t have to be just for testing plugin, theme and WordPress upgrades. They can be an entire development environment for a brand new site, a place for troubleshooting and fixing an issue, or even testing performance tweaks. Do you want to try out a new plugin or the latest beta version of WordPress? No problem. These are the kind of things a staging site lives for. And, if you care about your business and your customers, you shouldn’t be experimenting or making untested updates in your live site.

Does the phrase, “a copy of your live site” set off your SEO warning bells? Rest assured that staging sites are almost always password protected and/or blocked from indexing. That means they won’t affect SEO standings of your live site.
Do you need a final thumbs-up from your client before releasing new website features? Staging sites are invaluable for getting the site owner’s feedback on enhancements or fixes before they are made public.
Staging environments have been an integral part of the software development lifecycle (SDLC) for decades. Their main purpose in the SDLC is to make sure you got things right before going live. However, just because you have a staging site doesn’t mean you’re completely in the clear. They can be misused like any other tools in your toolkit. Not to worry—whether you’re new to staging sites or a seasoned veteran, we’ve got your back.
In this article, we’ll guide you through our best practices for using a staging site. We’ll begin by describing how you would incorporate it into your workflow. Then, we’ll dive into our list of dos and don’ts. Lastly, we’ll briefly explore some of the WordPress hosting providers who support staging sites.
Please note that we’ll use the words staging site, staging environment, and staging to all mean the same thing. Similarly, we’ll refer to the live site as production from time to time.
Incorporating a staging environment into your workflow
Life before staging
Let’s review a typical WordPress site’s update workflow without using a staging site. It would look like this:
- Log in to your site’s admin Dashboard.
- Click on Updates on the left sidebar menu.
- Under the Plugins section, click on Select All.
- Click the Update Plugins button.
- Cross your fingers.
Then rinse and repeat for installed themes and even WordPress.
When all plugins are updated, maybe you bring up your home page to do a visual inspection. If there are certain pages or forms that are critical to your business, you might even go the extra step to check if they’re still working.
Let’s say your website is an eCommerce site as an example. You try to purchase one of your products as a test. You find out that your shopping cart isn’t working. No products are being added, and you can’t figure out why. You’ve only got two options at this point, and both of them aren’t pretty.
Option 1: troubleshoot and fix the issue knowing your site is broken, and the clock is ticking
Thankfully, figuring out which plugin broke your shopping cart is pretty straight forward. One way to do this is to deactivate all your plugins. Then, turn them on one-by-one. Each time you turn back on a plugin, test your shopping cart. Once the shopping cart breaks again, the last plugin you reactivated before the issue reappeared is your culprit.
But, it’s not over. We know which plugin is breaking our site, but we don’t have a fix yet. Your site is still broken. And, the clock is still ticking. Now what? You’ll need to contact the plugin author, report your issue, and request an emergency fix or a temporary workaround. How long it takes for the vendor to verify your issue and deliver you a patch is anybody’s guess. All the while, no one can buy anything from your site.
Option 2: restore from a backup and accept a loss in data
Assuming your hosting plan comes with a daily backup, you can restore your site from the last backup yourself. Otherwise, you frantically call customer support for help.
You finally get your site restored, but there’s some data loss. Depending on how old the backup is that you restored, you could be hit with one to hundreds of lost product orders, customer data and subscriptions. Even one lost large purchase could deliver a critical blow to your business.
Life with staging
Here’s how things play out if you use a staging site for updating your plugins.
- Log into your hosting provider.
- Click on the one-click staging button to clone a copy of your live site to a staging environment.
- Log in to your staging site’s admin Dashboard.
- Click on Updates on the left sidebar menu.
- Under the Plugins section, click on Select All.
- Click the Update Plugins button.
Now, we can run our shopping cart test again. But, this time we’re testing to see how things are working on the staging site. Not the live site. Insert a sigh of relief here.
This means you can verify that your site is all good at your own pace. If there’s an issue, your live site isn’t affected. If there are no issues, then you can safely update all the plugins on your live site.
Best practices
The dos
1. Take a full backup
A full backup means that all the files and database tables that make up your site are copied to a safe location. This is opposed to a partial backup where you can select to back up only parts of your site. A full backup includes WordPress core files, theme files, media files, and the database (DB).
We recommend that you always make a full backup of your live site before creating the staging site copy. You can quickly restore everything back to normal from the full backup if needed.
It’s important to note that there is a difference is between a daily backup and an instant (unscheduled) backup—sometimes called a snapshot. A snapshot taken just before updating the live site is good to practise for minimising data loss if something goes wrong.
For instance, let’s say you didn’t take a snapshot, and your latest full backup was done 23 hours ago. Now, you want to abort the process of updating your live site for some reason. So, you restore from yesterday’s backup (it’s the most recent). When you check your site, it’s back up and running. You’re feeling good until … wham, you notice that the 200 purchases and customer accounts that were created over the past 23 hours are gone.
Always take a snapshot before creating a staging environment and before updating your live site.
More and more hosting providers are making the staging process easier. Kinsta’s staging to live feature is a one-click action that pushes your staging to site to the live site. Before the push to live, the live site is automatically backed up as part of the process. Similarly, the WP Staging plugin recently added an automatic snapshot feature to their push staging to live function.
2. Disable emails
While working in staging, you should disable all emails. You definitely don’t want to inadvertently flood your customer’s inboxes if the work you’re doing on staging is kicking out email notifications all over the place or your site sends scheduled emails. The Disable Emails module in our Uncanny LearnDash Toolkit is designed to remedy this.
You can prevent your staging site from sending any emails by using the Disable Emails module. To test if your emails notifications are working without sending out actual emails, use the Disable Emails module in conjunction with the Email Log plugin. Disable Emails will block outgoing emails, but Email Log will record what notifications would go out as if they were sent.
3. Clear the cache
It happens to all of us. After we make a simple change, we reload the page to see it, and it’s not there. We hit reload a couple more times—still nothing. We go back to the change. The change looks good. We hit the save button just to be extra sure. We click reload again. Nothing. We’re just about the scream before we realise we should clear our caches.
Assuming your change doesn’t have an error, you save your work, and you’re looking at the right page, this problem is almost always due to caching. To save time and your sanity, we recommend disabling your caches while you are making changes in staging. Only enable them when you are doing performance testing or to make sure there are no plugin conflicts if you use a caching plugin. Make sure you clear your caches on the live site too when you push changes.
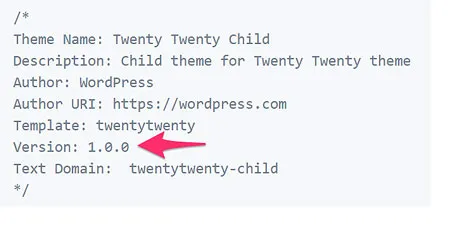
4. Version your child theme
Version your child theme by updating the version field in the header section comments of child theme’s style.css file. This way, anyone who uses your child theme can make sure they’re pulling down the latest static files rather than what’s cached in the browser.
The don’ts
1. Never push the staging database to production
Your production database should be the single source of truth. Treat it like your personal gold mine. Therefore, never contaminate it. This means, never push your staging database to your live site, especially if you have an elearning, ecommerce or membership site (in general any site where users have accounts and/or generate new data). Overwriting your production data from staging is never a good idea. Some automated staging tools do not permit pushing the staging DB to production. Instead of pushing from staging to a live site after validating changes, reproduce the steps you took on staging. It’s often helpful to keep a log as you test on staging, noting the updates you ran and changes you had to make to ensure everything worked properly after the updates. (If code updates were required to fix things and you use git repositories, it should be easy to push the fixes required on a staging site to the live site automatically, and if changes affecting the database are needed then keep a lot of everything that was changed.)
2. Don’t take partial backups
As we mentioned above, full backups are the only way to fly. You might see options in your dashboard for backing up only the database, media, theme, or plugins. When it comes to working with staging environments, don’t take partial backups. We need to make sure we can always restore our complete site—not just pieces of it.
3. Don’t keep your backup on the server
There are two big reasons you shouldn’t keep your full site backup on your website. First, if your server crashes and all files are lost, your most recent full backup is also gone. Second, your backup file(s) takes up disk space. Depending on the size of your site, your backup files can be humungous. Your available disk space could shrink to nothing if you have an increasing stockpile of backups on your site. Your site will screech to grinding halt when you’re out of disk space. Managed WordPress hosts typically offload backups to Amazon or another cloud provider to ensure they’re kept safe.
4. Don’t give public access to your staging site
When staging sites are created on hosting plans that support them, they should automatically be private. However, you should always check especially if you manually created your staging site. It’s a good idea to password protect your site, and at a minimum make sure that search engine indexing is blocked. Staging sites should be controlled environments, meaning, you know what’s happening to the site at all times. Otherwise, you can be wasting precious time chasing your tail trying to figure out why the changes you made yesterday aren’t working today.
5. Never automatically update WordPress, themes, and plugins
If your site is mission-critical, meaning that you’ll lose revenue and customers if your site goes down, you should never automatically update your WordPress version, your active theme, and any active plugins. You’ll need to check with your hosting provider’s policy to see what their default update settings are. If they default to any kind of automatic updates, then you’ll need to know if you can disable them. This is especially important for ecommerce, elearning and membership sites where the signed in experience is different and automated checks wouldn’t notice issues resulting from updates.
Automatic updates for themes and plugins are usually disabled by default. If they aren’t, then you can write filters in a must-use plugin or use a plugin like Easy Updates to turn this off.
To be clear, disabling automatic updates doesn’t mean you’re off the hook for keeping your site up-to-date. Never automatically updating means, you should take the time to test your site with updates before going live.
Setting up staging on various host providers
If you’re looking for a hosting company, we recommend that you choose a provider that has built-in support for staging sites. Below, we’ve picked 3 hosting providers that support staging sites in their plans.
Let’s go through how you would set up a staging site for each provider.
WP Engine
1. Log into your User Portal.
2. Navigate to Sites.
3. Click on the site name that you want a staging site for.
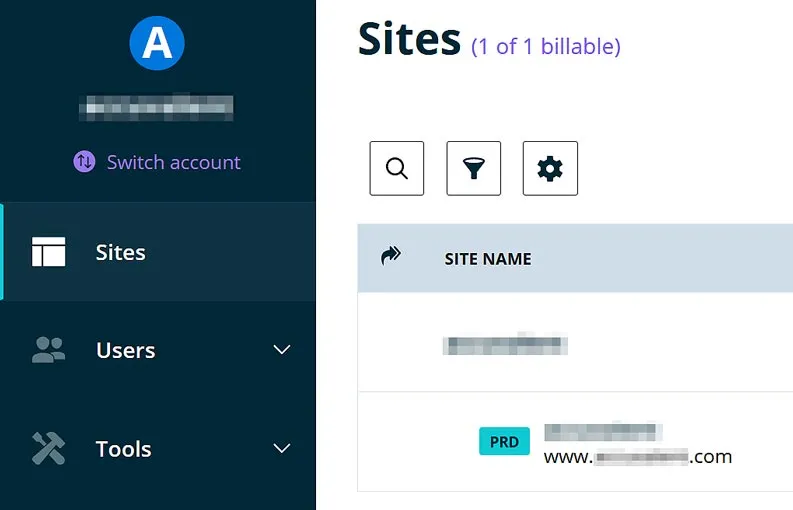
4. Click on Add Staging.

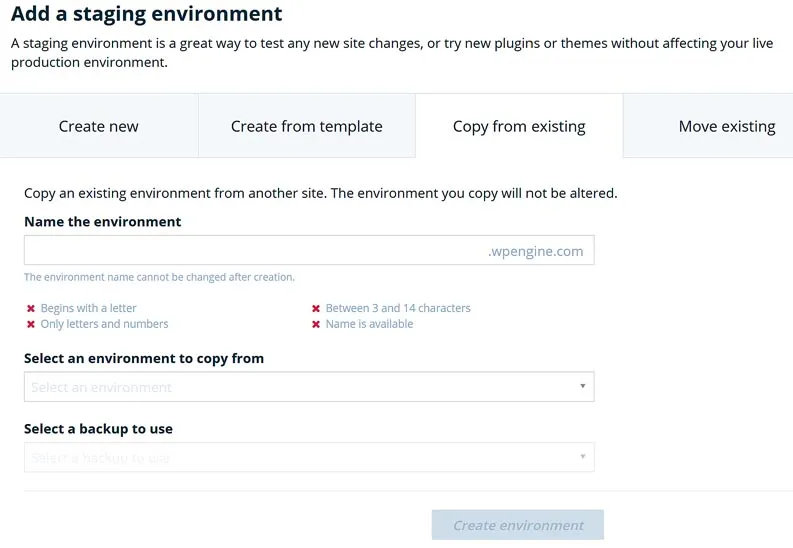
5. Click on the Copy from existing tab.
6. Enter the name of your staging site in the Name the environment field.
E.g., “mysite-staging”. Using this example, your staging site’s domain will be “mysite-staging.wpengine.com”.
7. Select your production environment in the Select an environment to copy from drop-down.
8. Select your most recent backup from the Select a backup to use drop-down.
9. Click on the Create environment button.
An email notification is sent when the staging site is ready.
Kinsta
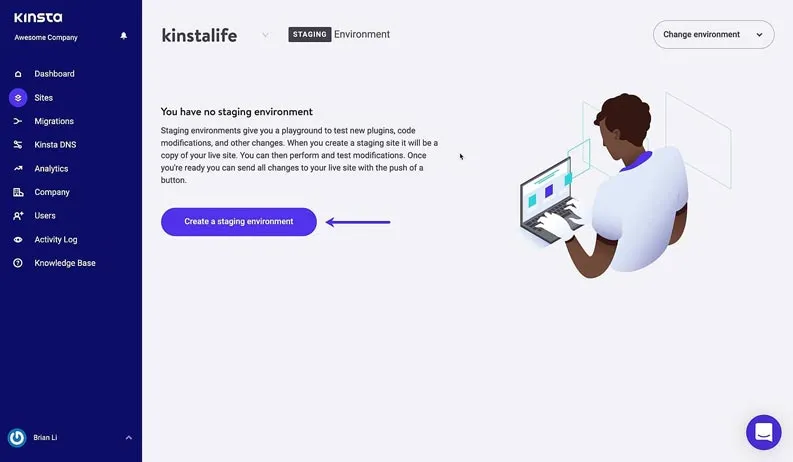
1. Log into your dashboard.
2. Navigate to Sites.
3. Click on the site that you want a staging site for.
4. Select Staging in the drop-down menu located at the top right of the page.
5. Click the Create a staging environment button.
Kinsta generates a staging site name and URL for you. The URL follows this format.
https://staging-sitename.kinsta.cloud
Where sitename is the name of your live site.
Pressidium
1. Log into your dashboard.
2. Navigate to Websites.
3. Click on the site name that you want a staging site for.
4. Click on the Staging tab at the top.
5. Click the Create Staging button.
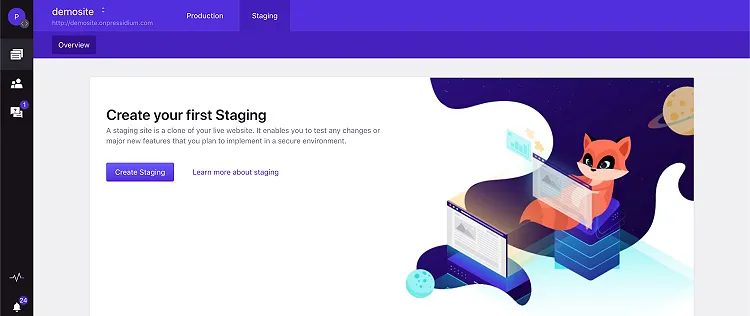
When the staging site is ready, you’ll see a notification in your dashboard. Your staging site’s link will look like:
https://mysite.dev.onpressidium.com
Where mysite is the name of your live site.
If your current hosting company doesn’t have staging support, you should request that they add it to their offerings. If they don’t plan on embracing staging sites any time soon, it’s time to shop around for a provider like the ones we’ve featured above.
Conclusion
We recommend that you always use a staging site even for updates that seem completely harmless. Conversely, we don’t ever recommend using your live site to test changes or try out new things.
If you’re still doubting that staging sites are vital for your business, there are a couple of rare cases where we think you could forgo a staging site:
- Your live site is private and has no visitors except for you.
- Your live site is public, but no one cares if it’s up or down.
Cost used to be a factor for skipping the use of a staging site. Luckily, more and more hosting providers offer free one-click environments. With increasing support for staging sites, there’s no reason to find out the hard way that running your operations without a staging site is far more expensive.
Let’s face it, having a website (whether it’s on WordPress or not) requires continuous care and feeding. If you want a healthy and safe website that’s always running the latest/greatest features, investing in a staging site is a no brainer.
I completely agree with this post. We have experienced many issues with WordPress updates and plugin updates in the past. Making a staging copy of our site before doing an update has made a big difference.
Interesting, the idea of never actually pushing from staging to live production. My client has recently hired a web developer to make changes to the theme, which I was planning to do in staging site. I am wondering if it would work to have them create the changes on staging and then use import/export WP plugin that is used for migrating to bring in the changes. It would certainly not work to expect them to create a whole new theme and a bunch of pages from scratch, after creating it in staging.
My worry is that a partial import will come with its own issues, such as CSS that calls to code that didn’t get imported and only exists in staging.
I am also looking for a way to temporarily disable all other admin users while I’m in staging, to be sure no one is working on the live site while I’m modifying staging. I know I can change their roles temporarily, but it would be nice if there were a message they receive when they can’t login. But your way of doing things, with never pushing from staging to live, would mean I wouldn’t have to.
Lots to think about here.
For code-level changes, like your CSS example and the theme, code should be in a git repository and you should just have to push it from your repo to the live site. It is very common to add new content, test updates and build new functionality in a Staging site, but ideally for code you deploy from a repo (not copy from one site to another) and for database changes you would generally just reapply them. For posts, yes, this may involve an export and import. This does now get beyond the scope of the article, but if your developer is working on different features and building some on Staging while others move to Live (related to your worry about orphaned code), maybe branches are used to manage different features or even independent plugins.
For your last comment, by default WordPress doesn’t allow one admin to modify a post that another admin is modifying. You should see a warning that another admin is in there. And for anything code related, assuming the developers are using git, there are controls in place to make sure one developer doesn’t modify another developer’s code.