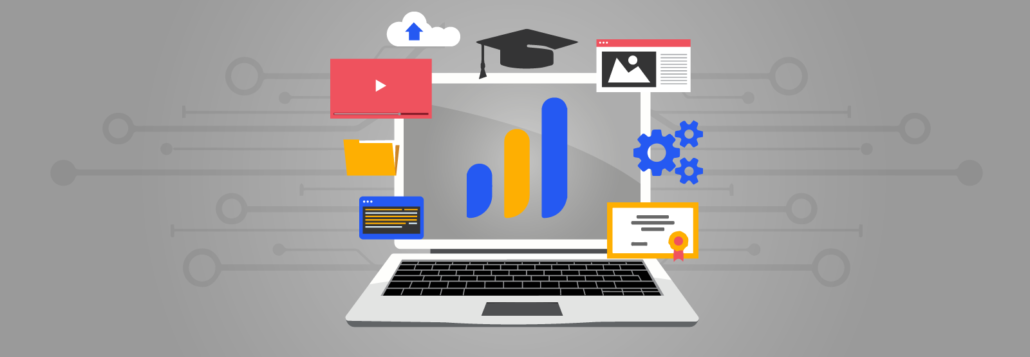
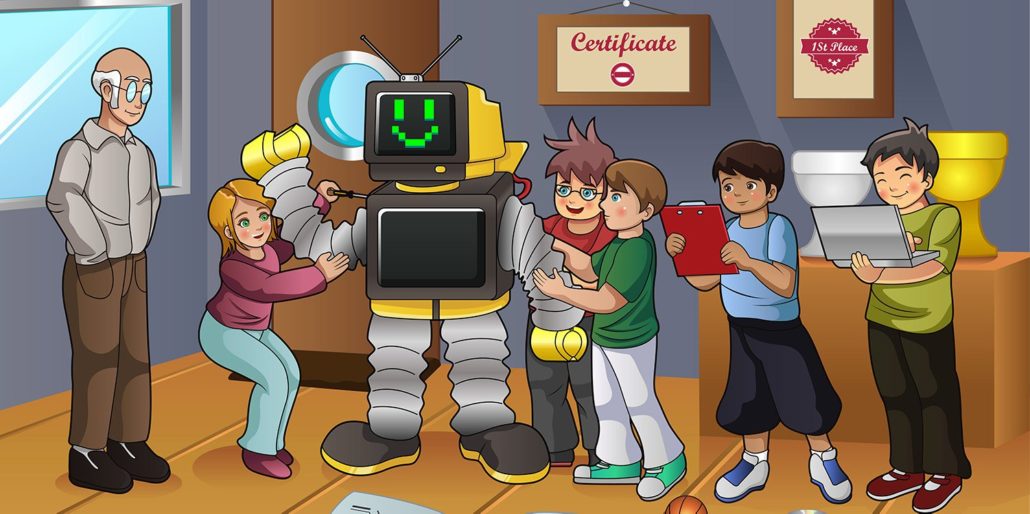
How to Reset LearnDash Course Progress

Let’s go back to the beginning! Reset LearnDash course progress with Uncanny Automator for all of your compliance, education, training and certification needs.

Going back to where you started isn’t always a bad thing. Just think of what happens every time you pass “Go” in Monopoly!

LearnDash LMS users know, better than most, the value of starting over again. Especially in the realms of compliance training and recertification, the ability to hit the reset button is vital for learners and administrators alike. That’s why so many LearnDash users trust Uncanny Automator.

In this comprehensive guide, we’ll walk you through the step-by-step process of resetting your LearnDash users’ progress with the #1 teacher’s assistant, Uncanny Automator. Provide your learners with the chance to start their educational journeys anew while simultaneously streamlining tasks for your busy course administrators.

Without further ado, let’s push that reset button!

Uncanny Automator for LearnDash

LearnDash is the #1 LMS for WordPress users. Likewise, Uncanny Automator is #1 automation and integration tool for WordPress. Together they make an unbeatable elearning platform!

Using combinations of triggers and actions, Automator can help you streamline your administrative workflows, save time and reduce costs.

automator-homepage

Furthermore, Automator seamlessly integrates LearnDash with all of your other favorite apps and plugins. This means that you can connect course progress to your CRM, ecommerce platform and even external apps like Google Sheets.

Resetting course progress is an Automator Pro feature, meaning that you’ll need to get a Pro license. Fortunately, a Pro license unlocks tons of powerful features that will make managing your LearnDash courses much easier.

Take advantage of a 14-day money back guarantee and get started with Automator Pro so you can follow along.>>>

Uncanny Continuing Education Credits: Create a Permanent Record of Course Completions

We know that just because you want to reset a user’s course progress in LearnDash doesn’t mean that you don’t want to keep some record of their academic progress. That would be like giving up all of your Monopoly money every time you passed “Go”!

For this reason, we have developed the Uncanny Continuing Education Credits plugin (Uncanny CEUs). This plugin has tons of amazing features for the LearnDash LMS but the standout feature is its ability to create a permanent record.

uncanny-ceu-plugin-homepage

Uncanny CEUs stores LearnDash course completions independently of LearnDash itself. This means that you can reset course progress as many times as you want and still maintain a record of your users’ course completion.

For WordPress developers and/or educators with more than one LearnDash site, we highly recommend getting the Uncanny CEUs plugin as part of Uncanny Toolkit Pro All Access Pass. In addition to all of the amazing features in Uncanny CEUs, you’ll also gain access to Tin Canny, Groups, and Codes along with a whole suite of powerful modules.

Reset LearnDash Course Progress for Compliance Training

One of the many reasons why you might want to reset your users’ LearnDash course progress is for annual compliance training purposes. With Uncanny Automator, you can easily reset LearnDash course progress for multiple users with the click of a button.

reset-learndash-course-progress-compliance-training

In the recipe pictured above, we’re able to single out all of our LearnDash users with a specific email domain and reset their course progress in bulk. In the next steps, we’ll walk you through how to recreate that recipe—and how to customize it to suit your learners’ needs!

Step 1: Create and Name a New Recipe

From your WordPress Admin Sidebar, navigate Automator > Add New. In the pop-up window that appears, select Everyone.

select-recipe-type-everyone

Give your new recipe a name that makes it easy to recognize at a glance. For example, we’ve named this recipe Reset LearnDash Course Progress: Compliance Training.

Step 2: Configure Your Trigger(s)

In the Triggers panel, from the menu of available integrations, select Run now.

run-now-integration

From the drop-down list that appears, select Trigger recipe manually.

Step 3: Configure Your Action(s)

In the Actions panel, click Add > User loop.

add-user-loop

In the Loop panel, click Add action and select LearnDash from the menu of available integrations.

learndash-integration

From the drop-down list that appears, select Reset the user’s progress in a course. You can also select Reset the user’s progress for all courses associated with a group if your compliance training consists of more than one course.

learndash-action-reset-the-users-progress-in-a-course

Automator will prompt you to select a course. Once you’re finished, click Save. Your Loops panel should look something like this:

learndash-action-reset-the-users-progress-in-a-course-live

Step 4: Add a Filter

By default, Automator will reset the course progress for all users who are not Administrators. More often than not, however, you’ll want to target a specific subset of users. You can do this using filters.

In our example, we’re targeting a subset of users from a particular organization using their email domain.

To add a filter, hover over the LearnDash action and click Filter. A window, labeled Condition, will appear. Select A token meets a condition.

a-token-meets-a-condition

A new window, labeled Configure the rule, will appear. In the field labeled Token click the Asterisk and select User email.

(Note: In Automator, tokens are dynamic data pulled from your WordPress website or even from within recipes.)

token-user-email

After selecting the User email token, you can fill out the remaining fields, Criteria and Value, to target specific users.

configure-the-rule

Once you’re finished, click Save filter.

Step 5: Hit the Reset Button!

You’re just about to reset your users’ LearnDash progress. All that’s left for you to do, is to click the Run now button!

reset-learndash-course-progress-compliance-training-run-now

Whoever said that there are no “do-overs” in real-life never used Uncanny Automator! In fact, there’s more than just one way to reset LearnDash course progress with Automator.

Reset LearnDash Course Progress Individually

You won’t always want to reset your LearnDash users’ course progress in bulk. Even if you are running a compliance training program, you may have users with individualized learning schedules.

Fortunately, there’s an Automator recipe for that too!

reset-learndash-course-progress-individually

With the recipe pictured above, we’re able to reset LearnDash course progress on an individual basis, one year after each user completes the course. Here’s how to recreate this recipe.

Step 1: Create and Name a New Recipe

From your WordPress Dashboard, navigate to Automator > Add New. In the pop-up window that appears, select Logged-in users.

select-recipe-type-logged-in-users

We’ve named this recipe Reset LearnDash Course Progress Individually.

Step 2: Configure Your Trigger(s)

In the Triggers panel, from the menu of available integrations, select LearnDash.

From the drop-down list that appears, select A user completes a course.

learndash-trigger-a-user-completes-a-course

Automator will prompt you to select a course. Once you’re finished, click Save.

Step 3: Configure Your Action(s)

In the Actions panel, click Add action and select LearnDash from the menu of available integrations.

From the drop-down list that appears, select Reset the user’s progress in a course. Once again, Automator will prompt you to select a course.

Once you’re finished click Save.

Step 4: Add a Delay

Likelier than not, you won’t want to reset the user’s LearnDash course progress immediately after they complete it. As such, we’ll need to add a delay.

Simply hover over the LearnDash action and click Delay.

automator-learndash-action-filter-and-delay

A pop-up window will appear where you can set a delay or schedule a specific date and time to execute the action.

In our example, we’ve configured a one-year delay.

automator-delay-1-year

Once you’re finished, click Set delay.

Step 5: Go Live!

Recipes that don’t use the Run now trigger can either be in Draft or Live. To automate the reset process, simply toggle the recipe from Draft to Live.

reset-learndash-course-progress-individually-live

With this recipe, you can set individualized learning schedules for your WordPress users. But, trying to remember all of those dates can be a challenge.

Once again, Automator is there to help. You can add reminders for you and your LearnDash users with your CRM of choice or take advantage of Automator’s built-in Emails integration.

reset-learndash-course-progress-individually-email-reminder

Reset LearnDash Course Progress with Ecommerce

Automator also allows you to integrate your ecommerce platform, such as WooCommerce, with LearnDash.

woocommerce-learndash-integration-certification

A recipe like the one pictured above is great for certification purposes. Every time a user purchases access to a certification course, Automator will reset their course progress.

Try adding filters and delays to a recipe like the one pictured above in order to suit your learners’ needs.

Conclusion

Hopefully, now, you have everything you need to reset LearnDash course progress in whichever way suits your workflows. Whether you want to reset users’ progress in bulk, individually or in connection with other actions on your WordPress website.

If you have any questions, don’t hesitate to drop us a line in the comments section below. Until then, just remember: it’s never too late to hit the reset button as long as you have Automator at your fingertips!

Better Notifications for LearnDash

With the LearnDash Notifications add-on and Uncanny Automator, students and staff can stay in touch, communicate more and learn together.

In self-directed elearning courses, it can be difficult for instructors to stay engaged with their students. While reports help instructors gather summary-level details on their students’ progress, they don’t keep educators in the loop as the learning unfolds. The LearnDash Notifications Add-On, however, addresses some of the challenges associated with real-time feedback. Even so, the LearnDash Notifications Add-On can’t quite always accommodate the needs of both students and instructors.

For example; how do students become aware of new course availability, new feedback from instructors, or new group discussions? To promote engagement and increased learning, elearning websites require a way to reach out to students beyond the website itself.

Whether you’re looking to enhance the LearnDash Notifications Add-On or replace it altogether, you’ve found the perfect solution.

LearnDash Notifications Add-On

In the LearnDash ecosystem, the easiest and most common way to send notifications to students and instructors (typically “Group Leaders” in LearnDash) is by email using the free LearnDash Notifications Add-On. It’s a powerful add-on that allows key LearnDash events, like course completion or assignment approval, to trigger email notifications to students, Groups Leaders and administrators. And with the new (at the time of publication) 1.6 release, it even adds conditions, so you can choose to send notifications only to users in certain groups, who have not completed a quiz, who are enrolled in a course, etc.

LearnDash Notifications is a great plugin that supports email notifications for a variety of scenarios, and since it’s free, it makes sense to use it on most LearnDash sites. It even has support for dozens of shortcodes so that you can include dynamic content (like the user’s name or course name) in the emails.

Better LearnDash Notifications - LearnDash Notification Add-On Triggers

With over 15 trigger types, a dozen conditions and dozens of shortcodes, there’s support for the most common email notification scenarios.

But what if you want to reach out to students via more than just email? And what if instead of a few dozen options, you had hundreds of triggers, multiple communication channels and thousands of conditions?

Enter Uncanny Automator

Uncanny Automator is our no-code automation platform for WordPress that we originally created as a way to personalize elearning for LearnDash. A little more than five years later, it has evolved into a robust system that connects LearnDash activity to more than 100 other plugins and apps. If the LearnDash Notifications Add-On gives you the ABCs of email notifications, then Uncanny Automator gives you the post-doctoral thesis in elearning linguistics. But while an actual PhD in linguistics night cost you an arm and a leg, there’s even a FREE version of Automator that connects some of the core LearnDash (and other plugins!) triggers to email and other channels!

More triggers

The LearnDash Notifications Add-On covers 15 basic scenarios. But what if you wanted more? Uncanny Automator gives you the ability to customize your LearnDash notifications, far beyond what the LearnDash Notifications Add-On can do. These are just some of the notifications you can send with Automator:

  • A user achieves a percentage, score or point value above or below a certain amount (“passing” or “failing” a quiz is great, but what if you want certain notifications based on score instead, like maybe notify the Instructor the first time only that someone gets a perfect score on a quiz?)
  • A new course, lesson or topic is created–or perhaps a new course is added to a group
  • A Group Leader is added or removed from a Group (keep other instructors in the loop about teaching staff changes)
  • A user completes a group’s courses
  • A user is removed from a group or course

But that’s just the start. No LearnDash site runs with the LearnDash plugin alone; it takes several, maybe even dozens, of plugins to run a LearnDash site effectively.

Want to know when new feedback forms are submitted for your course, but only on completion of the course? Here’s a recipe that notifies Group Leaders when the feedback form has been submitted and the user has completed the course:

Better LearnDash Notifications Automator WPForms/LearnDash Recipe

Maybe Group Leaders need to know when students have attended a live onboarding seminar that also enrolls the student in the next course? There’s a recipe for that too:

Better LearnDash Notifications Events Calendar/LearnDash recipe

Perhaps students receive a special certificate of congratulations after attending a live event that follows a course, so both LearnDash course completions and the Group Leader marking them attended triggers a special certificate:

Better LearnDash Notifications Events Calendar/LearnDash recipe graduation

More channels

Sending email notifications is great, but what if it’s not the best or only way to reach your students? By connecting LearnDash to Uncanny Automator, you can open up new channels of communication with your staff and students.

If your instructors work at a large institution, they’re likely flooded with emails everyday—and sending even more emails only results in more noise that gets ignored. But, if you had a dedicated support channel in Slack, you could get live updates any time users in a particular group fail a quiz or receive a low grade:

Better LearnDash Notifications LearnDash Slack recipe

Alternatively, certain scores on a quiz might open a ticket directly in your Help Desk system so important updates are easily tracked and followed up on. And one of our favorite examples for students who prefer more social messaging applications such as WhatsApp, SMS messages via Twilio or forums and groups in BuddyBoss, you can celebrate student achievements by sharing them with other students and staff. Perhaps, like in the example below, your students can celebrate their course completion or high grades in a specific group’s activity feed in BuddyBoss (and add multiple triggers to mark each accomplishment):

Better LearnDash Notifications LearnDash BuddyBoss recipe

With your students’ consent (perhaps via an opt-in form when they register), some site admins might even choose to share key accomplishments such as certification on social media in a private Facebook group.

More conditions

Adding filters to notifications is a great way to ensure that notifications only go to the right people at the right time. Conditions are a very recent addition to the LearnDash Notifications Add-On, and at the time of writing, supported conditions are:

  • User is enrolled to a group
  • User is enrolled to a course
  • User has completed a course
  • User has completed a lesson
  • User has completed a topic
  • User has submitted a quiz
  • User has completed a quiz
  • Essay has just been submitted
  • Essay question has just been put into graded status
  • User has uploaded an assignment
  • User’s assignment has been approved
  • User has not completed a quiz

It’s a great list, and on the LearnDash side of things, it absolutely covers the highlights. So what can Uncanny Automator bring to the table that LearnDash Notifications doesn’t have?

  • A lot of “not” in or “not” completed conditions. Maybe a notification simply doesn’t apply to a tester group. Instead of explicitly adding all of the other groups to the notification, you can just say “this notification applies to everyone except members of this group”.
  • Group hierarchy support. Maybe you support a hospital network with multiple departments and divisions, and maybe a certain notification applies only to members of one specific organization. If they have 50 groups in their group hierarchy, and perhaps those groups sometimes change, managing notifications for those groups would be a nightmare. With Automator, you can just set up a condition to have a notification run for everyone in a selected group and its children.

Of course, your LearnDash site is likely running more plugins than just LearnDash. What if you only want notifications to go out to users with a certain membership level in MemberPress, a matching WordPress role or a specific CRM tag via WP Fusion? No problem.

Taking things a bit to the extreme, here’s a WhatsApp notification that will only go out to users with an uncannyowl.com email address that have an “opt-in” tag in FluentCRM and are active Platinum members in MemberPress:

Better LearnDash Notifications WhatsApp Action with Automator conditions

You can keep notifications as simple or as advanced as you want in Uncanny Automator. You can even schedule and delay them.

More data

Suppose you want to send a confirmation notice to students when they complete a course—some type of congratulatory message. The LearnDash Notifications Add-On makes this really easy, and in the email you can include details like first name (or really any user data) as well as the course name. For many sites, this is enough.

Uncanny Automator, of course, currently has support for over 5,000 unique tokens. Some are based on user and system data, some based on the trigger, others even based on data in other actions in the same recipe. Here are just a handful of examples of other types of data you could include in the notification above if you used Automator instead of the LearnDash Notifications Add-On:

  • The number of courses the user has completed.
  •  Custom meta for the course, like continuing education credits earned, course duration or course author.
  • The course expiry date.

Or you could just do more with it, like include a coupon code for the user’s next course purchase or attach a printable PDF certificate along with the notification.

Get started for free

Many of the notification types outlined in this article are fully available in the free version of Uncanny Automator and run without restrictions. Triggers related to quizzes and course, lesson and topic completions are unrestricted in the free version of Automator, as are sending emails to students, Group Leaders and admins. By signing up for a free account, you can also try out notifications via Slack, WhatsApp, Twilio and more with complimentary credits.

With the right notification system in place, improved knowledge transfer and community building are just a few clicks away. Between the LearnDash Notifications Add-On and Uncanny Automator, LearnDash users have easy access to a class-leading notification system for elearning platforms.


How to Create & Sell LearnDash & WooCommerce Promo Codes

In this step-by-step guide, we’ll show you how to create and sell LearnDash and WooCommerce promo codes. Use them for course registrations, to sell event tickets or to unlock special features on your website.

So you want to be a master codebreaker, do you? Well, you’ve come to the right place. With Uncanny Codes, you can create and customize unique codes to sell, unlock or promote just about anything on your website.

Whether you want to use codes for event registration, product tie-ins, or to run limited promotions, Uncanny Codes has you covered. In this quick guide, we’ll show you how to create and sell promo codes and feature some of the best ways to use them.

Don’t worry, you won’t actually need to know anything about cryptanalysis in order to follow along.

What You’ll Need

If you want to “crack the code”, you’re going to need a supercomputer— or a cipher machine and a lot of time. But if you’re trying to make some unbreakable codes of your own, all you’ll need are these awesome WordPress plugins.

Uncanny Codes

Uncanny Codes is the best code management plugin for WordPress. Auto-generate dozens (or thousands) of codes with your own prefix, suffix, expiration date and usage rules. Native form-building integrations with Gravity Forms, WPForms and others makes Uncanny Codes easy-to-use on the front and end back end.

How to Create & Sell LearnDash & WooCommerce Promo Codes 1 — Uncanny Codes Features

Click here to download the Uncanny Codes plugin.

Uncanny Automator

Uncanny Automator is the #1 WordPress automation plugin. Create combinations of triggers and actions across 100+ integrations to automate repetitive tasks, improve your workflows, and save time and money.

Automator Mascot Icon 512px

Ironically, Automator has a no-code promise (the computer programming kind) that will make creating your own codes (the promotional kind) easier and a lot more fun than trying to crack the Caesar shift. And, not to mention, a lot cheaper than hiring a developer.

Click here to download the Uncanny Automator plugin.

WooCommerce

As the most popular ecommerce plugin for WordPress, WooCommerce needs no introduction—but it’s a key tool in our codebreaking algorithm so we’ll introduce it anyway. In addition to stocking your digital shelves, WooCommerce can handle payment processing, shipping and tracking, marketing, memberships and more.

How to Create & Sell LearnDash & WooCommerce Promo Codes 2 — WooCommerce Homepage

With countless extensions and tons of powerful themes, you can build and customize your ecommerce store anyway you’d like. It’s not an enigma why more than 6.3 million websites power their online shopping experience with WooCommerce.

Click here to download the WooCommerce plugin.

Now that you have Uncanny Codes, Automator, and WooCommerce, there isn’t a spy on earth who can make codes faster than you. In the next section, we’ll show you how to generate codes, create WooCommerce products to sell them and how to configure automations that fit into your workflows.

How to Sell Anything with Codes

In this example, we’ll show you how to generate batches of codes that future students can redeem to gain access to online courses—almost like a cryptographic key!

Leverage partnerships with academic institutions, publishers and marketers and include these codes in printed textbooks and other hard copy content. Then, students and customers can register on your website to redeem the codes and gain access to supplementary material or special promotions.

Alternatively, with just a few tweaks to this example, you can sell codes for event registration or as event tickets, to run limited promotions, or to unlock restricted (read: top secret) content.

Here’s how it’s done.

Step 1: Generate Your Codes

From your WordPress Admin Sidebar, navigate to Uncanny Codes > Generate codes. You’ll be prompted to name the batch of codes that you want to create. We’ve named this batch of codes Introduction to Cryptanalysis.

How to Create & Sell LearnDash & WooCommerce Promo Codes 3 — Uncanny Codes Name this batch of codes

Next, you’ll have to select a method for how you intend to use the codes. We want these codes to enroll users into LearnDash courses/groups when they are redeemed. However, we’ll be selling the codes to academic institutions, corporate entities and/or publishers to distribute to end-users on their own. In order to be able to sell the codes, we’ll have to select the Uncanny Automator option.

How to Create & Sell LearnDash & WooCommerce Promo Codes 4 — How are the codes going to be used

Under Code settings, in the field labeled Number of uses per code, set the value to “1”. Setting the number of uses, or redemptions, per code to anything other than “1” will prevent you from being able to sell them.

Set an expiration date and time. If you’re selling these codes to an academic institution or textbook publisher, you can set the expiration date and time to coincide with the academic year and/or the publication date of new textbook editions.

Next, select Auto-generate codes.

How to Create & Sell LearnDash & WooCommerce Promo Codes 5 — Uncanny Codes Code settings

No two codes are alike—that’s what makes them so tough to crack. To auto-generate your codes, fill in the remaining fields as desired. For example, we’re creating 1,000 unique codes with the suffix “01” for our own internal record keeping purposes. Alternatively, someone selling event tickets in the form of codes might choose location prefixes or suffixes to denote cities, states, and/or countries. In later steps, you’ll see how you can use filters to sort users into different workflows based on data such as code prefixes and suffixes.

How to Create & Sell LearnDash & WooCommerce Promo Codes 6 — Uncanny Codes Code settings auto-generate codes fields

After you’ve configured your code settings, click Generate codes and create a recipe.

Step 2: Create a New Recipe

Once your codes have been created, Uncanny Codes will take you to an Uncanny Automator recipe editor screen that will look something like this:

How to Create & Sell LearnDash & WooCommerce Promo Codes 7 — Uncanny Automator Uncanny Codes New Recipe Screen

Much like with your batch of codes, the first thing you’ll want to do is give your recipe a name that makes it easy to recognize at a glance. For example, we’ve named this recipe Uncanny Codes—LearnDash: Introduction to Cryptanalysis.

Next, in the Actions panel, click Add action. From the menu of available integrations, click LearnDash.

From the drop-down list that appears, select Enroll the user in a course and select the course that you want to associate with your new batch of codes. When you’re finished, click Save.

How to Create & Sell LearnDash & WooCommerce Promo Codes 8 — Automator LearnDash Action Enroll the user in a course

In the Recipe box in the upper right-hand corner, toggle the recipe from Draft to Live.

How to Create & Sell LearnDash & WooCommerce Promo Codes 9 — Uncanny Codes—LearnDash Introduction to Cryptanalysis Recipe Live

This automation will ensure that end-users crack the code (i.e., get enrolled in your supplementary course when they enter a code).

Step 3: Create a New Product

In the Automator recipe editor screen, you would have seen a friendly reminder to create a product associated with your new batch of codes so that you can sell them in your WooCommerce store.

How to Create & Sell LearnDash & WooCommerce Promo Codes 10 — Uncanny Codes Reminder to Create Product

After you’ve created your recipe, from your WordPress Admin Sidebar, navigate to Products > Add new. In the Product data panel, set the product type to Codes for Uncanny Automator.

How to Create & Sell LearnDash & WooCommerce Promo Codes 11 — Product type Codes for Uncanny Automator

Once you’ve set the product type to Codes for Uncanny Automator, the product will automatically be set to Virtual.

Each unique code that is part of a batch is sold individually. As such, the Regular price reflects the price per code. We’ve selected our code batch, Course Access, and set the price per code at $5.00.

How to Create & Sell LearnDash & WooCommerce Promo Codes 12— WooCommerce Product settings

Finish configuring your product as desired, including setting the title, product description, low stock threshold, etc. When you’re finished, click Publish.

Congratulations! You’re now ready to sell codes—just don’t get caught.

Step 4: Start Selling Codes

The next step in selling your codes is setting up a smooth workflow that minimizes friction for your customers and end-users and maximizes your sales.

Based on our product configurations, this is how our customers (academic administrators, publishers, etc.) will view the product page for our access codes:

How to Create & Sell LearnDash & WooCommerce Promo Codes 13 — Introduction to Cryptanalysis Product Page

Once this customer completes their shopping experience, they will pay $5.00 each for five (5) unique codes.

How to Create & Sell LearnDash & WooCommerce Promo Codes 14 — Introduction to Cryptanalysis Shopping Cart

After their order has been completed, the customer will land on a confirmation page with their purchased codes and a clickable Download CSV button. They’ll also receive an email with their codes along with a .csv file with the same information.

How to Create & Sell LearnDash & WooCommerce Promo Codes 15 — Purchased Codes

If we return to the product editor screen after the customer’s purchase as a site administrator, we can see that our inventory of codes has been reduced by five (5) with 995 still available for sale.

How to Create & Sell LearnDash & WooCommerce Promo Codes 16 — Introduction to Cryptanalysis Available Codes

Step 5: Create a Code Redemption Workflow

Once your customers have purchased their codes, they can decide their own method of distribution to the end-user. For example, textbook publishers can print one code in each textbook with instructions for code redemption. Marketers can do the same with their hard copy content or with user-restricted content on their own digital platforms. Academic institutions and office administrators can send the codes via email within their organizations.

To finally crack the code, however, the end-users will need some help from you.

If you are using the Gutenberg block editor, you can simply drag and drop the User Redeem Code block into the page you are editing. Alternatively, you can copy and paste the shortcode [uo_user_redeem_code] into a shortcode block.

How to Create & Sell LearnDash & WooCommerce Promo Codes 17 — Gutenberg Block Editor Uncanny Codes User Redeem Code

More advanced WordPress users can find alternate ways to incorporate code redemption into their workflows. For example, you can combine Uncanny Codes’ native WPForms integration along with Elementor Pro to create a sleek popup like the one below for users to redeem their codes.

How to Create & Sell LearnDash & WooCommerce Promo Codes 18 — Uncanny Codes WPForms Elementor Pop

Next, create an Uncanny Automator recipe that displays the Elementor popup after a user logs in to your website for the first time.

How to Create & Sell LearnDash & WooCommerce Promo Codes 19 — WordPress-Elementor First Time Login Popup Recipe

Users might accidentally click out of your popup without having redeemed their code. Give users the option to recall the popup with an Automator magic button.

In a new recipe editor, in the Triggers panel, select Automator from the menu of available integrations.

How to Create & Sell LearnDash & WooCommerce Promo Codes 20 — Automator Trigger Integrations Automator

From the drop-down list that appears, select A user clicks a magic button.

How to Create & Sell LearnDash & WooCommerce Promo Codes 21 — Automator Trigger A user clicks a magic button

The trigger contains a shortcode that you can copy and paste to embed the magic button anywhere on your website—for example, a user account page.

How to Create & Sell LearnDash & WooCommerce Promo Codes 22 — Automator Trigger A user clicks a magic button Live

Recreate the Elementor Pro popup action from the previous recipe in the Actions panel and toggle your recipe from Draft to Live.

How to Create & Sell LearnDash & WooCommerce Promo Codes 23 — Automator Elementor Code Redemption Popup Recipe

Your new users will be cracking codes like chestnuts!

Bonus: Create a Code Tracking Network

Every master codebreaker knows; you’re only as good as your spy network. If you or your customers need to keep track of code usage—for example, a compliance officer tracking employee enrollment in your course(s)—you can set up this recipe or one similar to it.

(Note: if you set up this recipe to track code usage, you can delete the recipe we made in “Step 2” once this one is Live as adding a user to a LearnDash group also gives them access to the courses associated with that group.)

We’ll start by setting up a trigger and action that creates a LearnDash group when a user purchases codes.

From your WordPress Admin Sidebar, navigate to Automator > Add New. In the pop-up window that appears, select Logged-in users and click Confirm.

How to Create & Sell LearnDash & WooCommerce Promo Codes 24 — Automator Recipe Type Selector Logged-in users

Name your recipe. We’ve named this recipe WooCommerce-LearnDash: Introduction to Cryptanalysis.

In the Triggers panel, from the menu of available integrations, click WooCommerce. From the drop-down list that appears, select A user pays for, lands on a thank you page for an order with a product.

How to Create & Sell LearnDash & WooCommerce Promo Codes 25 — Automator WooCommerce Trigger A user completes, pays for, lands on a thank you page for an order with a product

Next, in the Actions panel, click Add action. From the menu of available integrations, click LearnDash.

How to Create & Sell LearnDash & WooCommerce Promo Codes 26 — Automator Actions Integrations LearnDash

From the drop-down list that appears, select Create a group.

How to Create & Sell LearnDash & WooCommerce Promo Codes 27 — Automator Action LearnDash Create a group

Automator will present you with an editor where you can configure the group settings. We’ve used a token (a dynamic piece of data pulled from our website) to complete the Group name.

How to Create & Sell LearnDash & WooCommerce Promo Codes 28 — Automator LearnDash Action Create a group editor

When you’re finished with your configurations, click Save. Your action should look like this:

How to Create & Sell LearnDash & WooCommerce Promo Codes 29 — Automator LearnDash Action Create a group Live

Now, to complete our “spy network” we’re going to add a second trigger and a second action along with a filter.

In the Triggers panel, click Add trigger then click WPForms or whichever form-building plugin you used for your code redemption form. From the drop-down list that appears, select A user submits a form and select the form that contains the code redemption field. Click Save.

At the top of the Triggers panel, ensure that the Run recipe when setting is set to Any.

How to Create & Sell LearnDash & WooCommerce Promo Codes 30 — Automator WPForms Trigger A user submits a form

In the Actions panel, click Add action then click LearnDash. From the drop-down list that appears, select Add the user to a group.

How to Create & Sell LearnDash & WooCommerce Promo Codes 31 — Automator LearnDash Action Add the user to a group

Automator will prompt you to select a group. Because the group to which we will be adding these users has not yet been created (i.e., another user has not yet purchased the codes) we’re going to use a powerful feature called action tokens (dynamic pieces of data pulled from within the same recipe).

In the Group field, select Use a token/custom value.

How to Create & Sell LearnDash & WooCommerce Promo Codes 32 — Automator LearnDash Action Add the user to a group Group field

In the empty field that appears, click the Asterisk, the token symbol. Under Actions, select Create a group > Group ID. When you’re finished, click Save.

How to Create & Sell LearnDash & WooCommerce Promo Codes 33 — Automator LearnDash Action Add the user to a group Action tokens

With both actions, your Actions panel should look like this:

How to Create & Sell LearnDash & WooCommerce Promo Codes 34 — Automator LearnDash Actions Create a group and Add the user to a group

In our example, the user who purchases our codes (administrators, publishers, etc.) is not the same user who will be enrolling in our course (students, employees, etc.). As such, we need a way to “filter” users into the correct set of actions.

In the Actions panel, hover over the Create a group action and click Filter.

How to Create & Sell LearnDash & WooCommerce Promo Codes 35 — Automator LearnDash Actions Create a group Filter and Delay

In the Conditions window that appears, select WooCommerce > The user has purchased a specific product.

How to Create & Sell LearnDash & WooCommerce Promo Codes 36 — Automator LearnDash Actions Create a group WooCommerce Condition The user has purchased a specific product

In the window labeled Configure the rule, select the product associated with your codes. In our example, that’s Introduction to Cryptanalysis.

How to Create & Sell LearnDash & WooCommerce Promo Codes 37 — Automator LearnDash Actions Create a group Configure the rule

After you’ve selected your product, click Save filter. The action should now look like this:

How to Create & Sell LearnDash & WooCommerce Promo Codes 38 — Automator LearnDash Actions Create a group Filter Live

To ensure that group leaders are not included as group members, you can add another filter to the Add the user to a group action as follows:

How to Create & Sell LearnDash & WooCommerce Promo Codes 39 — Automator LearnDash Actions Add the user to a group Filter Live

With these filters in place, Automator will sort users into groups to suit our workflow.

To complete our “network” and notify the group leader whenever a code is redeemed, we can add another action.

In the Actions panel, click Add action then click LearnDash. From the drop-down list that appears, select Send an email to Group Leaders of a group.

How to Create & Sell LearnDash & WooCommerce Promo Codes 40 — Automator LearnDash Actions Send an email to Group Leaders of a group

Automator will present you with an editor where you can configure the email message to send to group leaders whenever a user fills out the redemption form. Use tokens to include the user’s name and the code they redeemed.

How to Create & Sell LearnDash & WooCommerce Promo Codes 41 — Automator LearnDash Actions Send an email to Group Leaders of a group Email editor

When you’re finished, click Save. Your Actions panel should look like this:

How to Create & Sell LearnDash & WooCommerce Promo Codes 42 — Automator WooCommerce LearnDash Recipe Actions Panel

Finally, in the Recipe box, click Edit next to Times per user and set the value to “1”. This will ensure that, if a user goes on to purchase more codes from this batch in a separate transaction, they won’t create duplicate groups.

Toggle the recipe from Draft to Live.

How to Create & Sell LearnDash & WooCommerce Promo Codes 43 — Automator WooCommerce LearnDash Introduction to Cryptanalysis Recipe Live

Keep Cool, Keep Coding

Now that you’re a master codebreaker, we bet there isn’t anything you can’t sell on your website with the right code, product and recipe settings. What are some of the codes that you need us to crack? Let us know in the comment section below. Until then, keep cool and keep coding!

Q1 2022 Plugin Updates

Our blog has been quiet this quarter, but that’s mostly because we’ve been so busy with updates. And just how busy have we been in Q1? Here’s a summary of our plugin releases:

In total, that’s a whopping 25 releases this quarter. Many have been pretty big releases too, so in case you missed the updates, we’ll cover some of the most exciting highlights below.

Uncanny Toolkit Pro

Our most popular add-on for LearnDash, Toolkit Pro gained a number of new additions.

There’s a new module for Autocomplete Lessons and Topics on WPForms submission. We had it for Gravity Forms, now we’re extending support to WPForms as well. This is one of our more popular modules and a great way to require users to submit evaluation and feedback forms before course completion.

The Simple Course Timer added 4 new shortcodes. Instead of only outputting time at the course level, now there’s a way to show time spent on topics, lessons and quizzes. And there’s an additional shortcode to show total time a user has spent across all courses on a LearnDash site.

The Group Expiration module adds support for a new pre-text=”” attribute for the [uo_group_expiration_date] shortcode. What this allows is for sites to show a text string before the expiration date, so instead of just showing the date, now it’s easy to add context to what it is.

Finally, the Enhanced LearnDash CSV Reports gain support for new CEU and Course Meta columns. Yes, this one is really exciting. Beyond supporting additional records from our Uncanny Continuing Education Units plugin, this means you can pull in course attributes as new columns. So if you ‘re storing data against courses like instructor name, course identifier, semester, credit value, number of LearnDash steps, or really anything else, now you can include that information in the CSV export with all other records.

Course Meta CSV Report

Tin Canny

This announcement is going to surprise a lot of people: There is now a tool for administrators and group leaders to analyze quiz questions to assess performance and quality. We call it the LearnDash Quiz Question Analysis Report. Yes, it’s for multiple choice (“single choice”) question types only, and yes, it’s intended for text-based questions and answers. Still, for the majority of sites, that’s more than sufficient and it finally provides a way to see, at a glance, how users are answering quiz questions.

This is what it looks like:

LearnDash Quiz Question Analysis Report

In case it’s not clear, the report outputs every supported question in a quiz, the correct answer, the distractors, and the percentage of students that chose each possible answer. It supports search, sorting, and CSV export. For Group Leaders, as you might expect, the quiz list only incudes quizzes associated with courses in the user’s groups and it outputs data for students in those groups.

There’s no extra cost for this report, it’s available now for Tin Canny users.

Other Tin Canny updates this quarter were more subdued. There’s a new shortcode parameter to launch uploaded modules to a specific slide, uploaded modules now support defined vw and vh values for better layout control, the group quiz report supports negative scores, and more.

Uncanny Groups

Updates this quarter for Uncanny Groups mostly focused on new developer tools and refinements to existing capabilities. There are 10 new filters, there was an overhaul to how user search works for the Manage Progress report and multiple improvements behind the scenes.

And did we mention that support for adding more seats to subscription-based groups is finally coming in early April? It’s almost ready…

Uncanny Automator

Our Uncanny Automator plugins are, of course, where the big magic happened this quarter. And while it’s not directly LearnDash related, everything we keep adding to those plugins extends what you can do with LearnDash and opens up countless new use cases for LearnDash sites.

Let’s start with the highlights in the free version, and remember, all of these additions happened in Q1:

And our Pro version gained lots of new features too:

  • A new integration for OptinMonster.
  • 16 new triggers and actions, including several for LearnDash, like triggering recipes when a user’s access to a course expires and being able to remove students and a Group Leader from a group and all of its children.

And that’s what we’ve been up to this quarter. And through all of that heavy development work, our support team still managed to achieve a “happiness” score of 93 in Q1!

How to Do More With LearnDash Achievements

LearnDash is one of the most popular LMS (Learning Management System) plugins in the WordPress industry. You can create and sell courses, award certificates, create quizzes, and much more using this powerful plugin.

LearnDash offers a number of free and premium addons to enhance the functionality of your eLearning site. One such addon is LearnDash Achievements. It is a free plugin for LearnDash customers used for creating and displaying achievement banners on your eLearning site.

In this article, we’ll introduce you to the LearnDash Achievements addon, discuss things you can do using this addon, and show how you can do more with the addon by connecting it to popular WordPress plugins. Let’s dive in.

Introducing LearnDash Achievements Addon

LearnDash introduced the Achievements addon to add gamification features to your eLearning site. You can increase the engagement level of your students by awarding badges or points using this addon. It will also help you to improve the learning experience of your students.

The Achievements addon offers a number of LearnDash course-specific triggers to choose from. Whenever a particular condition is triggered, the addon will automatically award points and/or a badge to the user.

For example, you can award and show a specific achievement for completing a lesson or course. You can also display achievements for passing a quiz. You can even show an achievement banner when a student’s assignment is approved.

The addon also supports triggers for non-course activities like reading an article, commenting on an article, user registration, and more.

The LearnDash Achievements addon is available for free. You can install and activate the addon by visiting the LearnDash Addons page on your WordPress admin panel (of course, you need a valid license of LearnDash to use the addon).

How to Create Achievements Using the Achievements Addon

It’s time to show you how you can easily create an achievement using this addon. We’ll be creating an achievement for enrolling in a course.

First, you need to head over to LearnDash -> Achievements from the left sidebar of your WordPress admin panel. This will take you to the Achievements page where you’ll see 3 tabs: Achievements, Settings, and Shortcodes.

Achievements

The Achievements tab is the place where the admin can see and manage all the achievements. Let’s create a new achievement by clicking on the Add New Achievement button.

add new achievements

A new page will open up now with a number of fields.

In the Add title field, you should add the achievement name that’ll be displayed to the user. You can also add some text to the Message field.

The Details section is the most important part of any achievement.

The Trigger field controls when you want to award or display the achievement to the user. Go ahead to select User enrolls into a course (LearnDash) from the dropdown.

This will open up some new fields.

First, you need to select a course from the Course dropdown. Whenever someone completes that course, the achievement will be displayed to the user. You can also select All Courses to trigger the condition on completion of all the available courses.

configure details box

Want to award points to the user? You can do that by configuring the Points field. And you can add any numeric value of your choice to that field.

Note that the achievement points are useful for displaying leaderboards. Also, you can allow users to buy a particular course using these achievement points (you need to enable the option in the course settings).

Next, you can add an achievement image from the Image box. You can select a pre-built image by clicking on the Select Image link.

select achievements image

Finally, you should click on Publish to make your achievement live.

Settings

Want to change the look of the achievement banner? Maybe, you want to match it with your brand colors. Just visit the Settings tab to change the background color, text color, and even the time after which the banner fades away.

achievements banner settings

Shortcodes

The LearnDash Achievements addon offers some shortcodes to display the user achievements:

  • [ld_achievements_leaderboard] – It’ll display the list of users along with their points. For example, [ld_achievements_leaderboard=”10”] will display the top 10 users based on their points earned.
  • [ld_my_achievements] – This shortcode can display all the achievements earned by a user.

The Achievements addon also offers 2 Gutenberg blocks for displaying the individual achievements and the achievement leaderboard.

Do More With LearnDash Achievements Addon

The Achievements addon is a great addition to the LearnDash plugin. The addon makes it easy to create multiple achievements for different activities on your eLearning site.

Presently, the Achievements addon offers limited course and non-course triggers only. Want to do more with the addon? You can use the Uncanny Automator plugin and the Achievements addon together to take your gamification strategy to the next level.

In case you aren’t familiar with it, Uncanny Automator is a powerful automation plugin for WordPress. You can use it to connect WordPress plugins, WordPress sites, and third-party web apps together.

You can use the Automator plugin to collect achievements across all the plugins and tools you use, not just LearnDash. Not only that, but you can also connect our LearnDash plugins to the Achievements addon using the Automator plugin.

By connecting Uncanny Automator and LearnDash Achievements together, you can award badges and points to otherwise unsupported achievements, including the following:

The above examples are just some ideas – you can connect the Achievements addon to 75+ WordPress plugins and web apps and create unlimited achievements for your users. That means the simple Achievements addon could replace the need for additional gamification tools, all at no extra cost beyond the LearnDash license.

How to Integrate the Achievements Addon With Uncanny Automator

Let’s briefly show you how to use the Uncanny Automator plugin and the Achievements addon together with the help of an example – award an achievement to a user automatically for submitting a course evaluation form.

We’ll be using WPForms as the form plugin in our example. However, Uncanny Automator supports a wide range of form plugins like Contact Form 7, Gravity Forms, Fluent Forms, Ninja Forms, Formidable Forms, and more. So you can use any form plugin of your choice – the process will remain the same.

Whenever you need to automate a task using the Uncanny Automator plugin, you’ll have to create a recipe. And every recipe needs at least one trigger and one action. In our case, the trigger will be a user submitting a form and the action will be awarding an achievement to the user.

To create a new recipe, you need to head over to Automator -> Add new from the left sidebar of your WordPress dashboard (we’re assuming that you’ve already installed the Automator plugin). Next, you should select Logged-in users as the recipe type and then click on Confirm.

select recipe type logged-in users

After that, you need to add a recipe title to the Add title box for future reference.

Setting Up the Trigger

The next step is to configure the trigger for our recipe. To get started, you should select WPForms from the list of available integrations.

choose wpforms as trigger integration

Next, you need to select A user submits a form as the trigger option.

select trigger option

Selecting that option will open up the Form field. Just select the course evaluation form from the dropdown and then click on Save.

select course evaluation form

You’ve successfully configured the trigger. Let’s set up the action in the next step.

Setting Up the Action

To configure the action, you need to first click on the Add action button. Next, you’ll have to choose LearnDash under Select an integration (the Achievements addon is part of the LearnDash integration in Uncanny Automator).

select learndash as the action integration

You’ll see a list of options now. Just find and click on the option Award an achievement to a user.

select action option

This will open the Achievements dropdown field. Here you need to select the achievement you want to award to the user for submitting the course evaluation form.

select achievement from dropdown

Finally, you need to click on the Save button to make your action live.

Publish the Recipe

It’s time to publish our recipe. To do that, you need to change the toggle option in the Recipe box from Draft to Live.

wpforms to learndash achievements recipe

Your recipe is live now. That means, whenever someone submits the course evaluation form, you can automatically award an achievement to that user.

Endnote

The LearnDash Achievements addon is a powerful tool for adding game-like elements to your eLearning site. You can even use it with the Uncanny Automator plugin to connect it to 75+ WordPress plugins and web apps. And you can use the recipe example in this article as a reference to create multiple achievements for your eLearning site.

The best part is you can add multiple triggers and actions to any recipe to create complex workflows using the Uncanny Automator plugin. For example, you can add actions like getting a notification on Slack or adding the user to a mailing list to the above recipe.

Have any questions on how to use Uncanny Automator and LearnDash Achievements addon together? Please feel free to comment below.

Uncanny Automator is now FREE

The heading is not clickbait and there are no strings attached. Not only that, we made significant improvements before we released the new free version!

You can now get Uncanny Automator from the WordPress repository here: https://wordpress.org/plugins/uncanny-automator/. This free version replaces what we previously called “Lite”, except it’s even better than Lite: we removed the limit of 1 trigger per recipe and we even added more triggers and actions (including several previously only available in Pro).

Releasing Automator for free to the world was a hard decision for our team, but we believe it’s the right one for these 2 reasons:

  1. We want more people to try it. While Automator already has a big install base, we really want to see it grow and for more sites to try it. We’re very proud of the plugin and want to see it add value to more sites.
  2. Another company largely copied Uncanny Automator and released their own version in the WordPress repository. While reusing code isn’t uncommon in the open source world (and Automator does have a GPL license), copying our UI, website, and even name put us in a difficult situation and we wanted to make a big move to reinforce our dominance.

What is Uncanny Automator?

If you’re new to Uncanny Automator (and we know this post will attract a lot of attention from new users), it connects plugins, sites and apps together. It lets you create automations where something happening can make something else happen. These automations are what we call “recipes”. A simple example would be a WooCommerce purchase adding a user to a BuddyPress group. Of course, Uncanny Automator can do a lot more than that. 🙂 Maybe you want a form submission and an associated purchase to enroll the user in a course, register them for an event, and send their manager an email. That’s easy for Automator.

Uncanny Automator can do far more than that though. With Automator on 2 sites, you can have things that happen on one site (like a purchase) trigger things on another site (like user creation). You can also connect your WordPress site to other platforms using our webhooks and Zapier support, so other apps can make things happen on your WordPress site and the WordPress site can pass data to other systems.

Here’s a quick video explaining how it works:

Automator comes in 2 versions: the new free version on WordPress.org, and a paid Pro version (with different licensing options) available for purchase on this site. Pro does come with more powerful tools (check this list for a full breakdown; it also includes anonymous recipe support) but we promise the free version is extremely useful and capable too. We even added some features to the free version for this first public release (like a LearnDash course completion action and webhook actions) to ensure Uncanny Automator could add some value to almost all WordPress sites.

If you’re just getting started with Automator on your WP site, make sure you check out our Knowledge Base. It’s where we break down everything about using Automator. There are some video tutorials in there to help point you in the right direction too.

Changes for existing users

If you’re already an Uncanny Automator user (thank you!), things will be a little bit different for you. Lite users are being upgraded to Pro and Pro users are getting more sites (regular Pro users can now use license keys on 2 live sites, Agency will increase from 5 to 10 and 25-site users are upgraded to Unlimited). We recognize the huge role you’ve played in helping Automator grow and become a mature feedback; your feedback has been invaluable.

No manual changes to your plugins will be needed. When you upgrade the current Lite plugin it will automatically point to the WordPress repository version for your subsequent updates.

This is also a huge release

For current Automator Lite (and Pro) users, here’s what’s in the new version of the free plugin:

  • Email field types in form plugins now generate tokens for email type fields in actions
  • A Tin Canny verb can now generate course, lesson and topic tokens
  • Global tokens (for our new users, these are basically variables that you can use in actions) are available for the current date and time
  • Category and tag support is now available for recipes to more easily organize them

And for our Pro users, here’s what’s new in that add-on:

  • A WooCommerce trigger for order status changing to a status you define
  • New WordPress actions for creating new posts, adding new usermeta, and adding new postmeta (for user registrations and developers using Automator these could be gamechangers)
  • A new GamiPress action to revoke all points in a category
  • New trigger support for WooCommerce Subscriptions (the WooCommerce Subscriptions plugin is required for these triggers)

Set usermeta and postmeta with Uncanny Automator

We have done a lot of testing on these updates, but it’s a big release. Please let us know if you notice any issues.

A full changelog is available here for the new free version and here for Pro.

For any developers out there, not only are we releasing a free version in the WordPress plugin directory, you can now access our repository for the first time and make pull requests. Make sure you check out https://bitbucket.org/uncannyowl/uncanny-automator if you have suggestions or want to contribute.

We could really use your support

While Uncanny Automator is 1.5  years old now, we are are now playing catch-up to the copy released by another vendor. We really hope you will give our Automator plugin a try, and if you do and it adds any type of value to your site, or you like the work we’re doing, please consider leaving us a review, mentioning us on your site or social channels, and following us on Facebook and Twitter, etc. It would mean a lot to us. And in the meantime, we’ll continue producing great products for WordPress and turning Uncanny Automator into the most powerful automation plugin for WP.

If you have any questions about Automator or what we’re doing, please don’t hesitate to reach out.

We really hope you like Uncanny Automator and the changes we’re announcing today. 


15 Ways to Automate Your LearnDash Site

Do you spend too much time overseeing your e<earning programs and supporting students? Are completion rates lower than you hoped? Do you worry that your one-size-fits-all courses only meet the needs of some of your students?

They’re questions that every eLearning site owner and facilitator wrestles with. You want students to have a positive learning experience and benefit from the training, but your resources are limited and you need to focus on where you can add the most value. What you create doesn’t always work for everyone, so you end up spending countless hours poring over LearnDash reports and sending follow-up emails. And even those tend to go out later than needed and not deliver the impact you hoped.

There is a better way, and it’s by using automation on your LearnDash site. Solving the resource problem—maximizing learning outcomes and engagement with minimum time and cost—was one of the main reasons we built Uncanny Automator. It’s one of several tools we’ll explore here that make it make it easy to add automated workflows to your eLearning programs.

In this article, we’ll look at 15 easy automation ideas you can add to your LearnDash sites in minutes that help to deliver a personalized learning experience, better learner engagement, more sales, improved knowledge transfer and better course analytics. After applying some of the automations in this article, you’ll end up with better courses and more revenue with minimal effort and cost.

Personal Learning Paths

Creating personalized learning experiences can help to deliver improved student satisfaction, higher completion rates and better knowledge transfer. Not everyone learns the same way, and it’s important to give learners both control over the learning and the right learning interventions at the right time. With automation, a few simple recipes make it easy to support weaker learners, keep advanced learners from getting bored and provide alternatives to students that need them.

1. Let advanced users skip ahead. If users demonstrate mastery of a subject in a pre-test, why not let them skip the rest of the course? You could just autocomplete LearnDash lessons in a course that were covered by the pretest materials, or you might autocomplete that course entirely.

2. Give struggling students extra help. Sometimes students get left behind and don’t get the attention they need, but it doesn’t have to be that way. There are easy ways to identify struggling students, like poor scores in LearnDash quizzes or a lack of progress. Without automation, these are hard to track; you have to run reports to see quiz scores and there’s no easy way to track reduced course activity over time. But with automation, it’s instant; quiz scores can instantly trigger interventions and you can create easy workflows in a CRM using a plugin like WP Fusion (e.g. a user has a completion tag for the first lesson of a course but no course completion within 7 days of the lesson completion tag). When triggers like those happen you can serve the interventions automatically, which could include the following:

  • Enrolling the user in a remedial course automatically.
  • Sending the student an email with suggested learning activities.
  • Adding users to a study group via BuddyPress.
  • Notifying the user’s manager or instructor so personal intervention, like coaching, can be offered.

3. Incorporate personalized content. Contrary to what you might think at a glance, every LearnDash lesson and topic doesn’t have to be the same for every user. It’s easy to add user or group-specific variations to your courses—as long as you have the right tools. Users of Uncanny Owl’s Pro Toolkit can use LearnDash Group shortcodes to show content just to users of particular groups, and with membership plugins or CRM integrations, you can show content to users with a particular level or tag. Remedial users might see an extra video or download, or maybe users you’ve tagged as benefiting from auditory resources are offered an audio recording of the lesson. Interventions like these help learners receive the most suitable experience for their learning needs, all without facilitators having to get involved during the course.

4. Give users more control over their learning experience. With automation tools and more learner-facing controls in the front end, it’s easy to give users more choice about how they learn. With Uncanny Automator, you might create recipes that add buttons throughout your courses that let users skip ahead by autocompleting lessons, reset course progress to get extra practice, trigger an email to a Group Leader for assistance, self-enroll into additional courses, etc.

Improve Learner Engagement

5. Celebrate Learner Accomplishments. Self-directed programs can sometimes make the learner feel like they’re on their own, making it easier for them to lose interest and even stop the course altogether. Gamification is an easy way to reward progress and achievement, and with Uncanny Automator, this can become even more powerful. Besides awarding a badge with a plugin like GamiPress, you might send a congratulatory email from the instructor automatically, notify the learner’s manager, even send a tweet from the organization’s Twitter account with a congratulations message. To make congratulations emails more natural, leverage a CRM to tag the user based on a specific condition (like scoring over 80% on a final exam) and then send the email the next business day during working hours so that to the user it feels less scripted.

6. Add users to a study group for peer collaboration. Use learning metrics to add users to an appropriate study group and encourage students to get involved with the community. Maybe if a user scores 50% or lower on a course-pretest they’re added to a remedial group, and 90% or higher they’re added to an advanced group. This action might be combined with a series of dripped emails outlining how to participate in the community and encouraging involvement.

7. Check in on incomplete courses. Not all automations have to be triggered by something; it’s also extremely useful to trigger automations when something doesn’t happen. These types of automations are easier to set up with the help of a CRM and plugin like WP Fusion. These types of automations might send the user an email after a tag has been set indicating the user has access to a course but X days later does not have a tag confirming the user completed the course. They might also trigger interventions if a user hasn’t visited the site for several days or the user has viewed a lesson but hasn’t completed it.

Improve Course Sales

Certainly not every eLearning site is revenue-driven, but for ones that are, it’s easy to build in simple automations that increase sales opportunities.

8. Recommend products on course completion. One of your users just completed a course; what should they do next? Instead of leaving them guessing, you can send them an email with a product recommendation. If you use a CRM you can even make this recommendation based on previous purchases and course completions (you don’t want to recommend a course someone has already purchased or completed).

9. Offer upsells that fit the learner’s needs. Is a student consistently showing poor quiz performance? Suggest some private coaching sessions. Does a course evaluation form suggest interest in a particular topic area? Suggest a deeper dive in a more advanced class. More advanced behavior tracking through automations and CRMs means you can make better product recommendations, and better time the recommendations for when the user most needs them (and is most likely to buy).

10. Create certification programs. LearnDash on its own doesn’t support certification programs, but they can be a great way to encourage users to complete or purchase extra courses in order to be “certified” in a particular subject. The Uncanny Owl Continuing Education Credits plugin offers a way to offer certificates for completing combinations of courses, and with tools like GamiPress, BadgeOS and Uncanny Automator, you can award badges or other certification rewards to users that complete a series of courses. You could even make users “buy” a certification by having users both complete a series of courses and purchase a certification product.

Improve Knowledge Transfer

11. Reinforce training outside of the WordPress site. With automation, it’s easy to integrate the LearnDash courses with other learning interventions. After a set of important lessons, create a recipe with Uncanny Automator to send the learner a summary of what they learned and next steps. With Automator and Zapier, you can even pass training data to HR systems or other apps to deliver related training materials through other platforms used by your learners.

12. Offer more blended learning opportunities. If you offer live events and eLearning courses, why not sync the two together? Perhaps signing up for a live workshop unlocks an eLearning course to help users better prepare for the in-person session. Or offer bundles that reinforce learning across multiple channels for better engagement.

13. Keep learning manageable. It’s easy for students to feel overwhelmed when they look at a course listing and see a huge list of 30 courses that they need to complete. Instead of throwing everything users have access to at once, as is typical on a LearnDash site, you can use automation to unlock courses and other content only when it’s appropriate to do so. Have the completion of one course unlock the next 2 courses in a learning path, or perhaps reaching key milestones in a course unlocks other resources.

14. Set users up for success. This is a step we see routinely overlooked on LearnDash sites. When users start a course, why not send an introductory email that welcomes users to the course, sets expectations and offers tips for success? Make users feel more comfortable and understand how to get the most from a course to promote better learning outcomes.

Create Better Courses

15. Make course evaluation automatic—and more meaningful. You probably already have simple post-course evaluations on your site to capture a learner’s immediate (emotional) feedback. But do you measure knowledge transfer and retention? With tools like Uncanny Automator and Zapier, you could use pre and post-tests in a course to automatically pass quiz scores to Google Sheets and automatically compare results and learning as a result of course completion. But you can go further, and with a CRM perhaps trigger timed tests to go out 30 days after course completion to better assess application of learning to the workplace or retention of what students learned in the course.

Get Started with Automation

Many of the automation solutions outlined in this article can be added to your LearnDash site in minutes using tools like Uncanny Automator (which was used for all screenshots in this article). The benefits are significant and well worth the modest investment. For users, you can deliver more personalized user experiences, better support, personal learning paths and improved knowledge transfer. For administrators and facilitators, the time and cost savings can’t be understated, so it’s a win-win situation for everyone on your LearnDash site.

And the best part is that it’s easy. With Uncanny Automator, create your first recipe in minutes and add dozens of site-enhancing automations in a few hours. Get started now or find our more about how Automator can improve your LearnDash site!

Uncanny Automator is Here

We did it! After 9 months of development, 2 months in beta and 2,000 hours of development time, the most powerful automation plugin for WordPress is now available. You can get it right now from only $49 annually at https://automatorplugin.com/.

So what is Uncanny Automator and why do you need it? Automator lets you create “recipes” that perform things automatically on your website. When something happens, something else happens. Maybe a user logs in for the first time and you send them a welcome email. Or maybe a user purchases a product and submits a form and you add them to a course and set a tag in Infusionsoft. Personal learning paths, marketing automation, even routine admin tasks – they can all be set up to run automatically on your website to save you time and give your users a better experience.

To create these time-saving workflows, Automator connects the plugins that are already on your site together. Whether you use WooCommerce, BuddyPress, Gravity Forms, LearnDash or many more, Uncanny Automator connects your plugins so that they can “talk” to each other. It works seamlessly and in the background as people use your site. No code is needed and it’s super intuitive to set up recipes on your site. You can have your first recipe running in 5 minutes!

We’re launching Uncanny Automator 1.0 with a full 65 triggers and actions. (Triggers are activities that Automator watches for, like making a purchase or submitting a form. Actions are things that happen as a result of triggers, like sending an email, adding a tag in Active Campaign or enrolling a user in a course.) Since each recipe can have unlimited triggers and actions, you can literally create millions of different recipe combinations to make your site the way you want it to work.

Compare that with other integration plugins, which often connect 1 plugin with 1 other plugin in a very specific way. And if that dedicated plugin doesn’t work the way you want, you could be looking at thousands of dollars in development costs for a custom solution that’s still very inflexible.

Just in case 65 triggers and actions and support for 15 different plugins at launch isn’t enough for you, version 1.0 has support for Zapier webhooks. This means you can connect your WordPress site and plugins with over 1,000 non-WordPress apps. You can have your WordPress site trigger zaps (and coming soon, have Zapier trigger things on your site). Still not enough? We’re on track to support over 100 triggers and actions along with powerful new features by Christmas.

Whatever type of WordPress site you have, Uncanny Automator can make it even better.

Ecommerce site? Have purchases trigger personalized emails or unlock content. Or maybe orders with certain criteria, like dollar value, should set or remove a tag in your CRM (this requires the WP Fusion plugin). You might even combine purchase behaviours with page visits to trigger sales emails and drive more purchases.

eLearning site? There is simply no more powerful way to build personal learning paths, anywhere. Maybe one course unlocks the next course. Or create powerful interventions, like having poor score trends enroll the user in a remedial program, suggest additional support interventions and notify their teacher or manager. You can even have H5P and xAPI activity trigger recipes (with our Tin Canny plugin).

Whether you run a simple blog, marketing site for your business, community website or something entirely unique, Uncanny Automator can streamline your site and eliminate manual work.

Still not sure if Automator is right for you? We’re so convinced that you’ll benefit from using it on your site that we’re offering a 30 day, no questions asked refund policy. If you don’t like it, we’ll give you your money back. It’s as simple as that. Click here to get Uncanny Automator for your website!