Uncanny Groups plugin fully supports translations for multi-language sites using the WPML plugin. Once you have purchased a WPML license, the first step is to install and set up the WPML plugin on your site by following these instructions from WPML: Installing & Configuring WPML.
After installing WPML Multilingual CMS and WPML String Translation plugins and adding your additional language(s), there are 2 options for adding your Uncanny Groups translations:
- Create and upload a PO file, or
- Add translations for each text string
Both options must be set up and managed by a WordPress administrator.
There is not a “preferred” method to choose, as both will require adding translations manually. However, the method of adding translations via a PO file does allow for strings to be edited in a PO document offline, making it possible for non-admin users to collaborate on translations before they are added to WordPress.
In the next 2 sections, we’ll cover how to translate Uncanny Groups with each option.
Option 1 – Adding translations via PO file
Step 1 – Exporting a PO File
- Log in as an Admin user and visit /wp-admin/.
- Navigate to WPML > String Translation.
- Scroll down to the “Import / export .po” section.
- In the Select domain drop-down, choose uncanny-learndash-groups.
- Check the box labelled Also include translations and then select the language for the PO file.
- Click Submit and the language specific PO file will download to your computer.
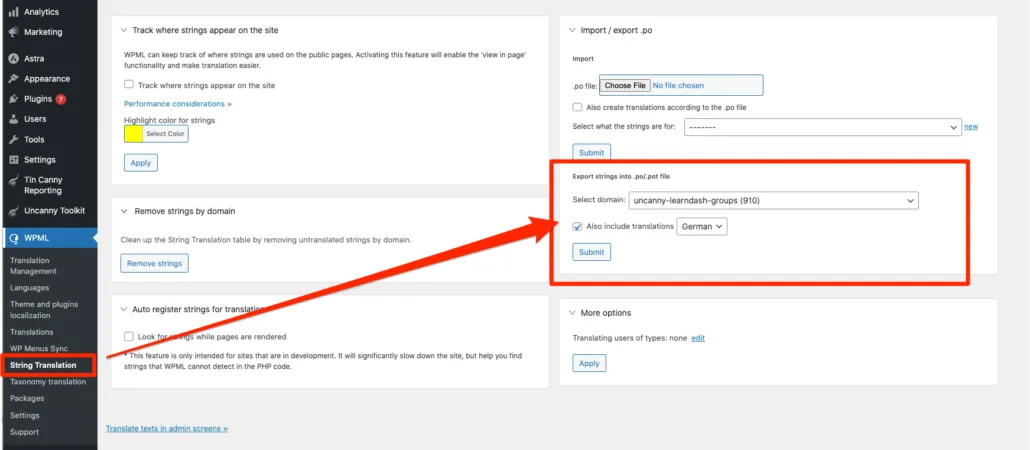
Export Uncanny Groups text strings as a PO file (this example shows including translations for German).

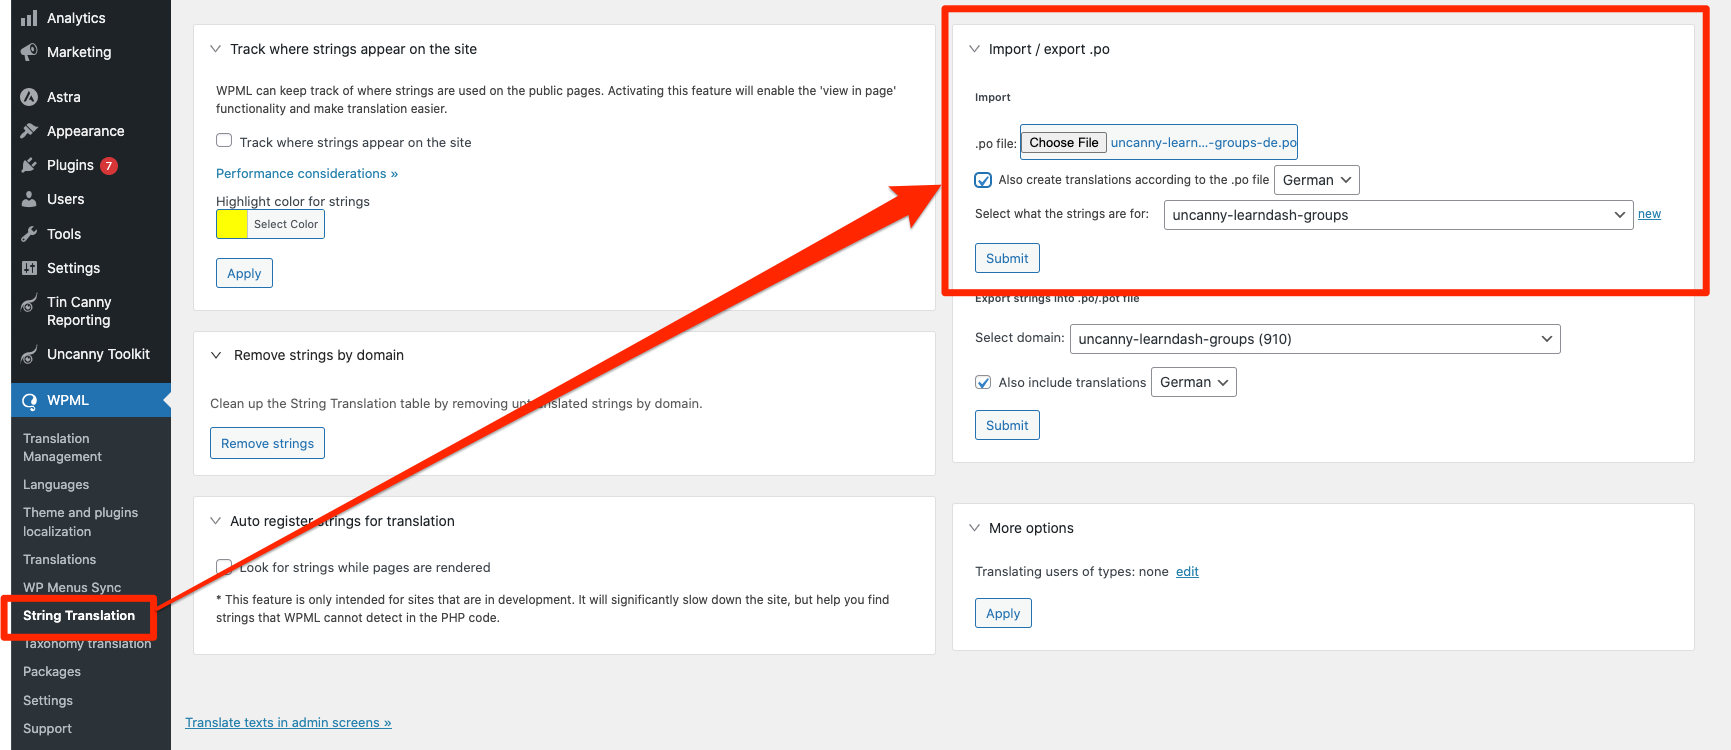
Step 2 – Importing a PO File
- Add you language specific translations to the PO file using any advanced text editor (e.g. POEDIT).
- When the PO file is ready for upload, return WPML > String Translation in /wp-admin/ and scroll to the Import / export .po section.
- Under Import, find the field labelled “.po file”.
- Click the Choose File button and select the PO file from your computer.
- Check Also create translations according to the .po file and then select the language related to the string translations in the PO file.
- Under the header Select what the strings are for, select uncanny-learndash-groups from the drop-down menu.
- Click Submit.
Step 3 – Confirm the PO File and String Translations were added
- After clicking Submit in the previous section, a page will load that allows you to review/select/deselect strings from the PO file. After you have reviewed the strings (or just wish to proceed), click the Add selected strings button.
- You will return to the WPML > String Translation page. All translations can be edited by first selecting uncanny-learndash-groups from the In domain drop-down, then clicking “Search”. When the Uncanny Groups strings load, you can edit language specific string translations by clicking the pencil icon (under the column associated with the language’s country flag). If the a text string does not contain a translation, then a plus “+” icon will show rather than a pencil.


Option 2 – Manual String Translations
- As an Admin user, visit /wp-admin/.
- Navigate WPML > String Translation.
- Select uncanny-learndash-groups from the In domain drop-down and a list of all text strings related to Uncanny Groups will appear.
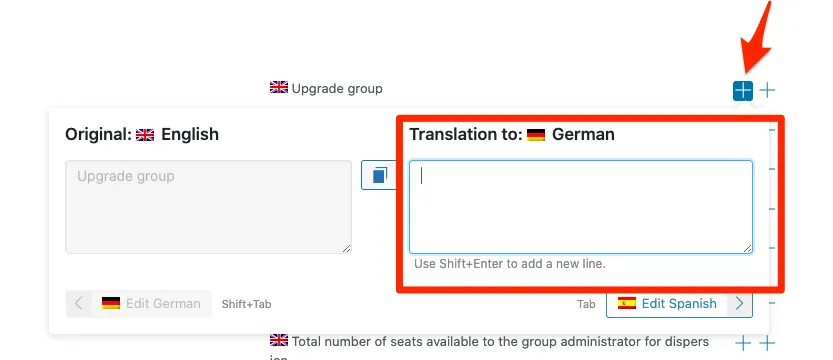
- When Uncanny Group strings load, add your language specific translation by clicking the plus “+” icon (under the column associated with the country flag).
- Add the string translation to the box on the right side of the modal box (under the text Translation to:).
- Click anywhere outside the modal to close the edit feature and the string will save (you will see confirmation of the successful save via an alert).

Using Both Options Together
If you upload a PO file, all translations will appear in WPML > String Translation for the Uncanny Groups plugin. You can then make edits to individual text strings by clicking the plus “+” icon beside the string in the associated language column. This method is recommended when editing a few text strings as opposed to having to update the PO file and re-upload your edits.
Furthermore, you can download a language specific PO file after manually adding (or editing) string translations. This PO file will contain all the translations that appear in the String Translation editor for Uncanny Groups.