
Overview
Uncanny Groups gives WordPress Administrators a central place to create groups, control seat counts, manage enrollment keys, and handle edge cases like WooCommerce-purchased groups. This article covers the full administrator workflow so you can get groups up and running — and keep them running — with confidence.
Before you start
- You need Administrator access to your WordPress site.
- Uncanny Groups for LearnDash must be activated and configured. If you haven’t done that yet, see Install and Set Up Uncanny Groups.
- Courses must exist in LearnDash before you can assign them to a group.
- If you plan to assign a Group Leader at creation time, have their username or email address handy (for Group Wizard)
Creating a group with the Create Group Wizard
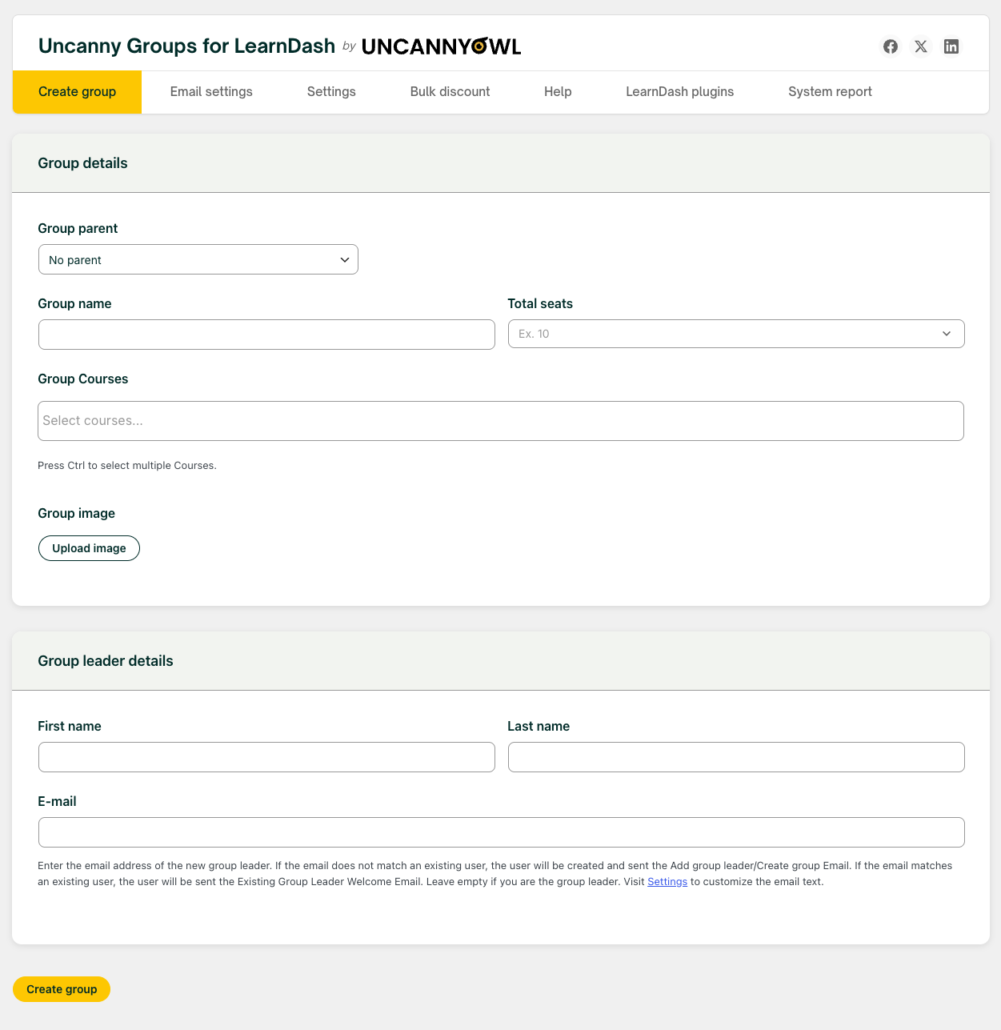
The Create Group Wizard consolidates everything you need for a new group into a single screen — no jumping between LearnDash settings and the plugin.
- In your WordPress admin, go to Uncanny Groups > Create Group.
- Fill in the required fields:
| Field | Notes |
|---|---|
| Group Name | The name that appears in the Group Management interface and in email templates via #GroupName |
| Total Seats | The maximum number of members the group can hold |
| Courses | One or more LearnDash courses to assign to the group |
- Optionally, add a Group Leader:
| Field | Notes |
|---|---|
| First Name | Required in versions earlier than 4.0; optional in 4.0+ |
| Last Name | Required in versions earlier than 4.0; optional in 4.0+ |
| Email Address | If the address is not yet registered, the plugin creates a WordPress account automatically |
- Click Process Group.
The plugin creates the LearnDash group, assigns the leader (if provided), and redirects you to the LearnDash Group Edit page. If a new user was created for the Group Leader, they receive an email with their login credentials.
Tip: You can always add a Group Leader later from the group’s edit screen or from the front-end Group Management page.
Where to find a group’s settings
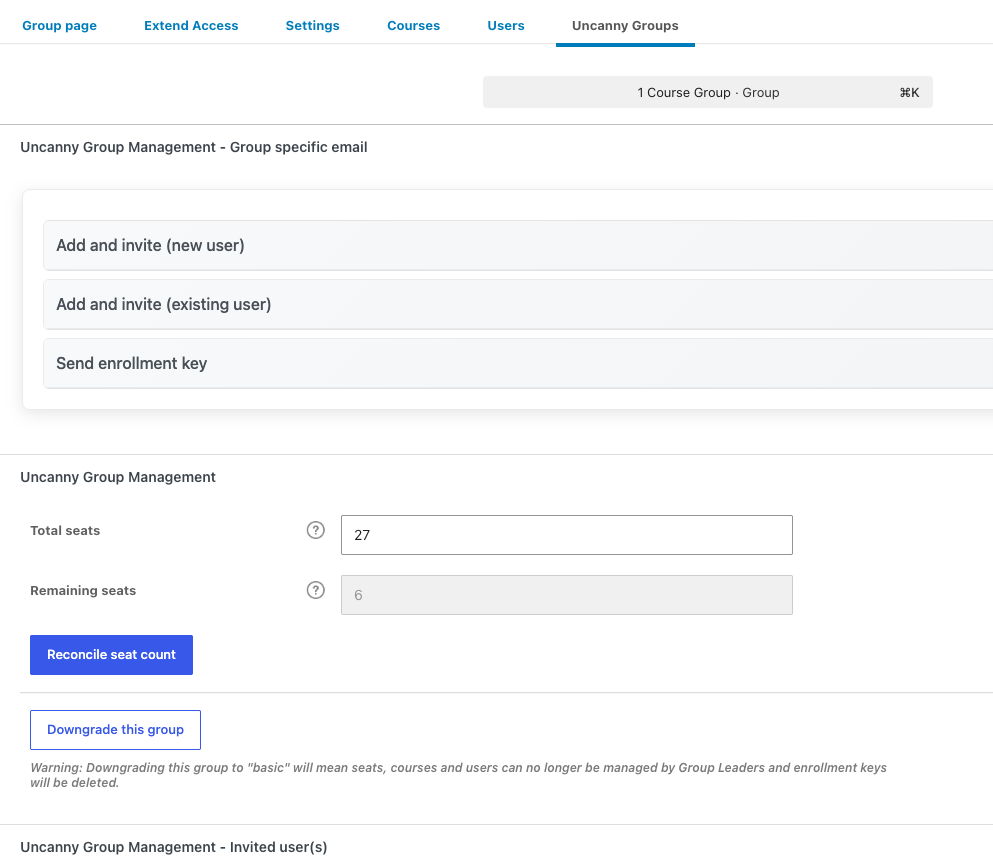
Uncanny Groups 6.1.8+: Every Uncanny Groups setting for a group now lives under a dedicated Uncanny Groups tab at the top of the group’s edit page. Open a group under LearnDash LMS > Groups, then click the Uncanny Groups tab to find Total seats, Remaining seats, the Reconcile seat count and Downgrade this group controls, and the group-specific email overrides. If a setting seems to be missing after a WordPress or plugin update, this tab is where it now lives.
Managing seats
Seat counts control how many members a group can hold. Administrators can adjust seats at any time, even while Group Leaders are actively managing their groups.
Editing seats
- Go to LearnDash LMS > Groups and open the group you want to edit.
- Open the Uncanny Groups tab, find the Total seats field, and enter a new value (this value only appears for upgraded groups. Groups created using the Uncanny Group Wizard tool are already upgraded, however, see Upgrade Existing LearnDash Groups for more info on upgrading basic LearnDash groups).
- Save the group.
How seat counts adjust automatically
When an administrator adds users or seats directly from the LearnDash backend:
- The number of seats is automatically updated for that group and the remaining seats are adjusted accordingly.
- If an admin adds more users than there are seats, the overall seat count is increased to accommodate them and the remaining seats are set to zero.
Reconciling seat counts
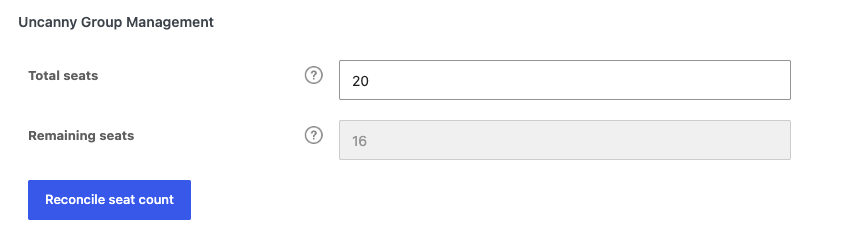
If a seat count appears out of sync with the actual member list (for example, after a bulk import or manual database change), use the Reconcile seat count button under the Uncanny Groups tab on the group’s edit page. This recalculates the count based on current group membership.
Managing users with pending enrollment keys
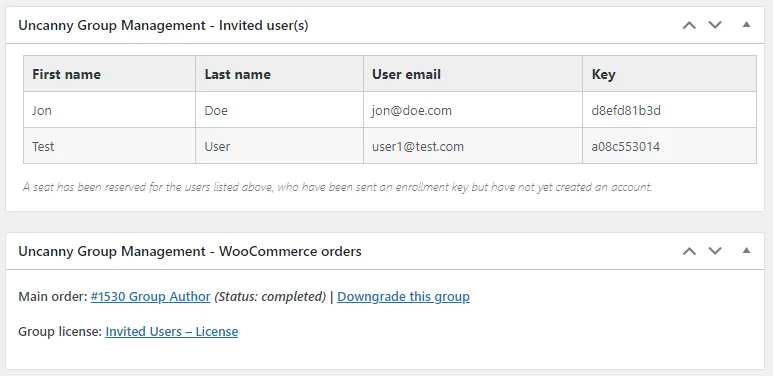
When a Group Leader sends enrollment keys to users, those users hold reserved seats from the moment the key is issued — even before they register.
The group edit screen (in newer versions of Groups, the Uncanny Groups tab) shows a list of pending key holders (users who received a key but haven’t completed registration). You can:
- Review who is holding reserved seats.
- Remove a pending user to free up their reserved seat. Removing a pending user does not invalidate the key itself; if seats are available when the user later tries to register, the key will still work.
The Group List: seats column and Download Keys
In LearnDash LMS > Groups, Uncanny Groups adds two enhancements to the standard group list:
- Seats column — shows used versus available seats at a glance (for example, “12 / 50” indicates 12 seats used out of 50 available seats).
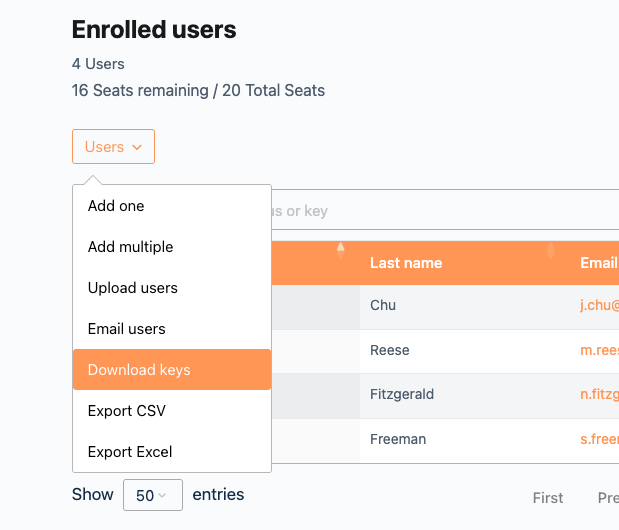
- Download Keys — hover over a group name to reveal the Download Keys option (a link under the group name); it exports all enrollment keys for that group as a CSV.
Downgrading WooCommerce groups
Groups created through WooCommerce are linked to the originating order and product. If that order or product is deleted, the group may lose WooCommerce-dependent functionality (such as seat top-ups through the storefront).
You can downgrade a WooCommerce group to a standard LearnDash group. After downgrading:
- The group and all its members remain intact.
- Reporting functionality is preserved.
- WooCommerce-specific features (purchasing additional seats, purchase history) are no longer available for that group.
To downgrade, open the group in LearnDash LMS > Groups, select the Uncanny Groups tab, and use the Downgrade this group button.
Note: Downgrading is not reversible through the plugin interface. Only downgrade a group when the WooCommerce connection is no longer needed.

Related Articles
- Install and Set Up Uncanny Groups — activate and configure the plugin for the first time
- Set Up Group Management Pages — configure the front-end pages Group Leaders use
- Using the Group Management Page — Group Leader’s guide to adding members, distributing keys, and running reports
- Set Up User Enrollment — enrollment key settings and invitation options
- Upgrade Existing LearnDash Groups — convert standard LearnDash groups to Uncanny Groups