
Overview
The Manage Content page is your library for every module you’ve uploaded with Tin Canny. From one screen you can upload new content, find existing modules, preview them, replace them with updated versions, and delete what you no longer need — all while keeping your reporting data intact.
The Manage Content page
Go to Tin Canny Reporting > Manage Content. The page was redesigned in v5.1 with a cleaner, modernized layout that makes a large content library easier to scan.
Each uploaded module is listed in a table with these columns (verified in source):
- Module ID — the module’s unique ID (preserved when you replace content).
- Content — the module name/title.
- Type — the module format (SCORM, xAPI, etc.).
- Uploaded — when it was added. (New in v5.1.)
- Size — how large the package is. (New in v5.1.)
You can search by title and sort by any column (all columns are sortable) to find a module quickly, even in a big library.

Uploading new content
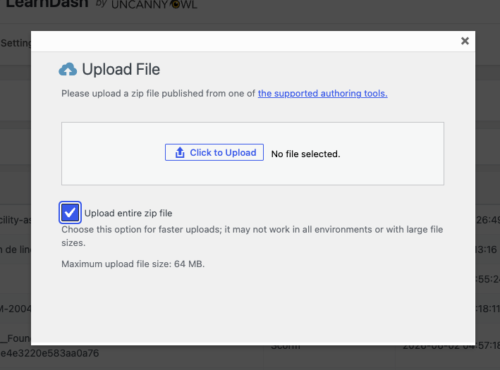
Click Upload new content, then Click to Upload and choose your module. Modules must be uploaded as a .zip file published from one of the supported authoring tools — it’s the only accepted file type. Once uploaded, a module can be embedded in any lesson or topic with the Tin Canny block or uploader. See Tin Canny Uploader.
Upload entire zip file (faster uploads)
By default, Tin Canny unpacks your .zip and uploads the module’s files individually. For a large module this can mean hundreds of separate transfers, which is slow. The upload screen offers a faster alternative:
- Tick Upload entire zip file before uploading. The whole package is sent as a single file and unpacked on the server — far quicker than uploading each file one at a time.
When to use it: As the in-product note says, “Choose this option for faster uploads; it may not work in all environments or with large file sizes.” If a single-file upload fails — usually because the .zip is larger than your server’s maximum upload size — leave the box unticked and upload normally. The screen shows your server’s maximum upload file size as a guide.
Previewing content
Use the preview option to view a module directly from the Manage Content page. Note that previewing a module generates xAPI tracking, just as a learner would..
Replacing content
When you publish an updated version of a course, you don’t have to delete the old module and re-embed a new one (which would break links and lose history). Instead, use Replace content:
- Find the module in the list and choose Replace.
- Upload the new package.
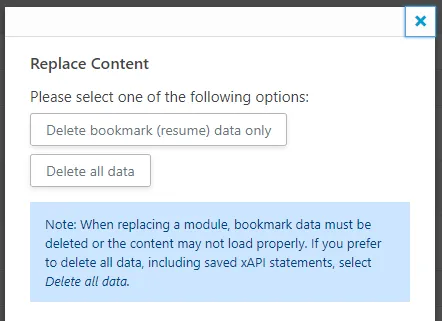
- Choose how to handle existing data:
- Delete bookmark/resume data only — This option deletes stored bookmark data (ie where learners restart the module), but xAPI statement history is kept. This data must be deleted whenever content is replaced as internal bookmark IDs may have changed, resulting in the existing bookmark data preventing the module from loading properly.
- Delete bookmarks and xAPI statements — This option deletes both stored bookmark data and stored xAPI statements (the data shown in the Tin Can and xAPI Quiz reports). A full reset for this module.

Because Replace preserves the module’s ID, every place you’ve embedded it keeps working, and (depending on your choice above) your historical completion records are retained. This is the recommended way to update content.
Deleting content
Remove a module entirely with Delete. Use this only when you no longer need the module or its data. For routine updates, using the Replace option is recommended.
Related Articles
- Tin Canny Uploader — uploading and embedding modules in lessons
- Authoring Tools Supported by Tin Canny — supported formats and publishing tips
- Setting up Tin Canny Reporting — data capture and protection settings