
Overview
Credits are awarded automatically when learners complete courses, but you’ll sometimes need to manage them by hand — to award credit for an activity that happened outside of LearnDash, to correct a record, or to remove one. You can do all of this directly from the Credit Report.
The Credit Report supports three manual actions on credit records:
- Add a new credit record — for a LearnDash course or for an activity that doesn’t exist as a course on your site (a webinar, a workshop, an in-person session).
- Edit an existing record — adjust the credit amount or date of a record that’s already there.
- Delete a record — permanently remove a credit a learner earned.
Adding and deleting credits have been available since version 3.1. Editing existing records inline was added in version 5.0.
These actions are available to administrators and group leaders in the enhanced report. If you’re displaying the report on the front end with the [uo_ceu_report] shortcode or block, each action is enabled with its own attribute (add=”on”, edit=”on”, delete=”on”). See Continuing Education Report for those options.
Adding Credits
- Go to Uncanny CEUs > Credit Report (or open an enhanced front-end report).
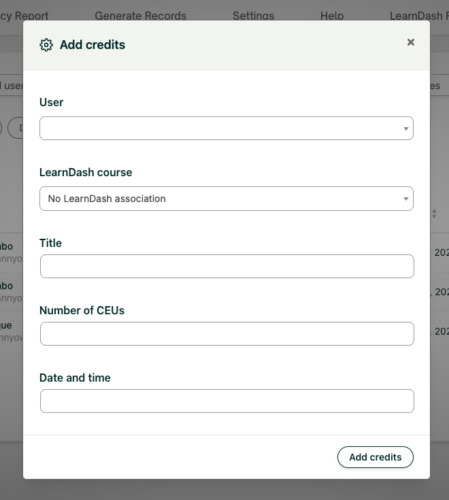
- Click the Add Credits button to open the entry form.
- Choose what the credit is for:
- A LearnDash course — Select the course. The credit amount matches the value already assigned to that course, so the course must have a credit value set. See Adding Credits to Courses.
- A non-LearnDash activity — Enter a title, the number of credits, and the date and time the credit was earned.
- Select the learner the credit applies to.
- Save the entry.
Tip: If you award a credit with a date in the future, it won’t appear in the report under the default date range. Set a custom date range with an end date past the award date to see it.
Editing Credits
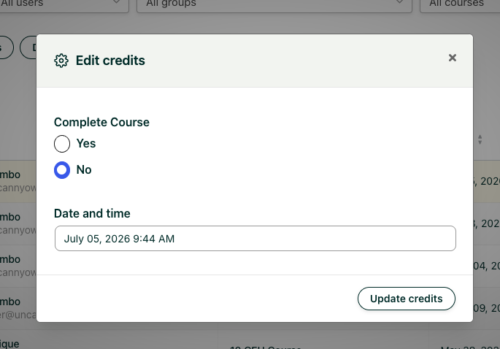
As of version 5.0, you can correct an existing credit record without deleting and re-adding it. If the credit is awarded via course completion, you will be able to edit the options Complete Course and Date and time. If the credit was awarded without course completion, you will be able to edit the Title, Number of CEUs and Date and time options.
- In the Credit Report, find the record you want to change and check the box on the left.
- Click the Edit credits button.
- Update the credits options depending on type of credit (detailed above).
- Save the change.
This is the quickest way to fix a typo in a credit amount or correct an award date.
Deleting Credits
- In the Credit Report, select the record (or records) you want to remove using the row checkboxes.
- Click the Delete Credits button below the filters.
- Confirm the deletion when prompted.
Deleting a credit record is permanent. If you only need to change a value, use Edit instead.
Related Articles
- Continuing Education Report — Enable add/edit/delete on the front-end report
- Adding Credits to Courses — Set the course credit values used when adding LearnDash credits
- Continuing Education Admin Reports — Filter and export the Credit Report
I want to add this feature on front end to a specific user role. Is there anything where I can add this functionality on the front end to a specific user rather than going into the wp admin?
Hi Bilal, out of the box this wouldn’t be possible, no. Adding and removing credits is exclusively an admin function.
Having said that, Uncanny Automator does allow you to link form submissions to awarding credits, so you could create a page restricted to a certain role (like with our Restrict Page Page Access module in Toolkit Pro) and then have a form on the protected page that adds any credits you want. It is not possible for non-admins to remove credits though.