
Installation
Installing the plugin can’t be more straightforward. After you purchase and download the plugin, you can simply sign into your WordPress site as an admin and navigate to Plugins > Add New. To install the plugin, click Upload Plugin to start the process. After installation, you will be directed to the License Activation page to enter your license key and activate the plugin.
Setup
The plugin has two reports (for Tin Can and xAPI Quiz Report) and a Settings tab.
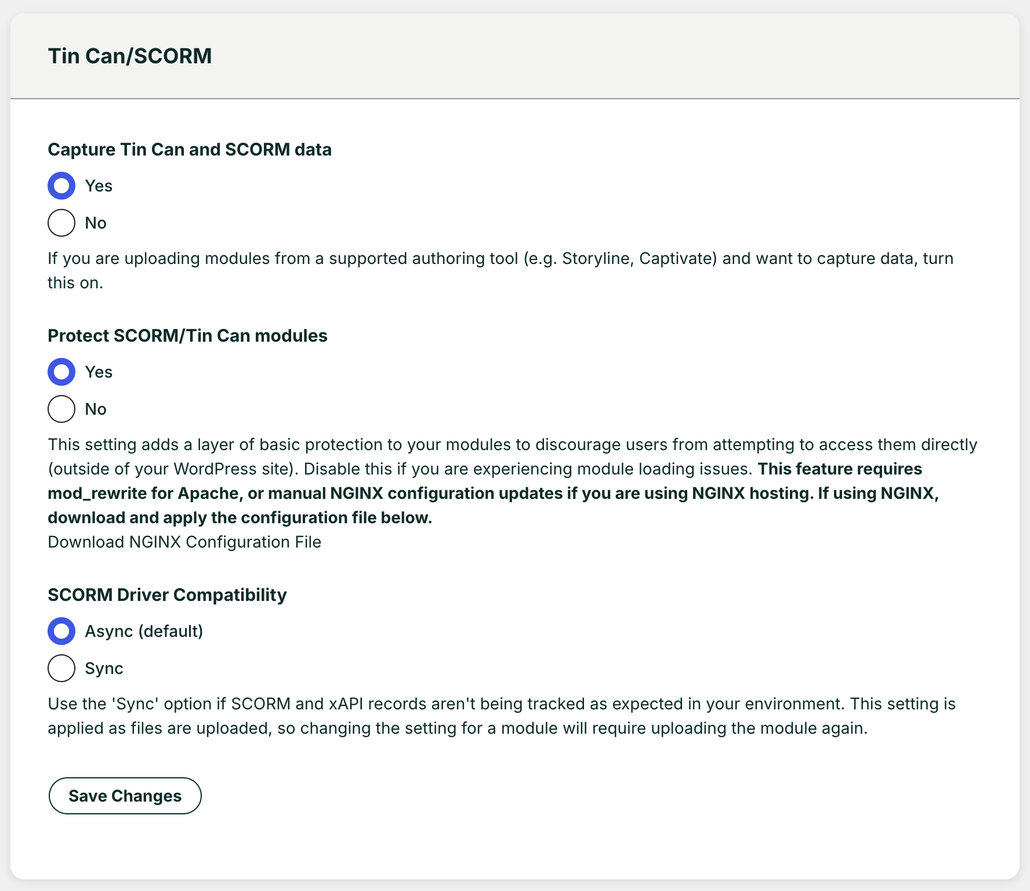
There are three optional controls on the Settings page under the heading Tin Can/SCORM:
- Capture Tin Can and SCORM data: Keep the default setting Yes unless you are certain you don’t want to track statements from H5P, Storyline, Rise, Captivate, iSpring or any xAPI/SCORM content in any of your courses. If you select No (to not capture Tin Can data), the Tin Can Report tab will be removed and so will the Tin Can activity menu on the User Report. In addition, no Tin Can data will be reported on the Dashboard or Course Report.
- Protect SCORM/Tin Can modules: This option can prevent modules from being viewed by users who are not signed to your site. You can set protection at a global level (as shown above) and also override the global setting at a lesson or topic level.
- SCORM Driver Compatibility: Depending on the authoring tool used, you may be required to change the default “Async” SCORM Driver compatibility to “Sync”. For most scenarios, this option will stay on the default “Async” setting.
The Reset Tin Can Data button allows you to clear all existing Tin Can statements in the Tin Can Report. This feature would be helpful if you need to reset test data. Note all historical data will be removed; this action cannot be undone.