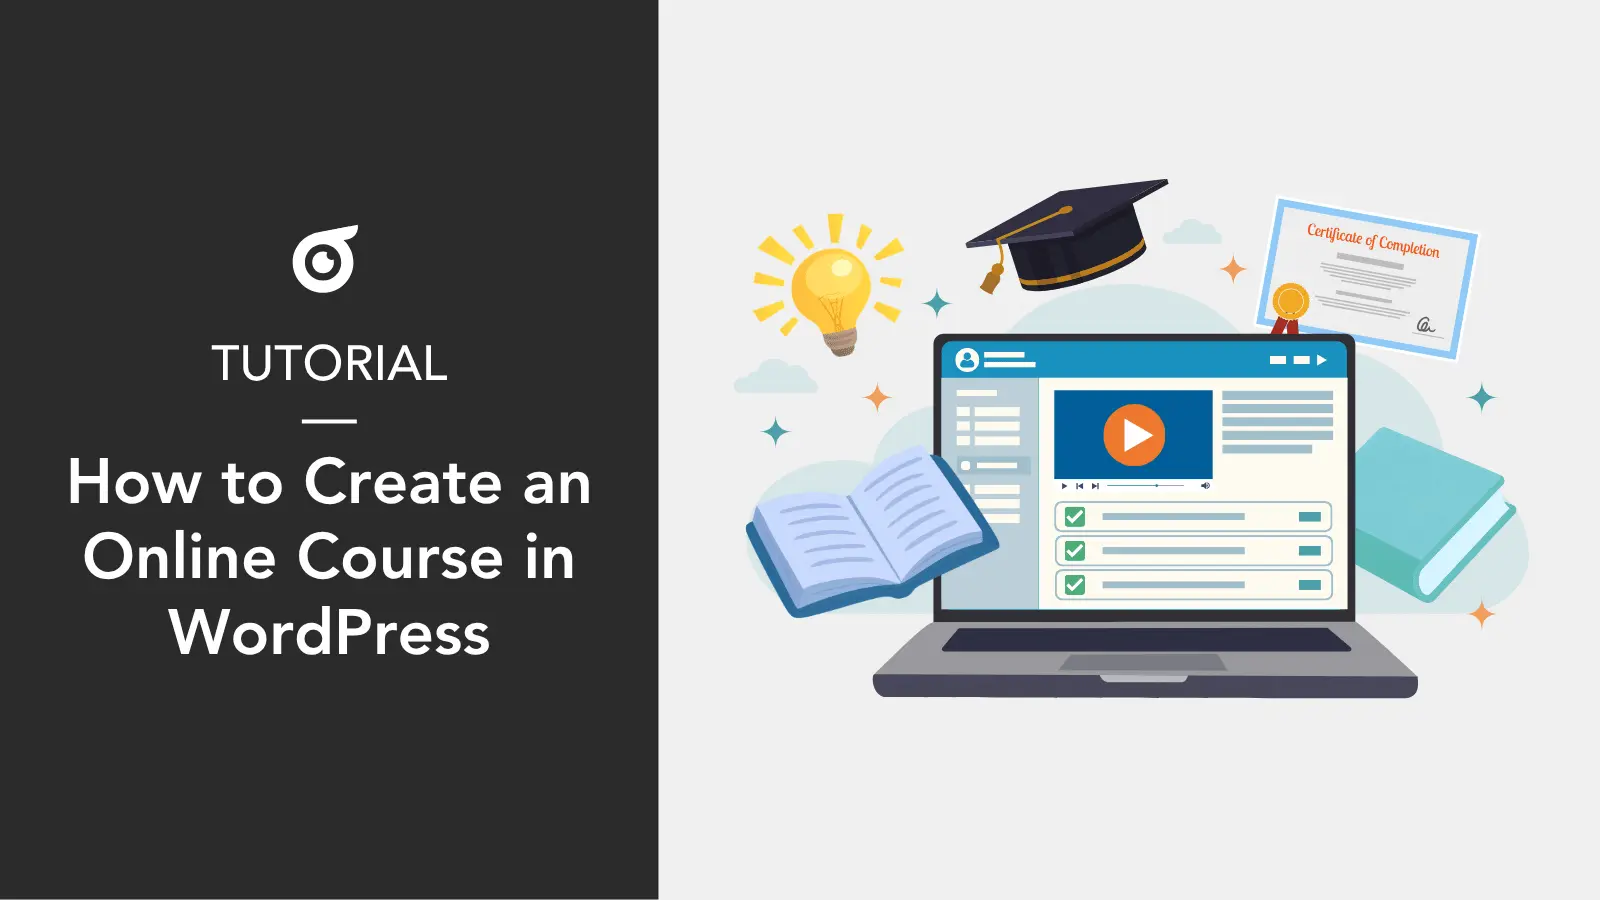
Create an online course in WordPress with this step-by-step LearnDash guide. Plan your structure, build lessons and quizzes, then publish and test your course.
You’ve got expertise and knowledge people would pay to learn. You probably also have opinions on how it should be taught. So the real question was never, “Should I build an online course in WordPress?”—of course you should! Instead, the question that has probably led you here is, “How can I create an online course without first having to take a course in web development myself?”
You’ve maybe even landed on a few pages before this one that have “build an online course” in the title only to find that those guides skip the part you actually came for: the building.
This post, I promise, doesn’t do that. Whether you are a total WordPress novice or someone with some CMS experience, this guide will take you from “I have an idea” to “I have a published course”, step by step. The content and the teaching will still be yours—you’ll just have a new skill to deliver it.
A quick note on scope before we start. I’ll be using LearnDash for this walkthrough, but the fundamentals here transfer to any major WordPress LMS plugin. (An LMS, or learning management system, is the software that hosts your lessons, tracks learner progress, and handles enrollments.) Also, this guide focuses on the build itself; selling the course is its own topic, and I’ll point you to it at the right moment.
One more thing worth noting up front: everything we’re about to do can be done with Uncanny Agent, an AI assistant for WordPress. We’ll build the course manually first so you understand every piece. Then, at the end, I’ll show you how Uncanny Agent could have built the same thing through plain text conversation in less than half the time.
Want to see what a finished LearnDash course looks like before you build one? Spin up our LearnDash demo site >>>
First things first: choosing the right platform for your online courses
Before you create your first lesson, there are two decisions you’ll have to make. I’ll cover them quickly, because most readers have already made at least one of them.
Decision 1: WordPress or a hosted platform?
You’re reading a guide about building an online course in WordPress, so you’re likely already leaning this way—but it’s worth a quick gut-check.
WordPress wins when you want full control over your data, content, branding, site features, and per-student cost structures as you scale, with no platform taking a cut of every sale.
Hosted platforms like Teachable, Thinkific, and Kajabi win when you’d rather someone else handle hosting, updates, and infrastructure, and you’re happy working within their templates and pricing.
Neither is wrong, it just depends on how much control over your online courses you need and what your growth plans look like.
Decision 2: Which WordPress LMS plugin?
If you’ve settled on WordPress, the second decision is which LMS plugin to use as the platform for your courses. The major options include LearnDash, MemberPress Courses, LifterLMS, Tutor LMS, and Sensei, among others.
Here’s the reassuring part: the fundamentals are common across all of them. Courses, lessons, topics, quizzes, certificates, and enrollments work the same way conceptually no matter which plugin you pick. The differences show up in the details—admin experience, reporting depth, group and team features, and the size of the surrounding ecosystem.
For this walkthrough I’ll be using LearnDash. It’s the most widely deployed WordPress LMS with the most extensible ecosystem for customization and expanded functionality.
Most importantly, the build pattern you’ll learn below transfers cleanly to other plugins if you eventually pick differently.
What you’ll need before you start
Building an online course in WordPress is like building anything else: you need to gather your materials first. If you already have a WordPress site running, you can clear this in a few minutes.
- A WordPress site. If you don’t have one yet, you’ll need WordPress hosting and a domain first. That’s its own decision and the right host depends on your budget and traffic plans, so I won’t push one here (I break down the options in this guide to the best WordPress web hosts).
- The LearnDash plugin. Worth being upfront: LearnDash is a paid plugin, not free. You can buy and download it directly from the LearnDash website. For most beginner course creators, the Essentials license is the right place to start—you can always move up a tier later.

- A LearnDash-compatible theme. Most well-maintained themes built for online courses or membership sites work fine, so I won’t single one out. If your current theme is actively maintained, it’s very likely already compatible.
Once you’ve purchased LearnDash, installing it takes about a minute. From your WordPress Admin Dashboard, go to Plugins > Add New > Upload Plugin, select the LearnDash .zip file you downloaded after your purchase, then Install and Activate. Finally, add your license key under LearnDash LMS > Settings > Licensing.
That’s everything you need in place. Now, before you click “Add New” on anything, let’s plan.
Plan your online course structure before you click anything
The single biggest mistake new course creators make—and why most of them never finish—is opening LearnDash and clicking buttons without a plan. But that’s not you.
Spend 30 minutes on paper (or a blank doc), outlining your course first. It will save you hours and headaches later.
Here’s what to sketch out before you touch the admin dashboard to make creating an online course in WordPress feel as easy as it should be:
- Your course title and a one-sentence promise. What does the learner walk away knowing or able to do? If you can’t say it in one sentence, the course isn’t ready to build yet.
- A lesson framework that moves the learner from where they start to where they want to end up. Think of each lesson as one meaningful step on that journey.
- Topics inside each lesson, if you need them. A topic is a sub-unit inside a lesson—useful for breaking a long lesson into shorter, more digestible learning sessions. Small courses often don’t need them at all, while large courses only feel digestible with them.
- Quiz checkpoints to reinforce the material that matters most before learners continue to the next lesson or topic.
- A completion certificate, if it’s relevant to your audience and market.
To keep every step in this walkthrough concrete, I’ll build a real course right alongside you. My course is for “Outdoorsman University”, a fictional educational institution for outdoor enthusiasts. Here’s the plan for my first course:
- Course: National Parks of Canada
- Promise: Learn how Canada’s national parks have evolved from prehistory to the present day, and discover the landscapes, ecosystems, wildlife, climates, and visitor experiences that make each park a must-visit destination for the committed outdoorsman.
- Lessons: 48 lessons, one for each of Canada’s national parks and national reserves.
- Quizzes: 288 quizzes, one quiz per topic within a lesson.
- Certificate: the Certificate of Completion, awarded on any course completion.
With that structure on paper, every click that follows has a clear purpose. Now, we build…
Creating an online course in WordPress with LearnDash
You have your materials and your blueprint—now it’s time to build.
In LearnDash and other WordPress LMS plugins, courses are the top-level containers for everything else. Your lessons, topics, quizzes, and certificates all live inside the course or are associated with it, so this is where we start.
Step 1: Add a new course
From your WordPress Admin Dashboard, navigate to LearnDash LMS > Courses and then click + Add New Course.
Step 2: Add your title, description, and featured image
LearnDash will take you to the “Course Page” tab. You can think of this tab as the one where you create your course’s front-facing identity.
Start by entering your course title—in my case, “National Parks of Canada”.
Then add a course description. Course descriptions are very much like product descriptions; they are marketing copy that also explain to prospective learners what they’d be signing up for by enrolling. Lead with your one-sentence promise, followed by a few short paragraphs.
Finally, add your course’s featured image.

Step 3: Configure the course settings and save
Next, you’ll want to configure your course settings. The Settings tab is where you’ll determine how the course behaves:
- Course enrollment. This is how learners get in. Out of the box, LearnDash gives you five options: open, free, buy now, recurring, and closed. Select the one that best suits how you plan on enrolling learners. For now, I’ve left mine set to the default which is “Free”.
- Display and content options. This controls the look and feel of the course.
- Access settings. Determines who can access the course and for how long. Determine whether the course has prerequisite requirements and the period of time for which new enrollees have access to the course or whether the course is only available for a specified time period.
- Completion awards. This is where you set the certificate and whether or not and how many course completion points the course is worth. You can leave this blank for now as we haven’t yet built a certificate.
- Course navigation settings. This determines whether the course enrollees must move through the material in a linear fashion, or if they can jump around. For most courses, linear progression makes the most sense.
- LearnDash course grip settings. Determines the values that are displayed on the front-end of your site within the LearnDash course grid.
Once you’ve configured your course settings, click Save draft. Every step that follows will build off of this course, so you’ve just laid the foundation.
Building your first lesson
A lesson is a major unit of content inside a course—one meaningful step in the learner’s journey. In my running Outdoorsman University example, the first lesson in the “National Parks of Canada” course is “Banff National Park”.
I’ll walk through building this first lesson in full; after that, you’ll repeat the same pattern for each lesson in your plan.
Step 1: Add a new lesson
From your WordPress Admin Dashboard, navigate to LearnDash LMS > Lessons and then click + Add New Lesson.
Step 2: Add your title and featured image
Just as with your course, you’ll want to name your lesson and possibly give it a featured image so you can always identify it.
Step 3: Add your lesson content
Use the standard WordPress block editor to build the lesson body—the same editor you’d use for any page or post. Add text, images, video embeds, and any other blocks your teaching calls for. This is where your actual content lives, so take your time here.

Step 3: Associate the lesson with your course
Open the lesson’s Settings tab and scroll down to Lesson Access Settings. In the dropdown next to “Associated Course” select the course(s) that this lesson should be a part of. In my running example, that’s “National Park of Canada”.
This is the step that tells LearnDash where the lesson belongs—miss it and your lesson floats unattached to any course.
Step 4: Publish the lesson
Once the content and course association(s) are set, click Publish. (Publishing the lesson is fine—learners still can’t see it until the course itself is published and they’re enrolled.)
That’s the full pattern for a LearnDash lesson. Repeat these steps for each lesson in your course plan. If your course is anything like mine—48 lessons and counting—you’re probably wondering if there’s a better way to build it. And there is…
Looking for a faster way to create online courses? Build courses in WordPress using Uncanny Agent
Instead of opening a blank editor over and over again, just tell Uncanny Agent, your AI assistant in WordPress:
“Draft 48 lessons—one for each national park and national preserve in Canada—and set the associated course for each lesson to ‘National Parks of Canada’.”
Agent will spin up the lessons for you in a fraction of the time. Try Uncanny Agent for yourself >>>
Add topics inside lessons
A topic is a sub-unit inside a lesson—a way to break a long lesson into shorter, more digestible learning sessions. Topics are optional. A short, focused lesson may not need any; a long one is far easier to work through when it’s split into a few topics.
Use topics when a lesson is long enough that a learner would naturally want to break it across multiple sittings, or when a single lesson contains a few distinct sub-concepts you’d like to track completion on individually.
Step 1: Add a new topic
From your WordPress Admin Dashboard, navigate to LearnDash LMS > Topics and then click + Add New Topic.
Step 2: Add content and associate it
Build the topic content in the block editor exactly as you did for the lesson. Then, under the topic’s Settings tab, set both its Associated Course and its Associated Lesson—this is the only real difference from building a lesson. The topic needs to know which lesson it lives under.

Step 3: Publish your topic
Once you’ve added your content and associated the topic with the right course(s) and lesson(s), click Publish.
Topic configuration is identical to lesson configuration—only the parent association differs. Add as many topics under each lesson as your structure calls for, or skip topics entirely if your lessons are short enough to stand on their own.
Build your first quiz
A quiz is an assessment unit. In LearnDash you can attach quizzes to lessons, topics, or have them sit at the course level on their own.
Quizzes reinforce learning, can gate progression (a learner has to pass before moving on), and—for some courses—feed into a grade or certificate.
Building a quiz is a two-part job: first the quiz container, then the questions inside it.
Step 1: Create the quiz container
From your WordPress Admin Dashboard, navigate to LearnDash LMS > Quizzes and then click + Add New Quiz.
Give the quiz a title—for me, that’s “History of Banff National Park”.
Under the Settings tab, set the Associated Course and, if it belongs to a specific lesson, its Associated Lesson.
Configure the basics here too: passing score, whether learners can retake it, etc.
Step 2: Build your quiz
To start creating your quiz, navigate to the Builder tab and click New Question.
LearnDash and other LMS plugins give you options for the kinds of questions that your quizzes can have. Select from:
- Single choice (one right answer from a selection)
- Multiple choice (one or more right answers from a selection)
- “Free” choice
- “Sorting” choice
- “Matrix Sorting” choice
- Assessment
- Fill in the blank
- Essay / Open answer

Add as many questions as your assessment calls for—typically 5 to 15 for a lesson-level quiz, more for a course-level final. Then create additional quizzes using the same container-then-questions pattern: one quiz per lesson plus a cumulative final, in our running example.
Save the quiz once your questions are in.
Set up a completion certificate
A certificate gives your learners something tangible to walk away with—and, for some audiences, something to share on LinkedIn or submit for professional credit. Here’s how to create one and attach it to your course.
Step 1: Create the certificate
From your WordPress Admin Dashboard, navigate to LearnDash LMS > Certificates and then click + Add New Certificate.
Step 2: Design it
Use the visual editor or the code editor to style your certificate. For a full walkthrough on designing certificates in LearnDash, check out this detailed guide from Liquid Web.

Step 3: Attach it to your course
Save the certificate, then go back to your course at LearnDash LMS > Courses and select the course that you just built.
In the Settings tab, scroll down to Completion Awards and set the “Course Certificate” to the one you just created.

Save your course.
Now learners who complete the course will now earn the certificate automatically. (Certificates can also be attached to individual quizzes, which is useful if you want to reward intermediate milestones as well as full completion.)
Set up enrollment
Enrollment is how a learner gets access to your course. LearnDash gives you several enrollment modes, and the right one depends entirely on your business model:
- Open: anyone with the URL can enroll, no account required.
- Free: requires a free account, but no payment. The default for genuinely free courses. Good for free lead-generation courses.
- Buy now: a one-time purchase. Requires an integrated payment processor (Stripe, PayPal) or WooCommerce.
- Recurring: a subscription. Same payment-integration requirements as “Buy now”.
- Closed: manual enrollment only; you add learners yourself. Common for corporate and B2B training.
Step: Set your access mode
For this walkthrough, we’ll use Free, so you can publish and test the whole course without setting up payment plumbing first. Open your course settings, find Access Mode, select Free, and save.
Publish and test
You’ve built everything. It’s almost time to teach—but first, let’s pretend to be students.
Open your course at LearnDash LMS > Courses, switch its status from Draft to Published.
Now test it as a learner, not as an admin—this is the step most people skip and later regret:
- Log out, or open an incognito/private window.
- Create a test account on your site.
- Enroll in the course.
- Walk through a lesson, complete a topic, take a quiz, and confirm the certificate fires correctly on completion.
Almost every new course creator catches at least one configuration issue during this test pass—a missing association, a quiz that won’t unlock, a certificate that doesn’t trigger. Far better to find it yourself than to hear about it from your first paying student.
A faster way: building courses with Uncanny Automator and Uncanny Agent
Up to this point, I’ve assumed that you’ve been clicking through every step of building an online course in WordPress with me. While it’s good to work your way through building courses manually to understand their structure, after a few lessons and topics, the process gets tedious. And time consuming.
There is, thankfully, a faster path for course creators who’d rather focus more on content and less on clicking. That faster path involves using Uncanny Agent, the most capable AI assistant for WordPress sites.

Uncanny Automator is the #1 AI + automation plugin for WordPress.
Using combinations of triggers and actions called recipes, Automator connects all of your favorite apps and plugins to execute workflows and automate repetitive tasks. For course creators, that means automating tasks like “when a learner enrolls in a course, add them to a Mailchimp list and tag them based on the course they signed up for”.
Uncanny Agent is the AI assistant for WordPress that works alongside Automator’s recipes. Agent can build your recipes from plain text, complete tasks on your tasks, and surface your site data from simple questions.
For course creators, that means you can build LearnDash courses, lessons, and topics through plain conversation instead of clicking through menus yourself. You can even give Agent your research and teaching materials and tell it to add the content to your courses, all from plain-language prompts.
The click-by-click LearnDash build is straightforward, but it’s slow and tedious—my course had almost 50 lessons! Instead of trying to create all of those lessons myself or uploading a CSV and praying that it imports properly, I just asked Uncanny Agent to build the lessons for me. With those lessons built, I was able to simply click into them and start adding the content that I’m actually passionate about.
You still review and refine everything; Agent drafts, you polish. But the time saved on setup is real.
Three things Agent and Automator are especially good at during course creation:
- Scaffolding course structures from a brief. “Create a course with these six lessons and these quiz checkpoints” → Agent does the clicks.
- Drafting first-pass content. Lesson outlines, topic descriptions, quiz questions, certificate copy—Agent generates the starting material; you edit.
- Wiring up enrollment workflows. “When a new learner enrolls, add them to my CRM, post a message to the sitewide BuddyBoss activity channel, and create and email a unique coupon code to them three weeks after their enrollment for 25% off of the “National Parks of the World” course”. Agent works with the Recipe Builder to create your automated workflow.
Try Uncanny Automator Lite (free for life) or get a Pro license and start handing off work to Uncanny Agent >>>
Teaching beyond the course
Up to this point, you’ve built a basic online course in WordPress. That’s enough to get you started. But I’m willing to bet my new certificate that you want to build more than just one course. And you want your courses to be as dynamic, flexible, and powerful as your teaching style.
For that, you’ll need to extend the capabilities of LearnDash with plugins that enhance the experience for everyone: your learners, instructors, group leaders, and (not least of all) yourself!
Here’s the shortlist of the best plugins to extend your WordPress LMS course capabilities, organized by who benefits and what changes for them.
For learners — a smoother experience
Uncanny Toolkit Pro for LearnDash adds dozens of modules that close common LearnDash front-end gaps: a course dashboard, learner transcripts, login redirects, autocomplete features, enhanced course grids, and bulk certificate generation.
Uncanny Groups for LearnDash turns LearnDash groups (LearnDash’s term for a cohort of learners under a shared group leader) into real cohorts with peer identity, group-leader visibility, and group-only features including dedicated forums.
For instructors and admins — better visibility and control
Tin Canny Reporting for LearnDash delivers detailed learner analytics and supports SCORM (a standard format for eLearning content from authoring tools like Articulate Storyline or Adobe Captivate) and xAPI (the modern successor to SCORM, capable of tracking richer learner activity). If you need to know what’s going on inside your courses, this plugin is essential.
Uncanny Continuing Education Credits tracks and awards continuing education credits (CEUs, CPDs, CLEs, CMEs, and others, depending on industry). If you teach in a regulated profession or need a robust learning record store (LRS) within WordPress, this is the piece that makes your course count.
For scaling to organizations
Uncanny Groups also powers B2B sales. Sell seat-based licenses to organizations, give their admin a front-end management page, and let them manage their own learners without ever touching your WordPress admin.
Uncanny Redemption Codes enables code-based bulk enrollment. Ideal for promotional campaigns, event giveaways, or distribution to organizations that handle their own provisioning.
For automating everything else
Uncanny Automator connects LearnDash to hundreds of other plugins and apps—Mailchimp, Stripe, Discord, Slack, Google Sheets, Asana, LinkedIn, OpenAI, and more. Automator’s deep integration with LMS plugins like LearnDash lets you even create automations based on quiz results. From enrollment to alumni, take the tedium out of managing your online courses with Uncanny Automator.
Get the LearnDash stack as a bundle
The All Access Pass bundles every premium Uncanny Owl LearnDash plugin—Toolkit Pro, Uncanny Groups, Tin Canny, Uncanny CEUs, and Uncanny Codes—at a significant discount. (You’ll also get a special discount on Uncanny Automator.) It’s the natural choice once you know you want more than one.
Final thoughts
You’ve built a complete WordPress course from zero—LearnDash for the foundation, your own expertise for everything that matters. More importantly, you now know the build pattern: course, lesson, topic, quiz, certificate, enrollment. That pattern doesn’t change. You can repeat it for every course you ever build on this stack.
One honest thing to carry with you: your first version isn’t the version your students will remember. Course creation is iterative. Ship it, watch how real learners move through it, see where they get stuck or drop off, and refine. The stack you’ve just built is made for exactly that kind of iteration and tools like Uncanny Agent make each round of changes faster than the last.
So don’t wait for perfection: build your first online course in WordPress today and let your students teach you the rest.
Frequently Asked Questions
AI is a real shortcut for the structural work of course building—scaffolding outlines, drafting lessons and topics, generating quiz questions, and writing learner-facing copy. The most direct path on WordPress is Uncanny Agent, an AI assistant for WordPress powered by Uncanny Automator.
Agent completes tasks alongside your automations—building LearnDash courses from prompts, drafting content, generating quiz questions, and wiring up enrollment workflows. You still review and polish the output, but Agent handles the click-heavy scaffolding so you can focus on the teaching.
The technical build—the part this post covers—usually takes a few hours once your plan is solid (less if you scaffold it with Agent). The slow part is creating the content itself: writing lessons, recording video, and designing quizzes that actually assess what you intend. Most new course creators spend roughly 80% of their time on content and 20% on the platform. Plan accordingly.
Usually yes, with some effort. Most LMS plugins share the same core concepts (courses, lessons, quizzes), but migrating between them means remapping content and re-enrolling learners.
Pick the plugin you intend to stay on for at least the next two to three years. For most WordPress course creators that’s LearnDash, but explore alternatives if you have specific requirements it doesn’t serve well.
Yes. The simplest pattern is a short, free “trial course” that teaches enough to be genuinely useful and ends with a clear invitation to enroll in the full paid course. LearnDash’s enrollment modes support this directly.
Three things matter most: a clean, well-maintained WordPress theme; consistent branding across your lessons, quizzes, and certificate; and a polished learner-facing front end. For that last one, Uncanny Toolkit Pro is the most common upgrade. Toolkit Pro provides professional features like a Course Dashboard, autocompletion options for lessons and topics, enhanced grids, and learner transcripts. Even the free version of Uncanny Toolkit adds features like login redirect to improve the user experience. Those are the features that make your courses feel like they are part of a real LMS rather than a WordPress site with courses bolted on.
LearnDash doesn’t handle continuing education credits on its own. Uncanny Continuing Education Credits is the standard add-on for awarding and tracking CEUs, CPDs, CLEs, CMEs and the like, with printable certificates and credit-tracking reports that map to common compliance requirements.